Building a Power Apps Code Component in Dynamics 365 using React
Power Apps Component framework provides the ability to create code components that can be used with Model driven app and canvas apps(experimental preview at the time of this writing) which provides a bunch of advantages compared to the traditional HTML Web Resources. To learn more about it refer to the official documentation here.
Assuming that you have an understanding of the below, let's get started!
- Familiarity with React development
- Component Framework
Setting up the Environment
In order to create the code components we need to Install Power Apps CLI which walks through all the required steps.
In addition, I am using the Visual Studio Code editor because of it's integrated terminal and many other features, but you can choose Visual Studio or other tools of your preference.
Creating the Component
What are we building?
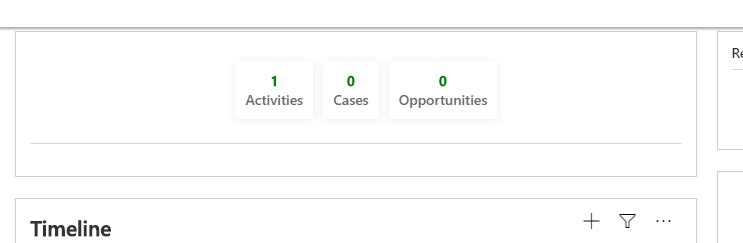
We will be creating a card like component which will look like below in Dynamics 365 that shows a high level overview of the contact record.
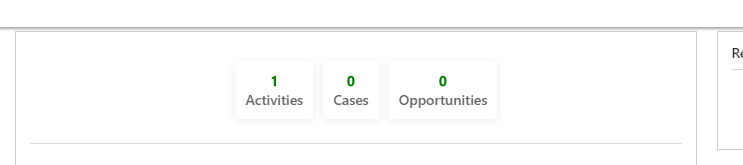
- It uses the Id and Logical Name of the record and retrieves information about related records.
- It uses WebAPI to retrieve the data by enabling the WebAPI feature in the control manifest file.
- It does not write any information back to the form.
- It only display data at this point. But you can extend it to show more information once you have the basic setup up and running.
Setting up the project
In the terminal pointed at the target folder where you want to create the code component run the below commands.
//create the folder for the project
mkdir recordoverview

//go into the folder
cd recordoverview

//initialize the code component project
//- namespace: Namespace of the code component.
//- name: Name of the code component. In this case I have used RecordOverview
//- template: Field or dataset. We used field but if you are building a grid
//            like component use the dataset.
pac pcf init --namespace {yournamespace} --name RecordOverview --template field

//install the needed dependencies for the project
npm install
Now let's add React to the project using the below commands
//Installs the core react packages
npm install react react-dom
//Install the type defintions for the above packages as dev dependencies
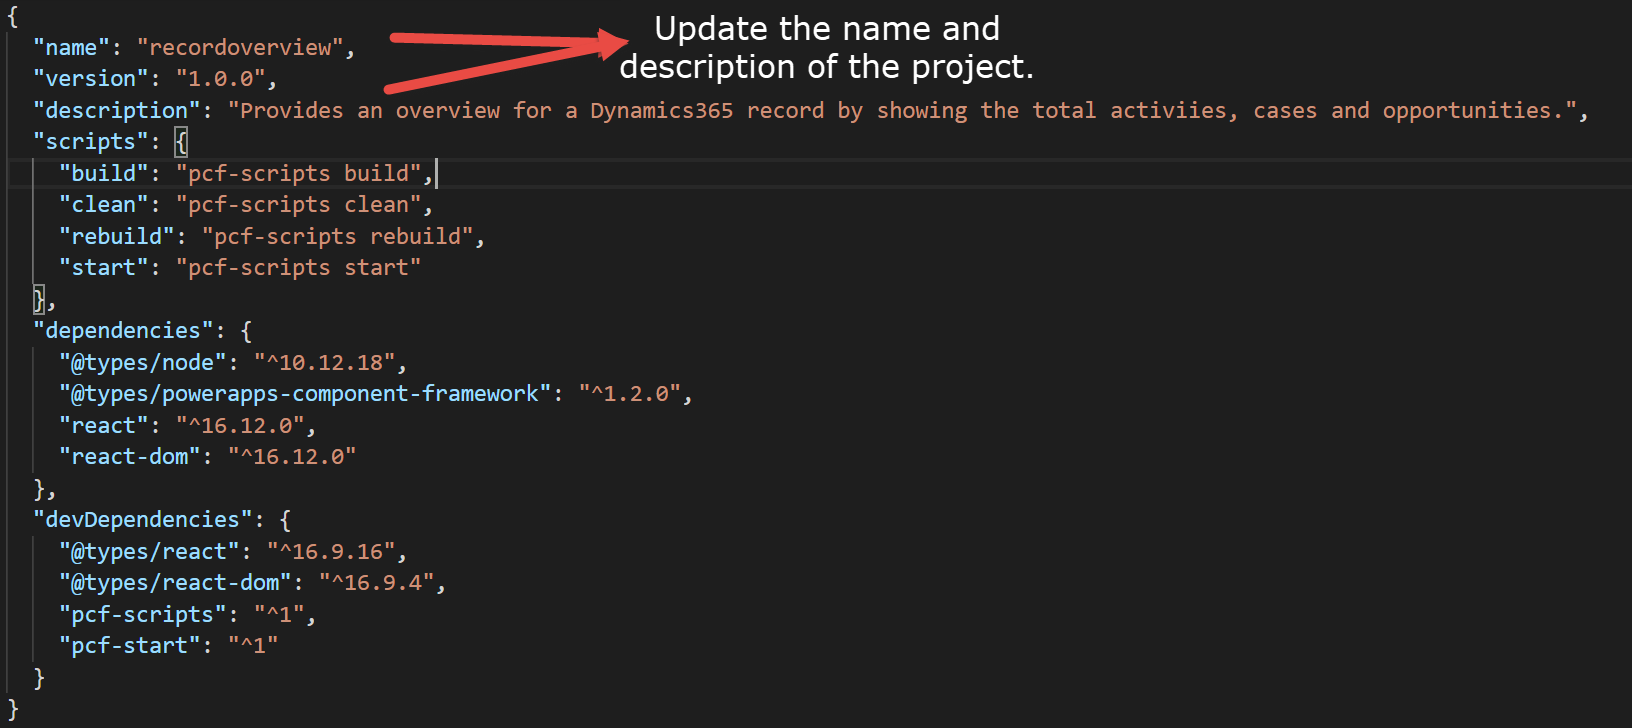
npm install --save-dev @types/react @types/react-domNow our package.json file should look something like below, let's also change the name and description at this time and save the file.
Now in your project folder let's look at a couple of files closely that are critical for the code component.
ControlManifest.Input.Xml
This file represents the metadata of the code component and the behavior.
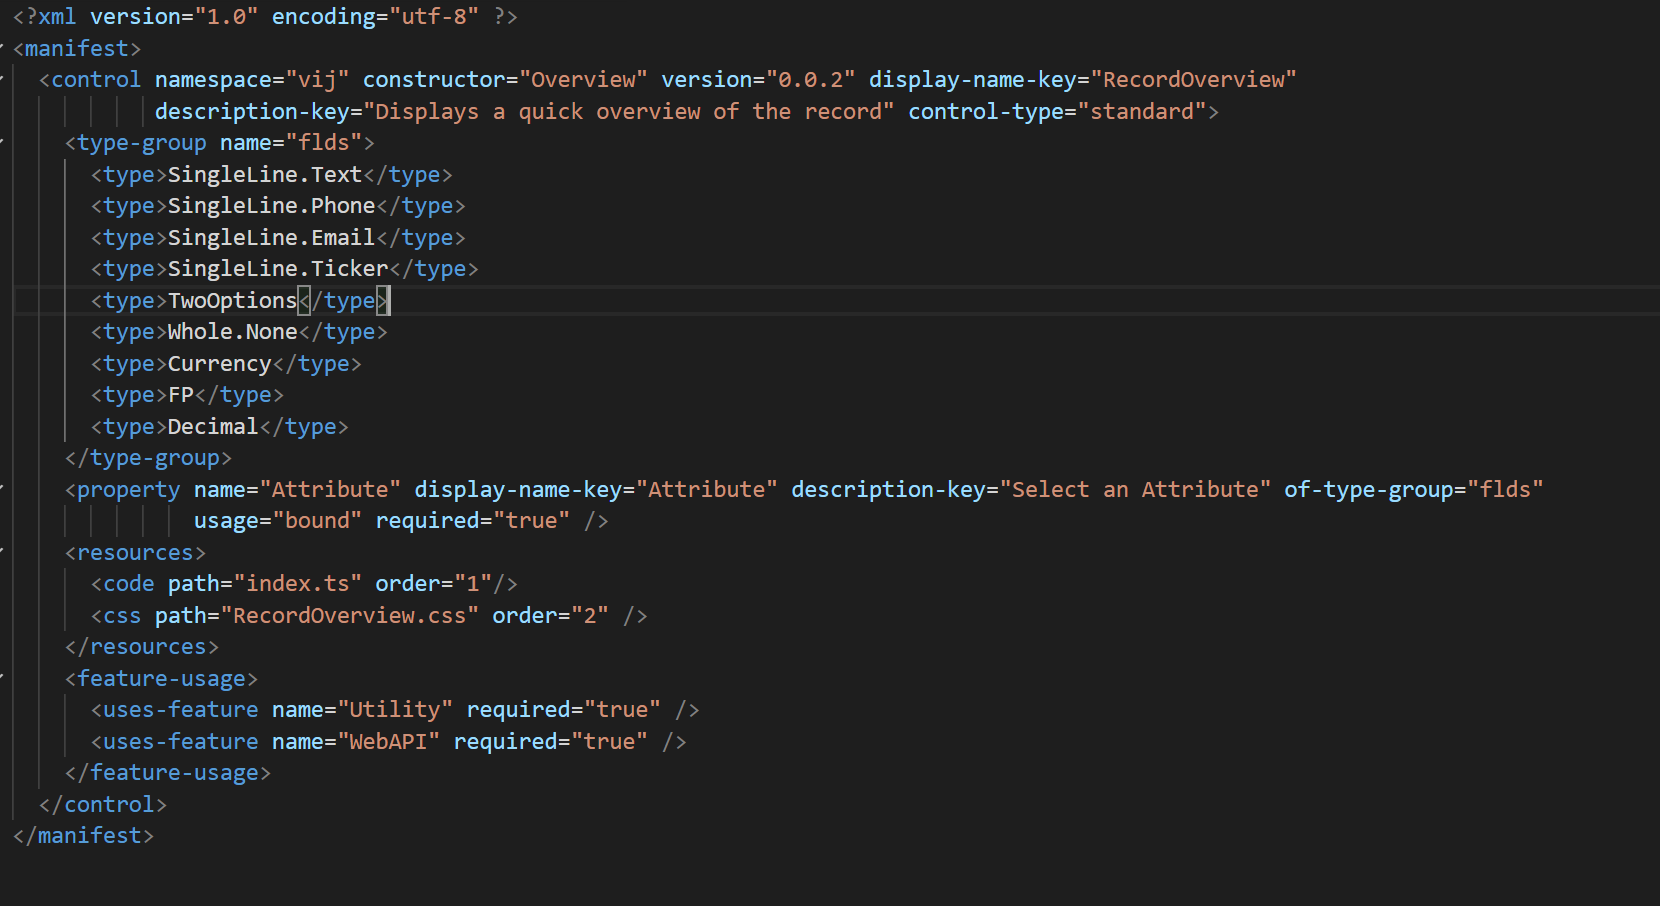
- control- defines the metadata for the code component control we are building like the namespace, constructor and the type of control.
- type-group: if you want to expose your control to multiple field types. In our example above we expose this control to be enabled for multiple field types as we just render a view and not modify the data associated with the attribute.
- property:- one or more properties you want to expose on your control.
- usage:
boundif the control can be used to change an attribute or just beinputfor read only values. We will use bound so we could render the control on the model driven form. Although, this isn't a good usecase for this component to be bound to an input, at this time this seems to be the only way to make this work.
- usage:
- resources : Provide the resources being used by your component. This would typically be the code resource along with stylesheets and images. In our case we just have the code and stylesheet resource.
- feature-usage : Which features you would like to have enabled in your control. Since we want to use WebAPI to retrieve the information about the related records we have specified this using
uses-feature.
Index.ts
This is where all the component logic resides. It has four main methods
- init:- Used to initialize the control and a good place to kick off remote server calls.
- updateView:- triggered when updates are made to the field values, data sets and global values. Some examples include change to field value either by BPF or other JS and we need to reflect our control to show these changes.
- getOutputs:- Returns the value of the property to the framework. The property name specified in the ControlManifest should match the name in the object for which we are setting the value. We will not be using this method in our case.
- destroy:- called before the control is being removed from the dom tree. You would perform any cleanup actions tied with your control in this method. We will not be using this method as well for this code component.
Creating the React Components
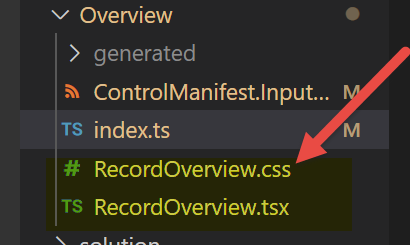
Let's create the two files we would need to build our overview component as below
- RecordOverview.tsx: The react functional component which will render the view
- RecordOverview.css: The stylesheet for the RecordOverview.tsx
import * as React from "react";
import { IInputs, IOutputs } from "./generated/ManifestTypes";


export interface RelatedRecordInfo {
    EntityCollectionName: string;
    TotalCount: number;
}

export interface RecordOverviewProps {
    id: string;
    context: ComponentFramework.Context<IInputs>;
}


export const RecordOverview: React.FC<RecordOverviewProps> = (overviewProps: RecordOverviewProps) => {

    const [relatedRecords, setRelatedRecords] = React.useState(Array<RelatedRecordInfo>());

    React.useEffect(() => {
        const retrieveAndSetData = async () => {
            let relatedRecords = await retrieveData(overviewProps.context, overviewProps.id);
            setRelatedRecords(relatedRecords);
        }
        retrieveAndSetData();
    },[overviewProps.id]);


    const retrieveData = async (context: ComponentFramework.Context<IInputs>, id: string) => {

        let activityFilter = `?$filter=_regardingobjectid_value eq ${id}&$apply=aggregate($count as ActivityCount)`;
        let activityResponse = await context.webAPI.retrieveMultipleRecords("activitypointer", activityFilter);

        let relatedRecords = Array<RelatedRecordInfo>();
        if (activityResponse && activityResponse.entities && activityResponse.entities.length === 1) {
            let entity = activityResponse.entities[0];
            let activityCount = entity["ActivityCount"] as number;
            relatedRecords.push({ EntityCollectionName: "Activities", TotalCount: activityCount });
        }

        let caseFilter = `?$filter=_customerid_value eq ${id}&$apply=aggregate($count as CaseCount)`;
        let caseResponse = await context.webAPI.retrieveMultipleRecords("incident", caseFilter);
        if (caseResponse && caseResponse.entities && caseResponse.entities.length === 1) {
            let entity = caseResponse.entities[0];
            let caseCount = entity["CaseCount"] as number;
            relatedRecords.push({ EntityCollectionName: "Cases", TotalCount: caseCount });
        }


        let opportunityFilter = `?$filter=_customerid_value eq ${id}&$apply=aggregate($count as OpportunityCount)`;
        let opportunityResponse = await context.webAPI.retrieveMultipleRecords("opportunity", opportunityFilter);
        if (opportunityResponse && opportunityResponse.entities && opportunityResponse.entities.length === 1) {
            let entity = opportunityResponse.entities[0];
            let opportunityCount = entity["OpportunityCount"] as number;
            relatedRecords.push({ EntityCollectionName: "Opportunities", TotalCount: opportunityCount });
        }

        return relatedRecords;


    }

    let relatedRecordsInfo: any = null;
    if (relatedRecords && relatedRecords.length > 0) {
        relatedRecordsInfo = (
            relatedRecords.map((relatedRecord: RelatedRecordInfo) => (
            <div key={relatedRecord.EntityCollectionName} className={"overviewItem"}>
                <div className={"itemTitle"}>{relatedRecord.TotalCount}</div>
                <div className={"itemSubTitle"}>{relatedRecord.EntityCollectionName}</div>
            </div>
            ))
            );
        }

return (
    <div className= {"overviewCont"}>
    {relatedRecordsInfo}
    </div>
    );
}
.overviewCont{
    height:100px;
    display: flex;
    flex-direction: row;
    flex-wrap: wrap;
    justify-content: center;
    align-items: center;
}

.overviewItem{
    color: #666;
    box-shadow: 0 1px 8px rgba(0,0,0,0.08);
    padding: 10px;
    margin: 0px 5px;
    max-width: 100px;
    cursor: pointer;
}

.itemTitle{
   color: green;
   text-align: center;
   font-weight:600;
}


.itemSubtitle{
    overflow: hidden;
    text-overflow: ellipsis;
}
Once we have the two files updated with the above code, let's look at couple of things in the RecordOverview.tsx
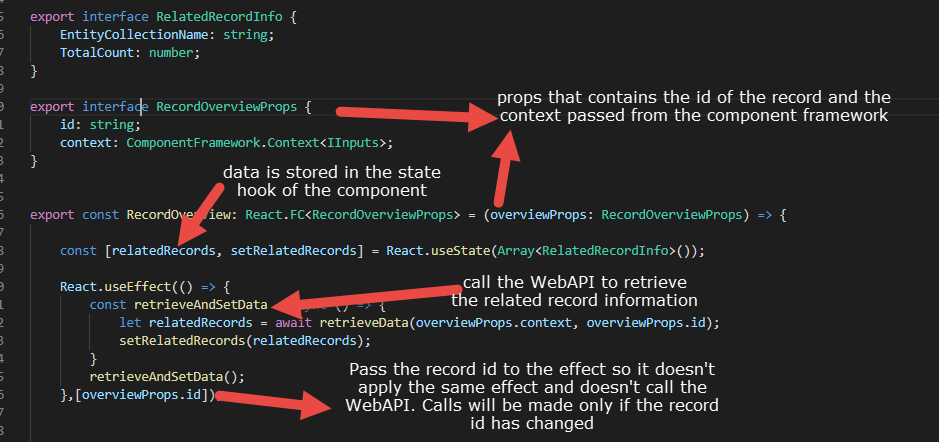
- We use the effect hook in the React component to make the WebAPI calls.
- The context from the component framework along with the id of the record are passed down as parameters to the React component.
- Data regarding the record is persisted in the component state using the state hook. Once the data is avilable it is used to render the view.
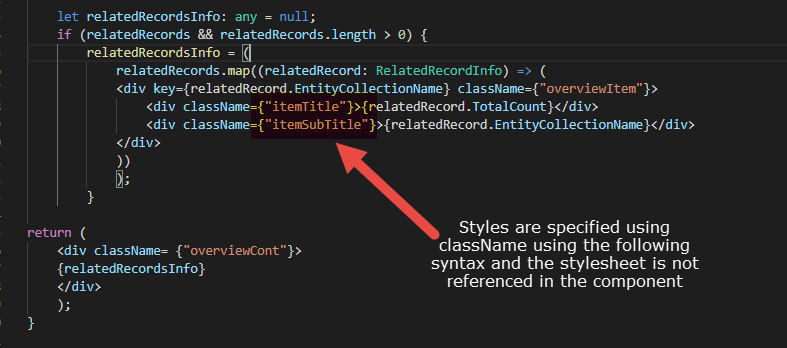
- We do not reference the stylesheet directly in the component but reference it in the ControlManifest file under resources. We would still need to specify the className to apply the desired styles on the elements.
Now that we have the React components ready to go let's update our index.ts file to use the react component as below.
import * as React from 'react';
import * as ReactDOM from 'react-dom';
import { IInputs, IOutputs } from "./generated/ManifestTypes";
import { RecordOverview, RecordOverviewProps, RelatedRecordInfo } from './RecordOverview';
export class Overview implements ComponentFramework.StandardControl<IInputs, IOutputs> {
private overViewContainer: HTMLDivElement;
private _context: ComponentFramework.Context<IInputs>;
private overViewProps: RecordOverviewProps = {
id: "",
context: this._context
};
constructor() {
}
/**
* Used to initialize the control instance. Controls can kick off remote server calls and other initialization actions here.
* Data-set values are not initialized here, use updateView.
* @param context The entire property bag available to control via Context Object; It contains values as set up by the customizer mapped to property names defined in the manifest, as well as utility functions.
* @param notifyOutputChanged A callback method to alert the framework that the control has new outputs ready to be retrieved asynchronously.
* @param state A piece of data that persists in one session for a single user. Can be set at any point in a controls life cycle by calling 'setControlState' in the Mode interface.
* @param container If a control is marked control-type='standard', it will receive an empty div element within which it can render its content.
*/
public init(context: ComponentFramework.Context<IInputs>, notifyOutputChanged: () => void, state: ComponentFramework.Dictionary, container: HTMLDivElement) {
let currentPageContext = context as any;
currentPageContext = currentPageContext ? currentPageContext["page"] : undefined;
if (currentPageContext && currentPageContext.entityId) {
this.overViewProps.id = currentPageContext.entityId;
this.overViewProps.context = context;
}
this.overViewContainer = container;
}
/**
* Called when any value in the property bag has changed. This includes field values, data-sets, global values such as container height and width, offline status, control metadata values such as label, visible, etc.
* @param context The entire property bag available to control via Context Object; It contains values as set up by the customizer mapped to names defined in the manifest, as well as utility functions
*/
public updateView(context: ComponentFramework.Context<IInputs>): void {
this.overViewProps.context = context;
ReactDOM.render(
React.createElement(
RecordOverview,
this.overViewProps
),
this.overViewContainer
);
}
public getOutputs(): IOutputs {
return {};
}
public destroy(): void {
ReactDOM.unmountComponentAtNode(this.overViewContainer);
}
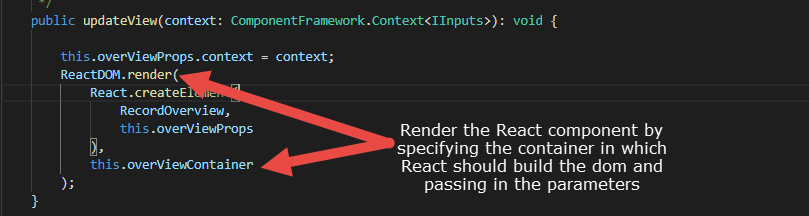
}Let's look at the init and the updateView methods where we set the overviewProps needed for the React component and also render the React component within the container.

We have now finished our component and are ready to test. Use the below component to run the app in your local environment.
npm start
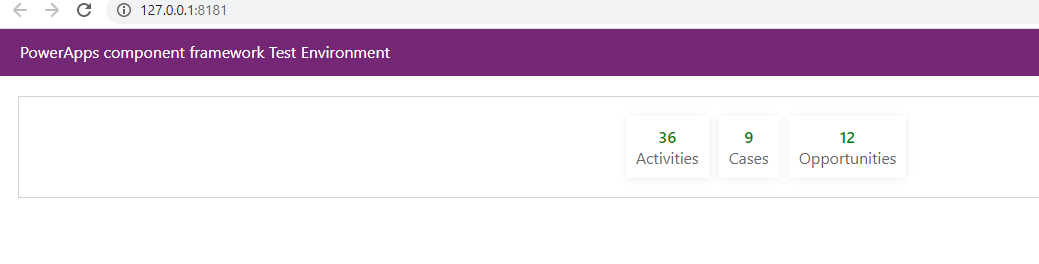
You should see something like this
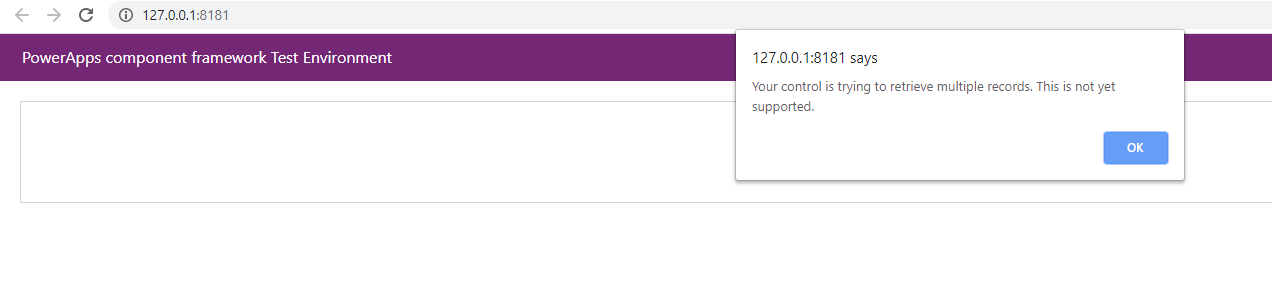
Since our WebAPI calls are not supported at this time we would need to put some fake data in our retrieveData method in RecordOverview.tsx component using a condition like below.
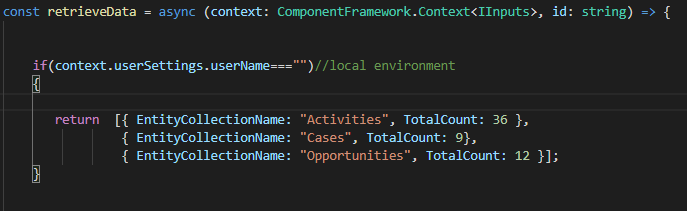
We should now be seeing this
We are now done with the local development and can now deploy this to Dynamics 365.
Let's perform the below tasks in the Visual Studio Developer Command Prompt. You would need to perform the below tasks once when initially setting up the project
//Navigate to the folder where you PCF project is located
//on your computer, in my case it's something like below
cd C:\Users\xxx\Documents\VSCode\Overview

//Create a solution folder in your project, name of the folder should reflect //the desired name you want to use for your solution
mkdir RecordOverview

//navigate into the solution folder
cd RecordOverview

// create the new solution project in the solution folder
pac solution init --publisher-name {publisher name you want to use} --publisher-prefix {prefix for the publisher}

//add reference to your PCF project, in our case it's as below
pac solution add-reference --path C:\Users\xxx\Documents\VSCode\Overview
At this point we have configured our project to be able to be generate the solutions every time we make changes and build the changes by running the following commands.
//build the project after testing, making sure all the changes are completed //locally in VSCode integrated terminal
npm run build

//now using the Visual Studio Command prompt run the follwing commands

cd C:\Users\xxx\Documents\VSCode\Overview\RecordOverview

msbuild /t:build /restore
You should now see the generated solution file under the below folder
C:\Users\xxx\Documents\VSCode\Overview\RecordOverview\bin\Debug

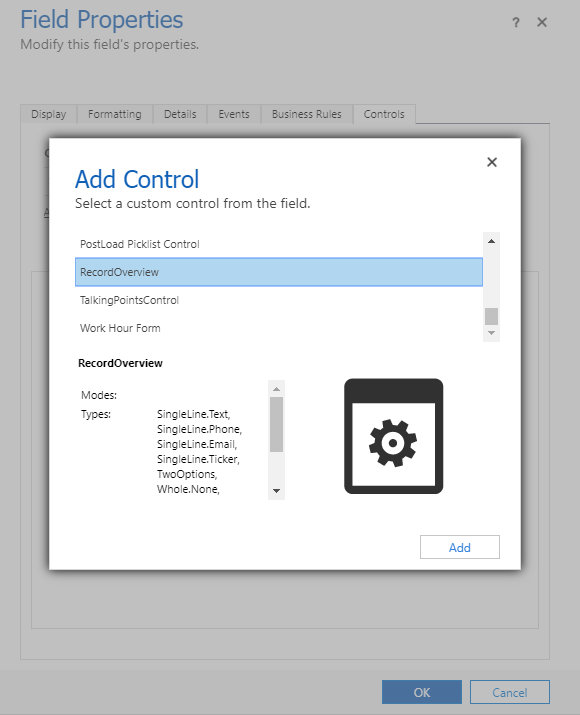
Let's import the solution and reference the control on the Contact form.
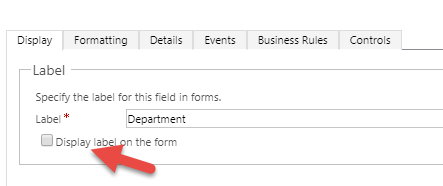
Find a field which is not going to be used on the contact form, in my case I am using the department field and under Controls tab add the RecordOverview control
You should have something like this
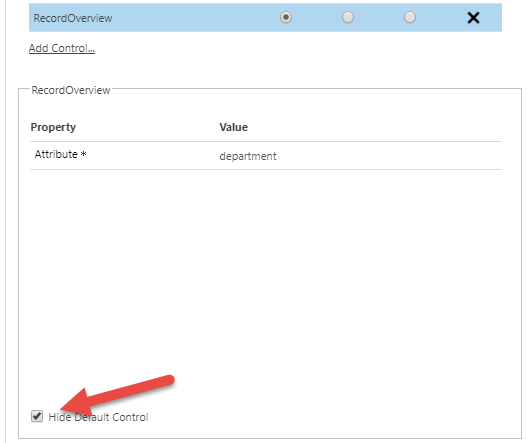
also, uncheck the Display Label, save and publish.
We should now see our control being rendered on the form
Hope this helps you build React components using PCF. If you are still reading this, thank you! Feel free to post any comments or issues you are facing when building this using React.