Create a Custom Connector in the Power Platform Using OAuth 2.0 Service Principal and Azure Function App

Custom Connectors are great when we to extend functionality to 3rd party APIs that do not have connector support or APIs that are specific to the business processes within an organization. This helps with easily using it across multiple instances in a tenant. A few months back Microsoft announced support for service principal authentication in custom connectors. I wanted to test the functionality to see how it works. Most of the documentation I found online was geared towards Microsoft graph API but nothing using an Azure function App that has Microsoft Entra ID enabled. I have tested this functionality using a sample API I have built and will walkthrough how to configure the custom connector.
Overview
- Prerequisites
- API Overview
- Creating the API
- Creating Custom Connector
- Testing Custom Connector
- Final Thoughts
Prerequisites
To follow along this blog, the following prerequisites must be met:
- Visual Studio 2022 Community or higher installed
- .NET 8 Framework installed
- Experience with C# and creating APIs using Azure function app.
- Azure tenant access for creating and deploying to Azure Function App and Storage account.
- Access to Power Platform environment to create the custom connector.
API Overview
To follow along this blog, you can bring your own API or use the sample repo. I will be using the sample repo, but the concepts should be the same.
We have a simple Appointment API built in .NET 8 and a C# Azure Function app that performs the CRUD operations using the HTTP trigger. For the sake of simplicity, the function app stores the appointment data in a storage account using the Table storage. We will be using a Table called Appointments and our function app will be performing CRUD operations on this table.
The source code for the API can be found here. I have also included the OpenAPI definition for the API that we will look at in a bit when creating the Custom Connector.
Creating the API
To create the API, we need to first clone the sample repo from GitHub and build it locally. Once the repo is built successfully, we can than do a quick test of the API to make sure everything is working as expected locally. But before we do this, we need to create the storage account as the function app relies on an Azure Storage account instead of an emulator. Since we will anyway be creating the Azure function app later, let's create both these resources so we have everything we need to deploy once we finish our testing locally.
Creating the Resources in Azure
I have created an Azure Function app and Storage account as below.

Next let's go to our storage account and go to Tables under the Data Storage section on the left-hand navigation. I have created a new Table named 'Appointments' which will be storing the appointment data for the customer.

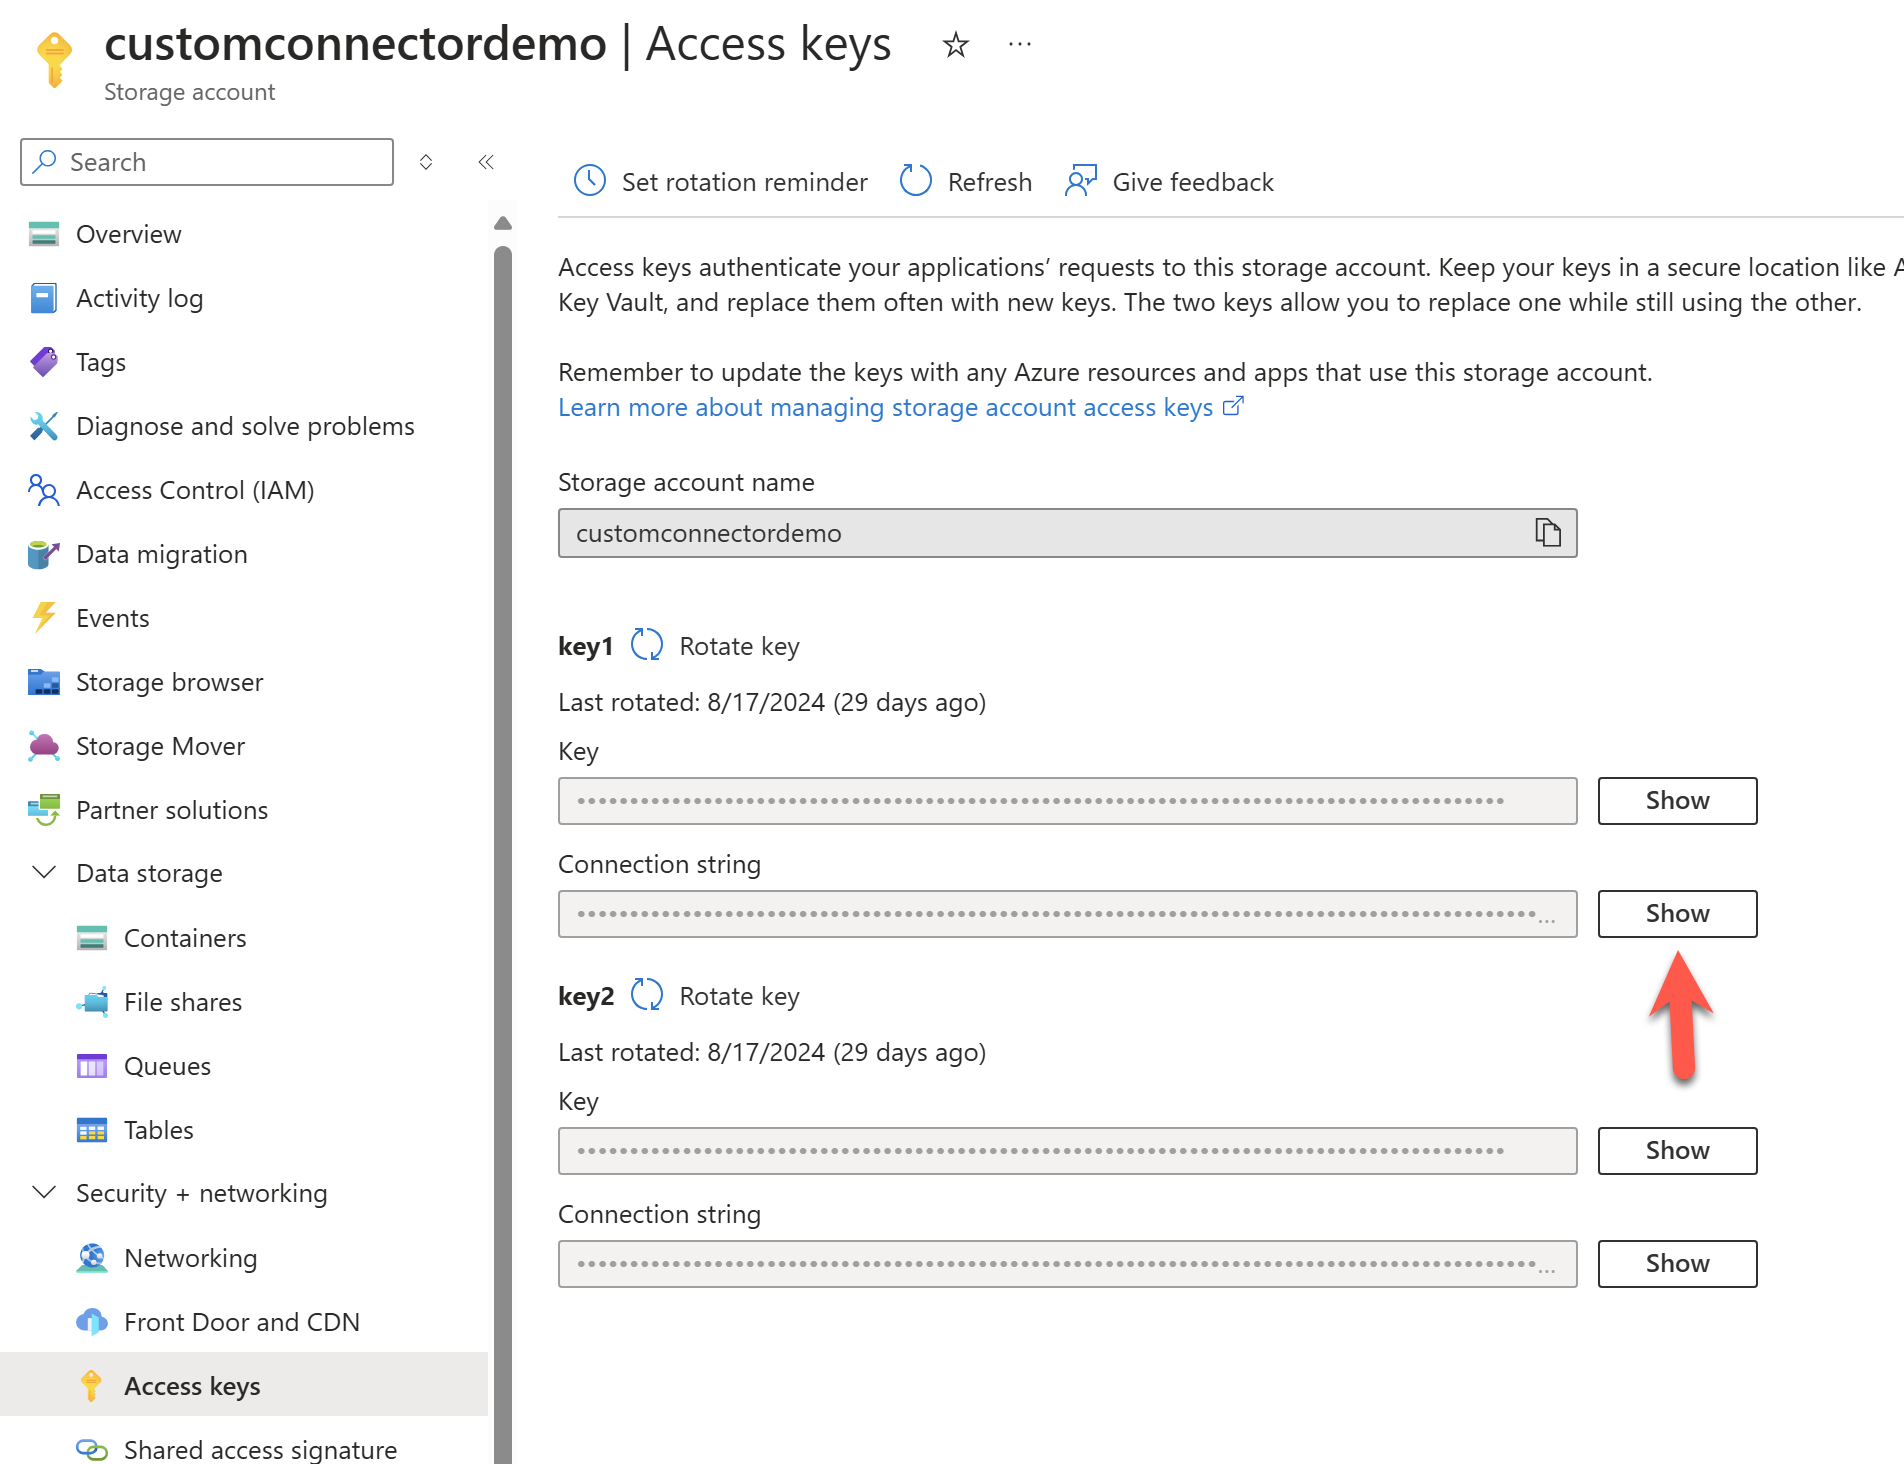
Next let's grab the connection string from the storage account and paste it in notepad. We will use this to update our local.settings.json file in our function app.
Appointment API Local Testing
Now, open the function app that you have previously cloned in Visual Studio. Create a new local.settings.json file in the function project. Copy the below settings and replace STORAGE_CONNECTION_STRING_HERE with the connection string you have previously copied.
{
"IsEncrypted": false,
"Values": {
"AzureWebJobsStorage": "UseDevelopmentStorage=true",
"FUNCTIONS_WORKER_RUNTIME": "dotnet-isolated",
"StorageConnectionString": "STORAGE_CONNECTION_STRING_HERE",
"StorageAccountAppointmentsTable": "Appointments"
}
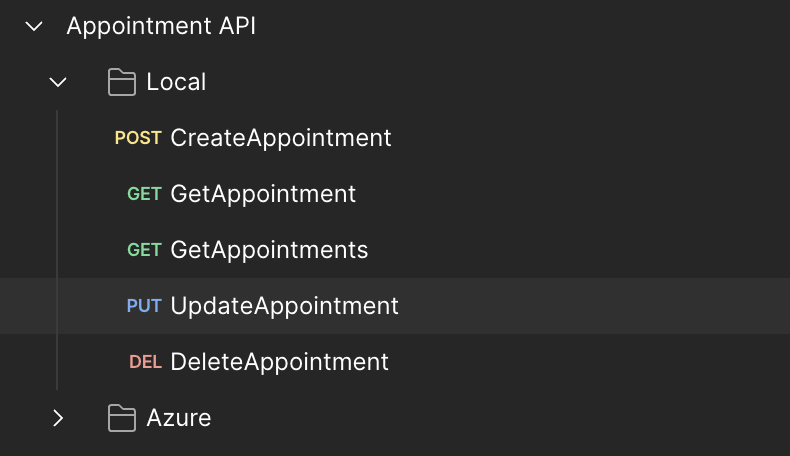
}Let's run the app now, we should now be good to test our app. You can use the sample Postman collection and environment to easily test your app. Once you have imported the collection you should see two folders with essentially the same requests. The Local folder makes it easy to test the API locally. Make sure to start the testing using the CreateAppointment request as the other requests use the values for the CustomerId and the Id specified in the CreateAppointment request body.
Publishing the API to Azure
Once we have verified everything is working as expected, the next step is to publish the API. For this, we will directly publish it from Visual Studio to the Azure function app that we have previously created. You could also directly create the function app from Visual Studio but if you have already created as indicated previously than you can publish it this way.
Adding Microsoft Entra Authentication on the Function App
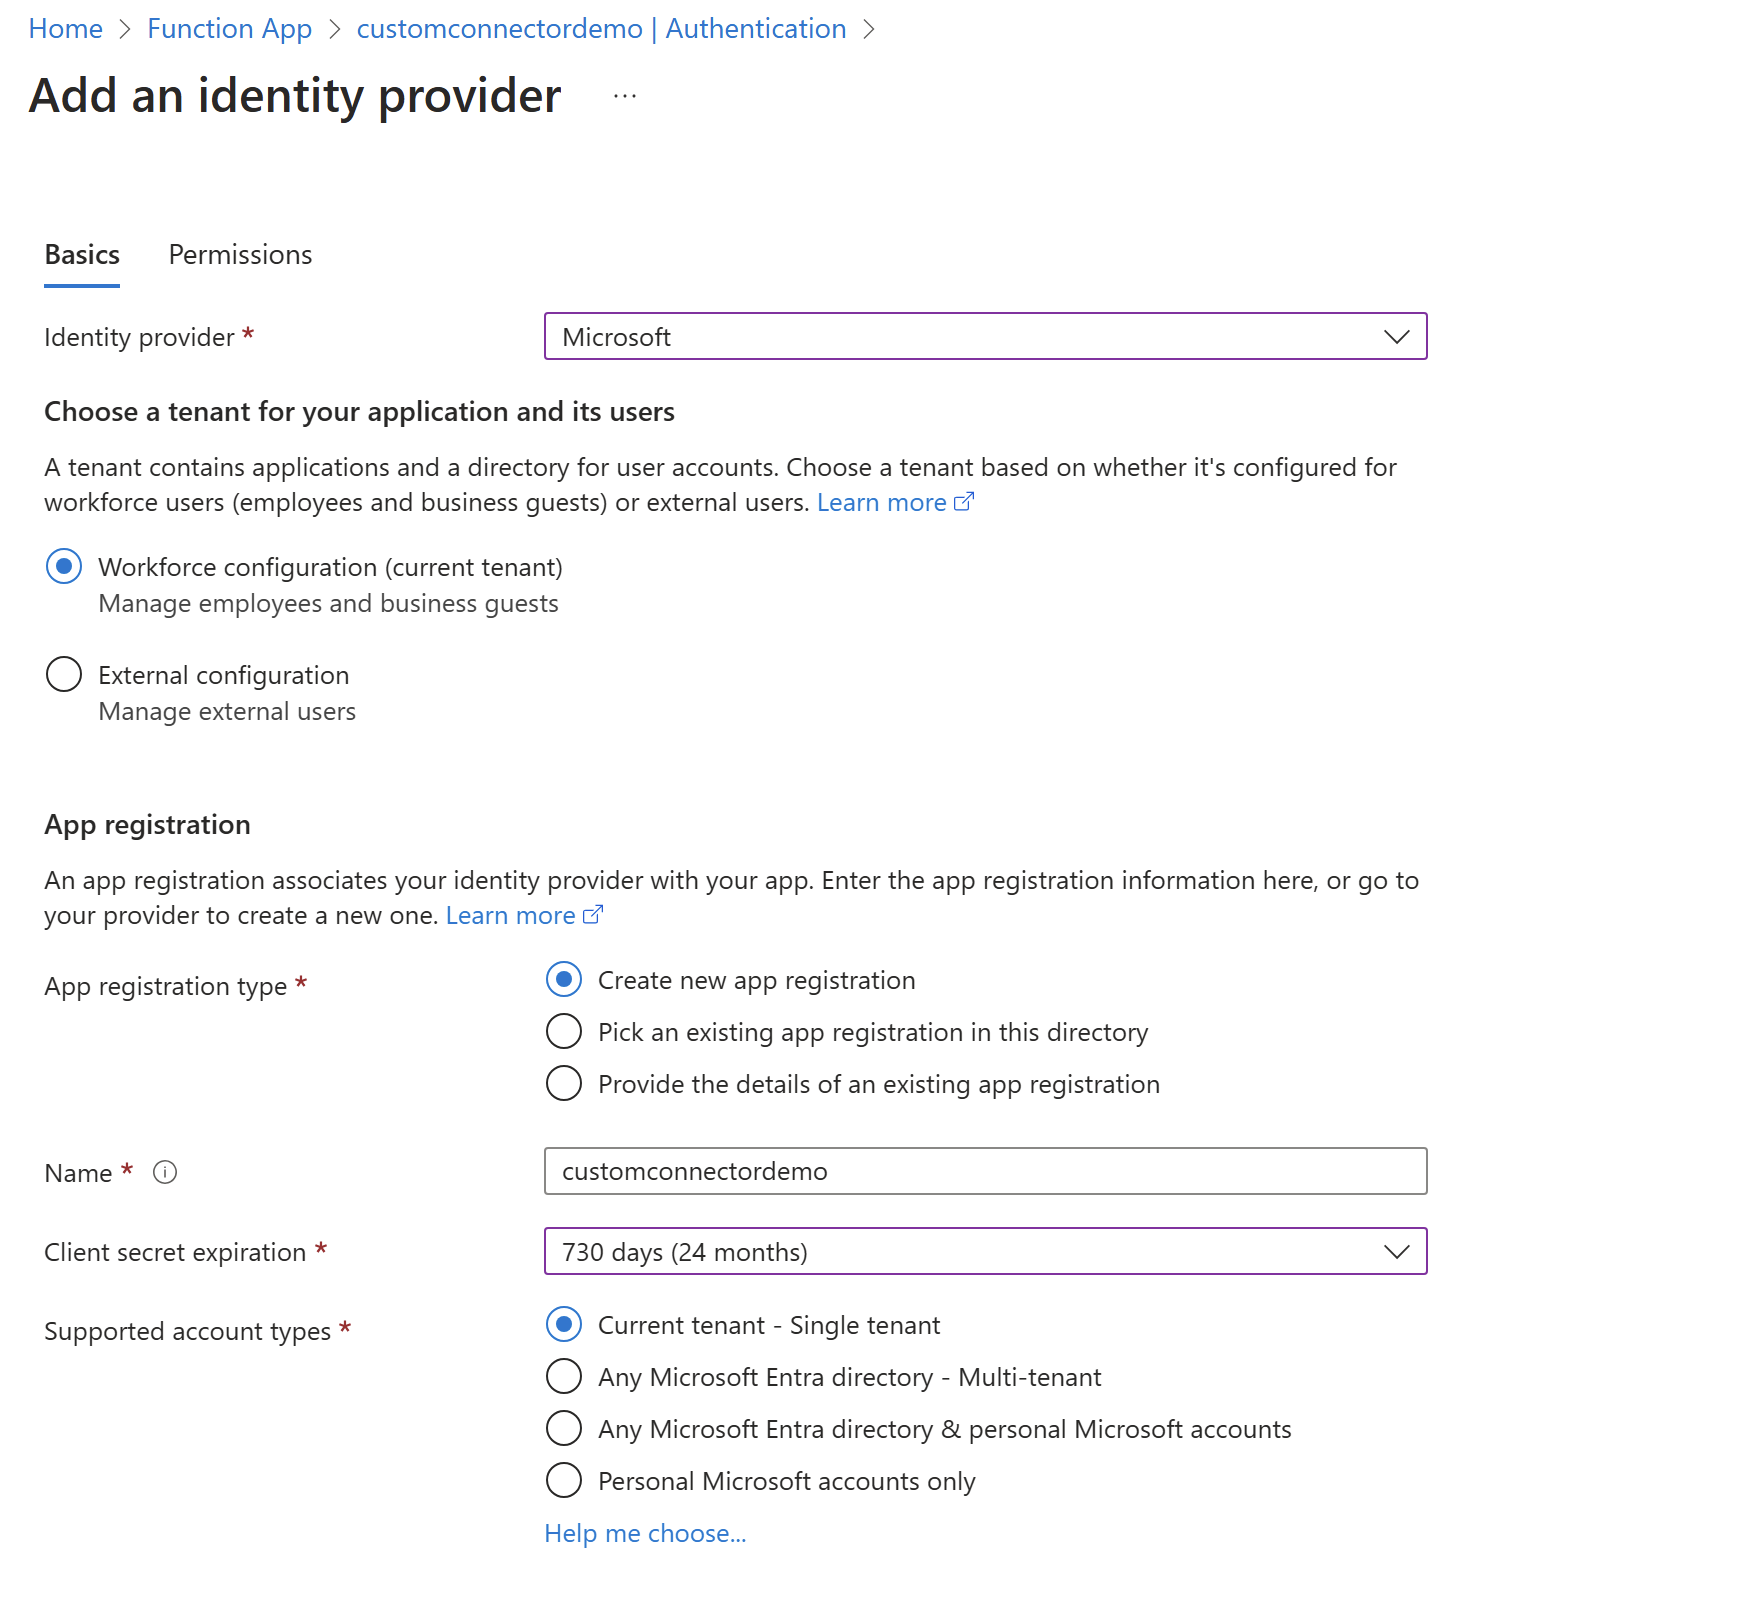
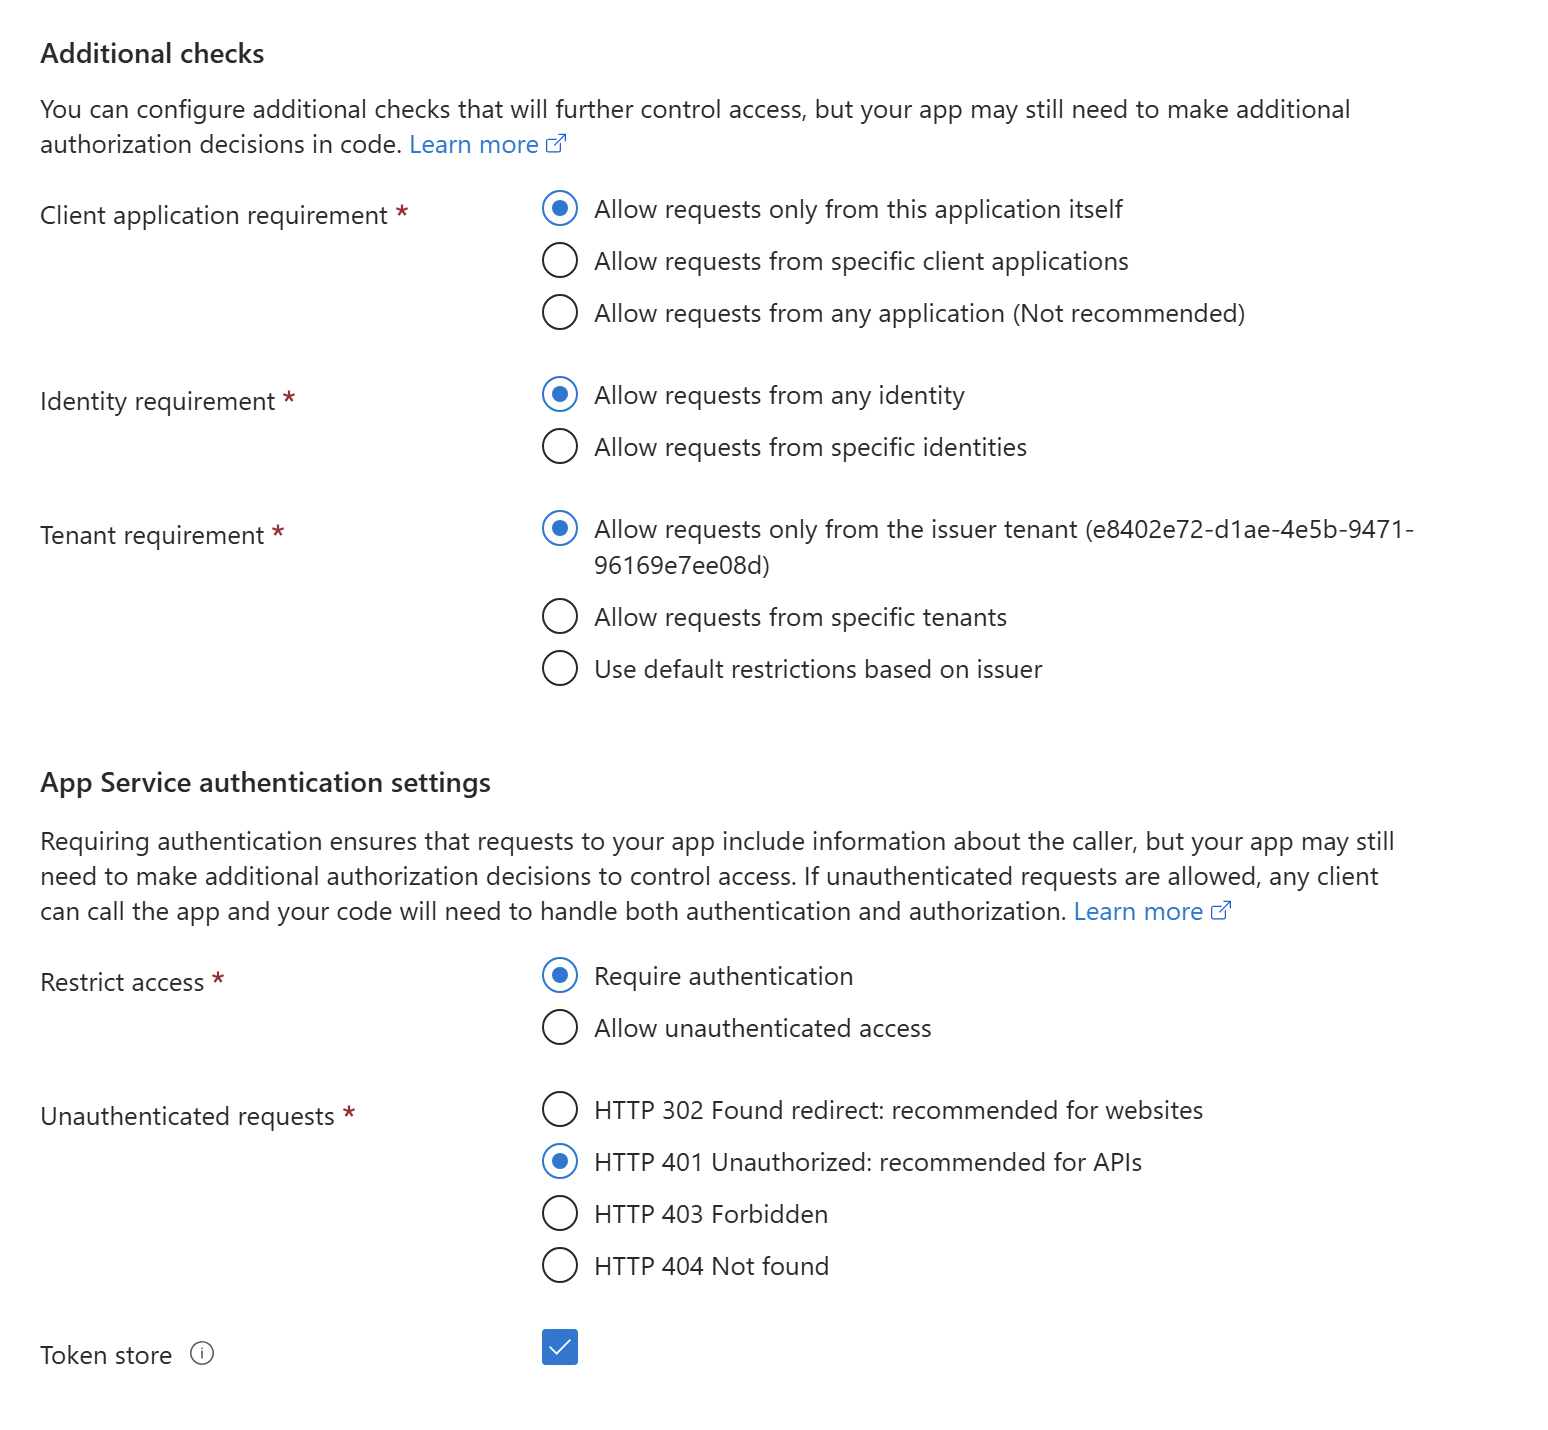
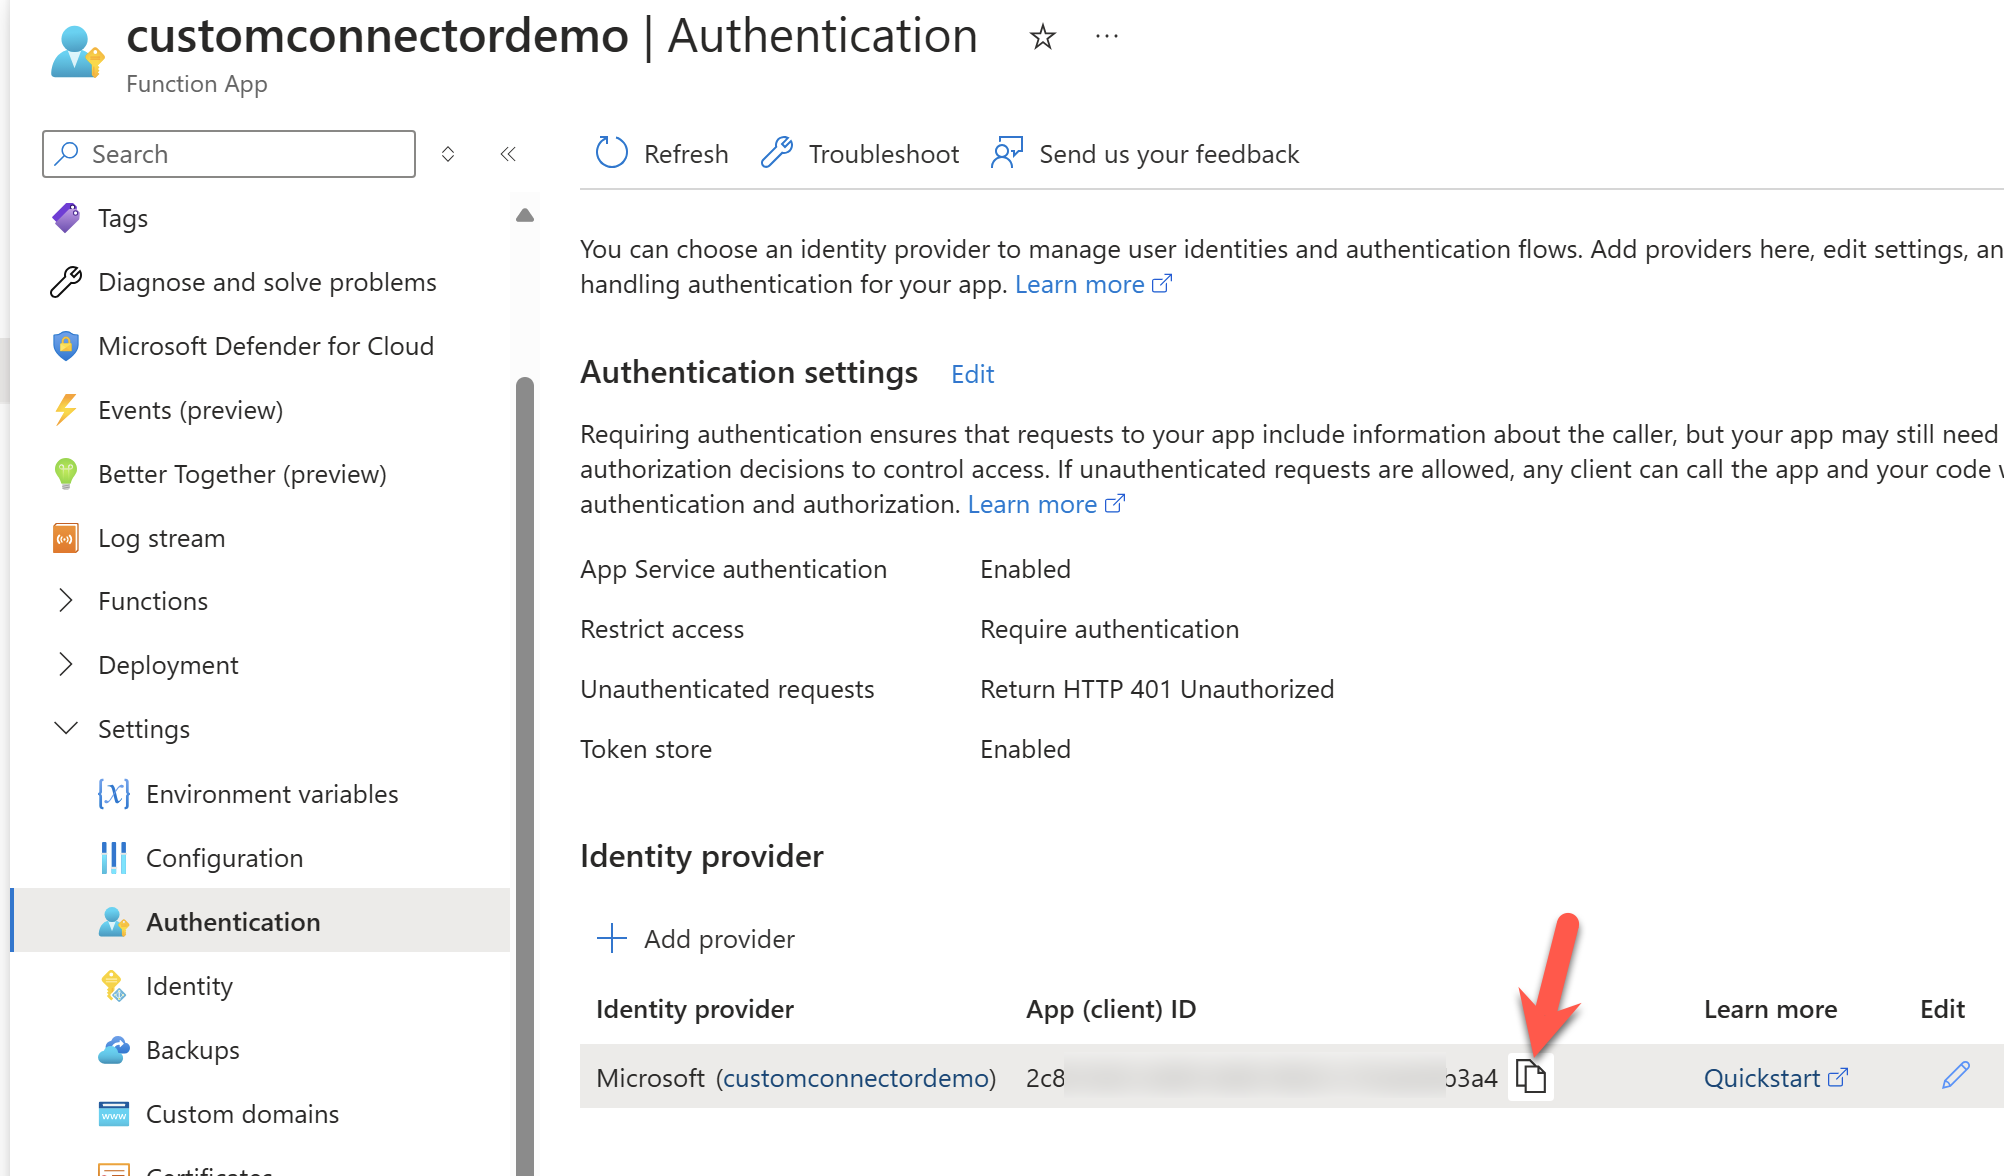
Navigate to Settings->Authentication->Add an authentication provider on the function app. Select Microsoft as the Identity provider. Create a new app registration as below.
Capture the Client Id and the Client Secret for the app registration that was created. The Client Id can be copied from below.
For the Client Secret, you can find the value under the environment variables or create a new client secret under the app registration.
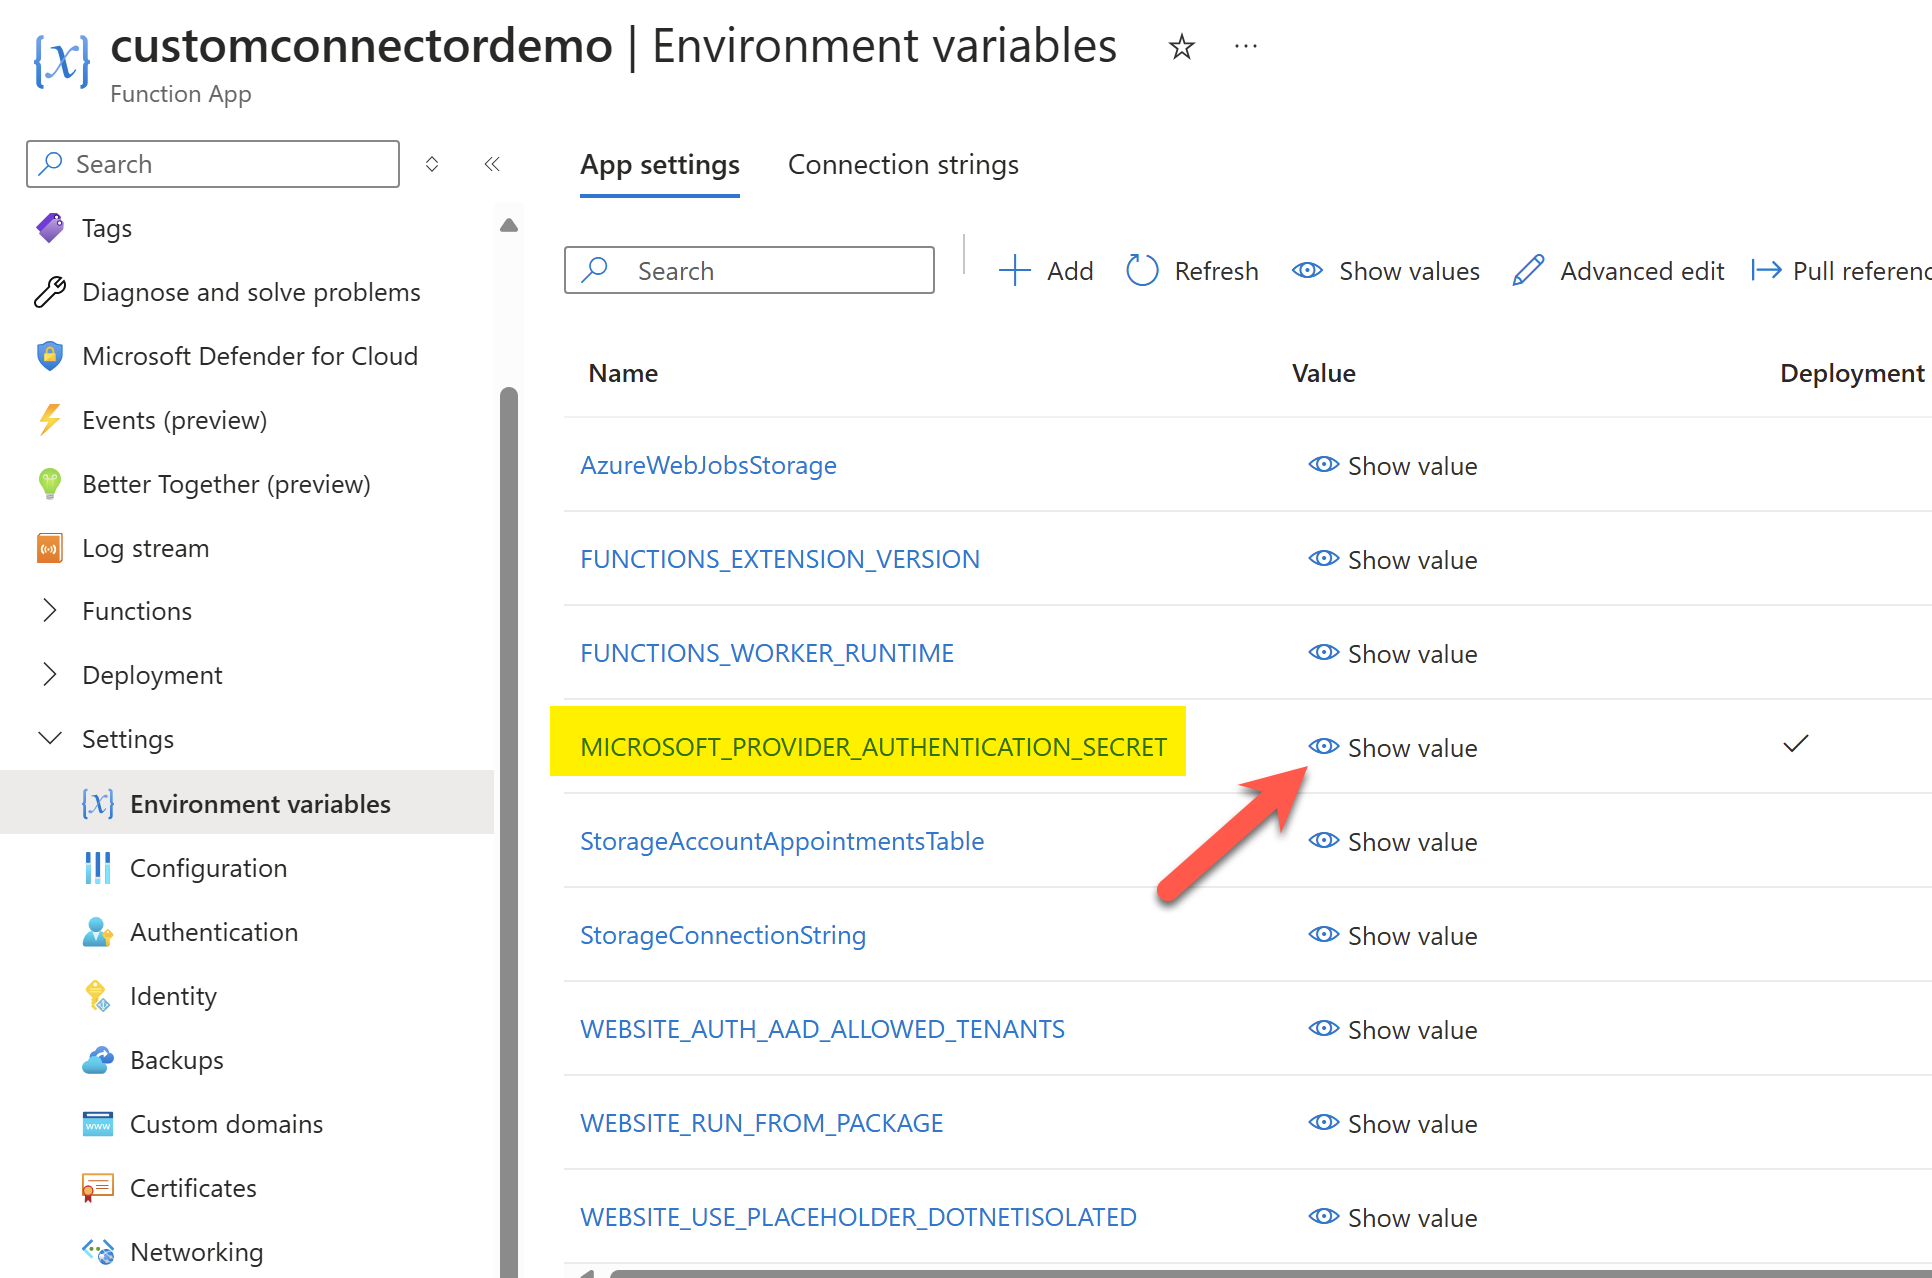
Let's store the Client Id and Client Secret in a separate file for now. We will use it when we are creating the connector.
Creating Custom Connector
We have everything we need at this point to create the custom connector. Let's go to a solution where we want to create the custom connector and create the connector as below.
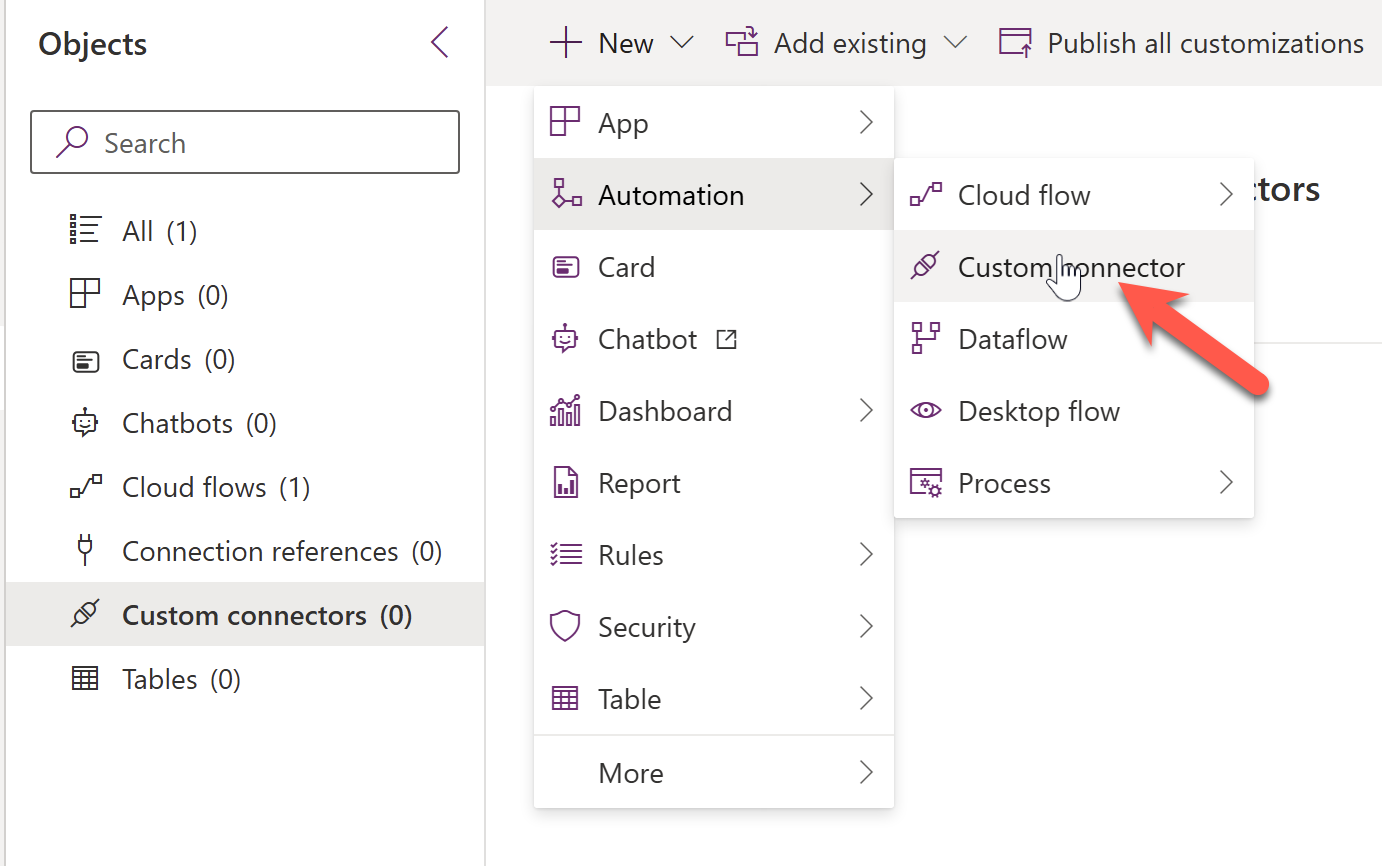
Provide a name for the connector and specify the host to be the host of your API. Specify the Base URL to /api since our function app uses this as the Base URL.

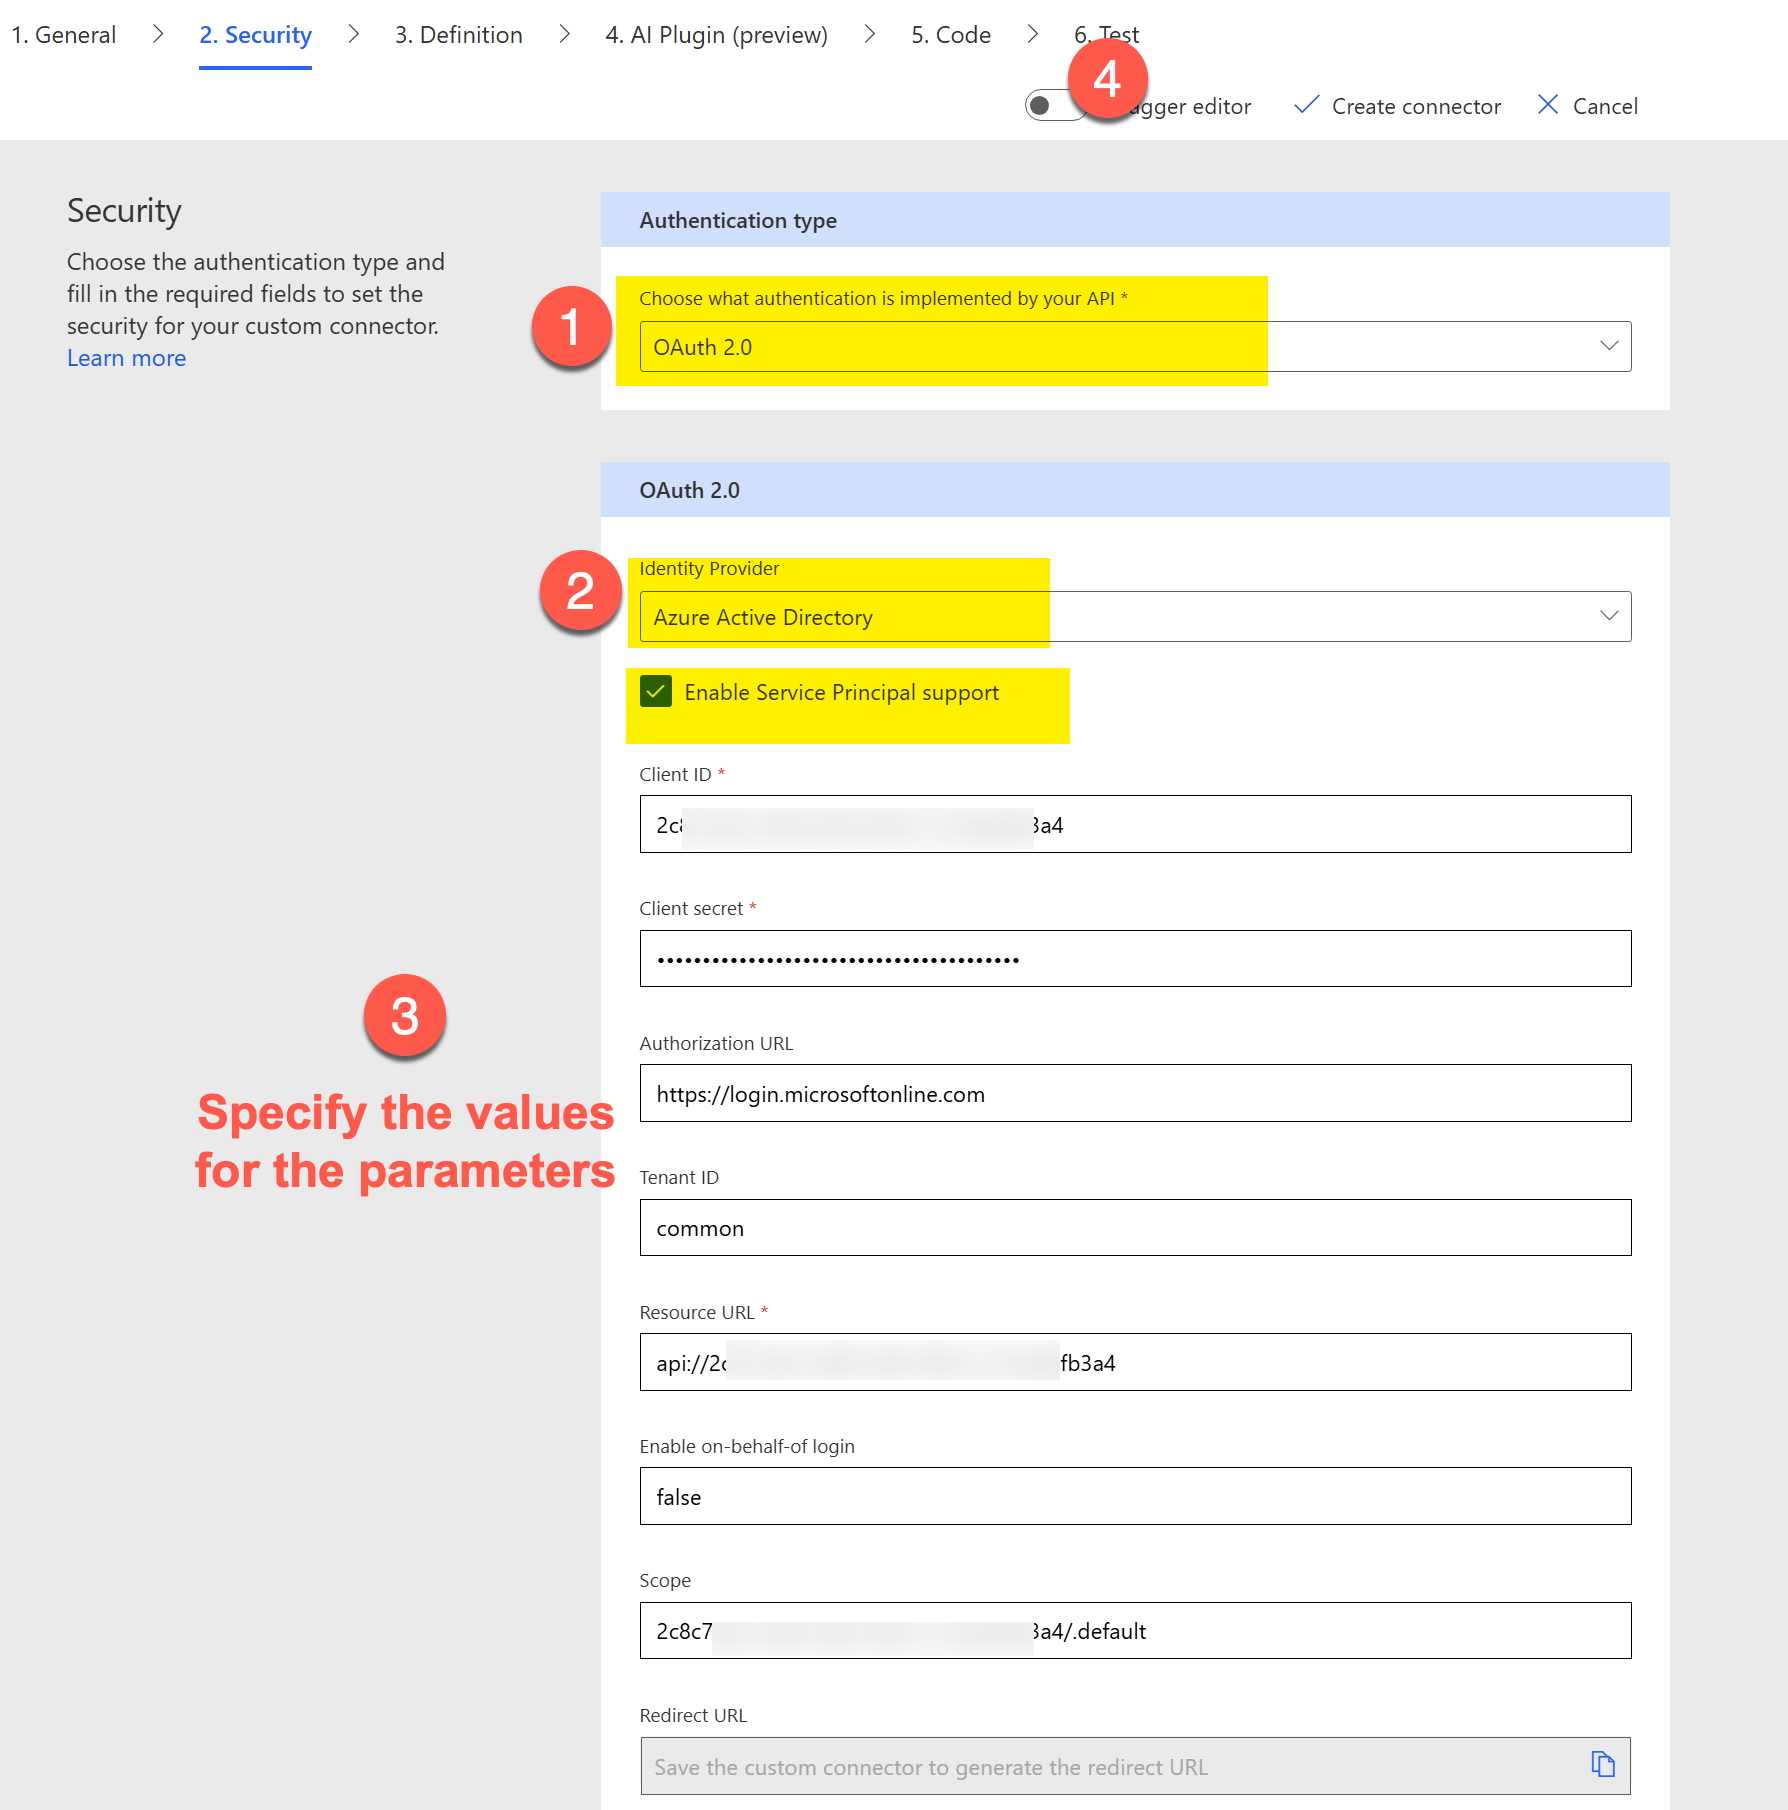
Specifying the Credentials
In a new tab, navigate to Microsoft Entra ID-> App Registrations and search for the App Id that was previously created on the Azure function app. Copy the Application ID URI. Leave the App Registration tab open as we will come back to it again in just a moment.
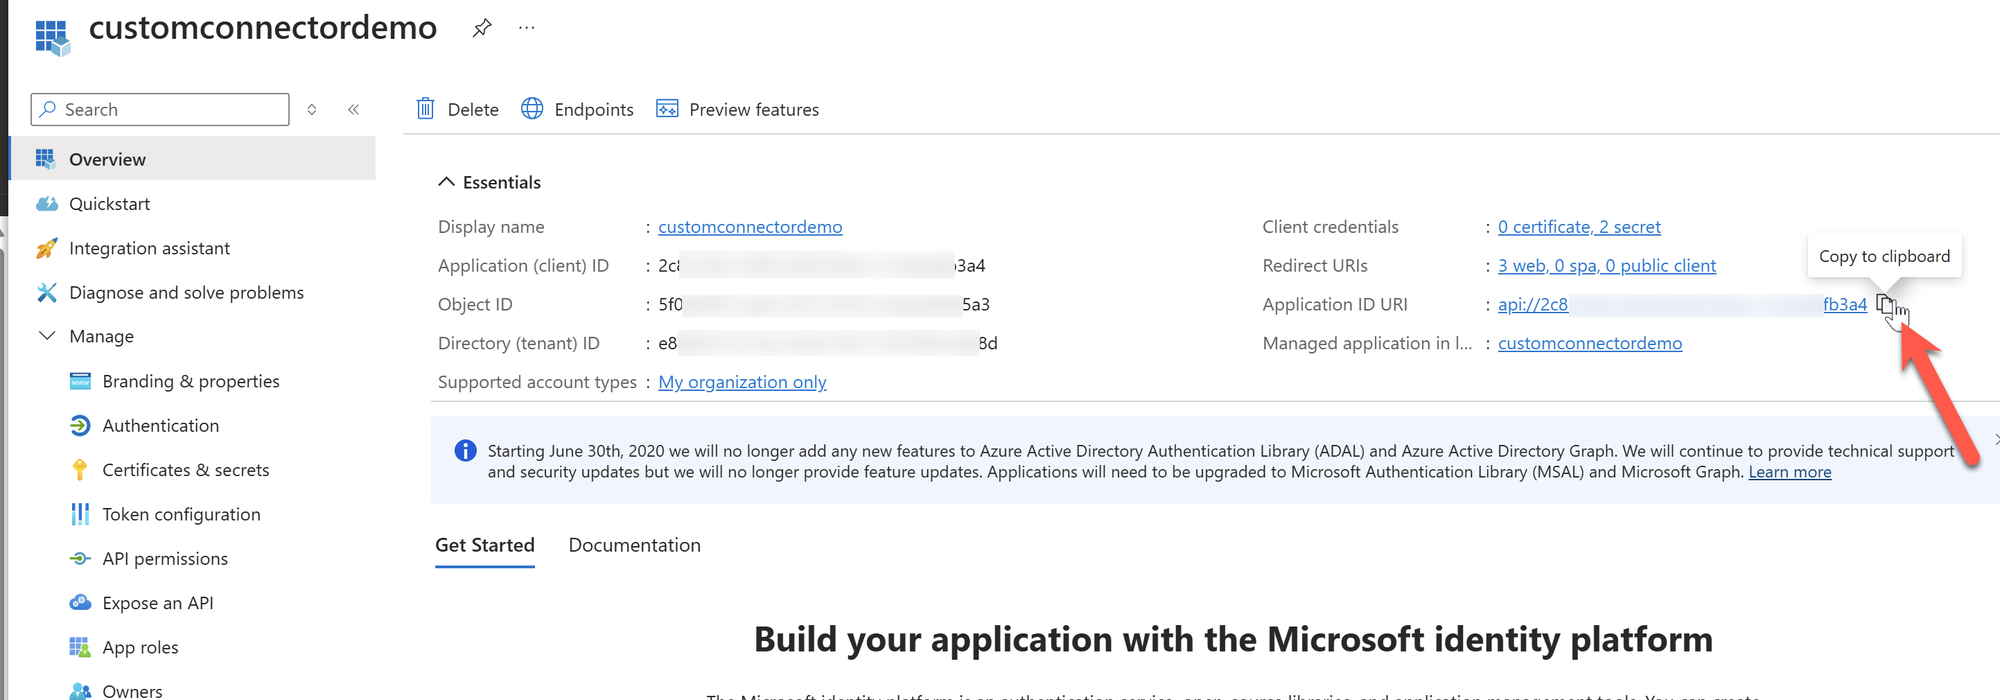
Let's go back to the security section of the custom connector and specify the values for the parameters in the configuration that we have previously stored. Paste the Application ID URI copied from the previous step into the Resource URL. For the scope we would need to set the value in the format of CLIENT_ID/.default as shown below.
Let's now enable the Swagger editor and specify the Open API specification.
Open API Specification and Modifying it with Client ID
Notice that Microsoft provides a default specification with the security definitions.
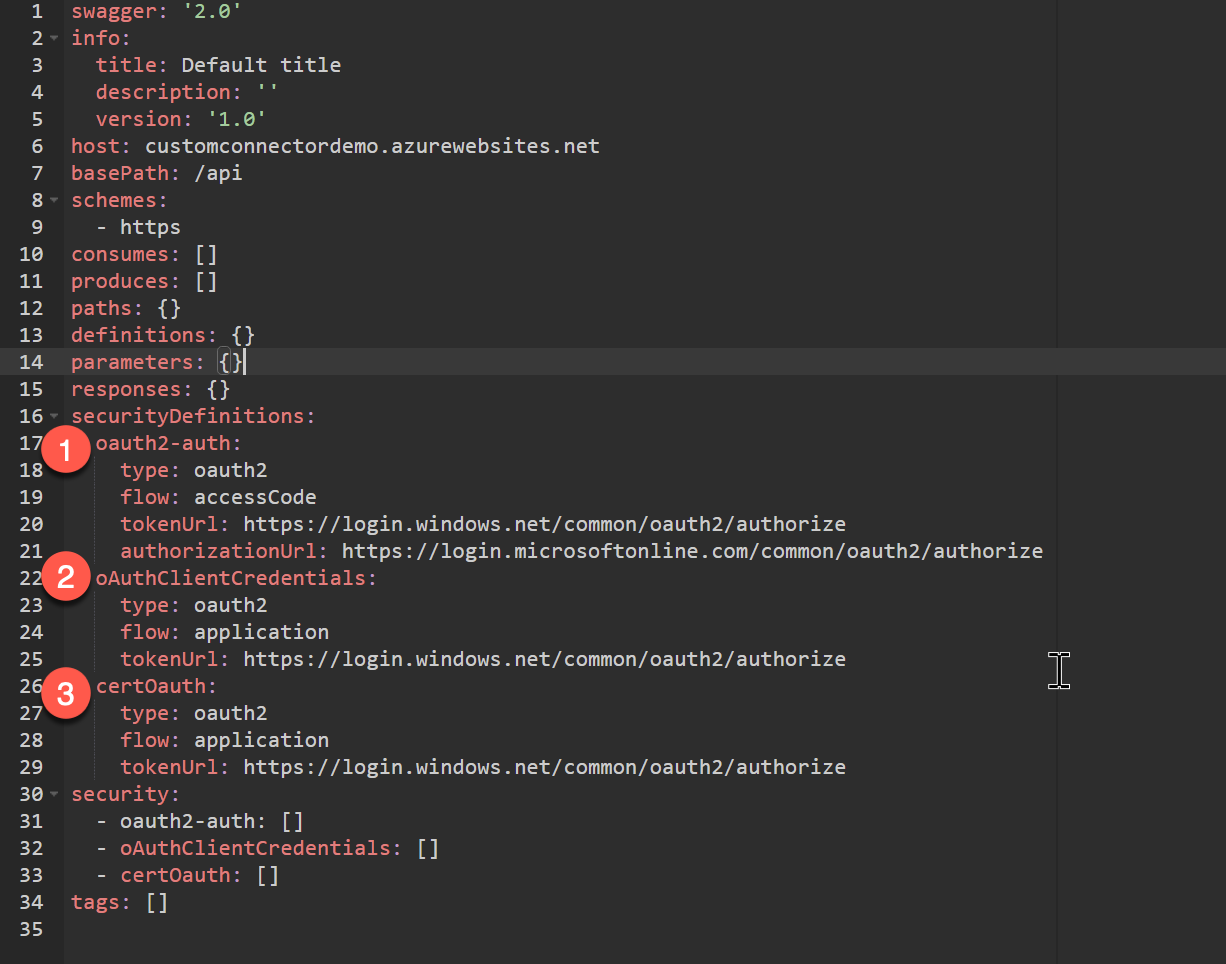
We do not need the certOauth configuration even though Microsoft provides it by default.
https://login.microsoftonline.com/{TENANT_ID}/oauth2/v2.0/token
If you are following along using the sample API, let's now open the Open API specification and make the following changes.
- Replace FUNCTION_APP_NAME with the name of your function in the host property on line 12.
- Replace CLIENT_ID with the client id of the app registration. This will update the security and security definitions on the specification.
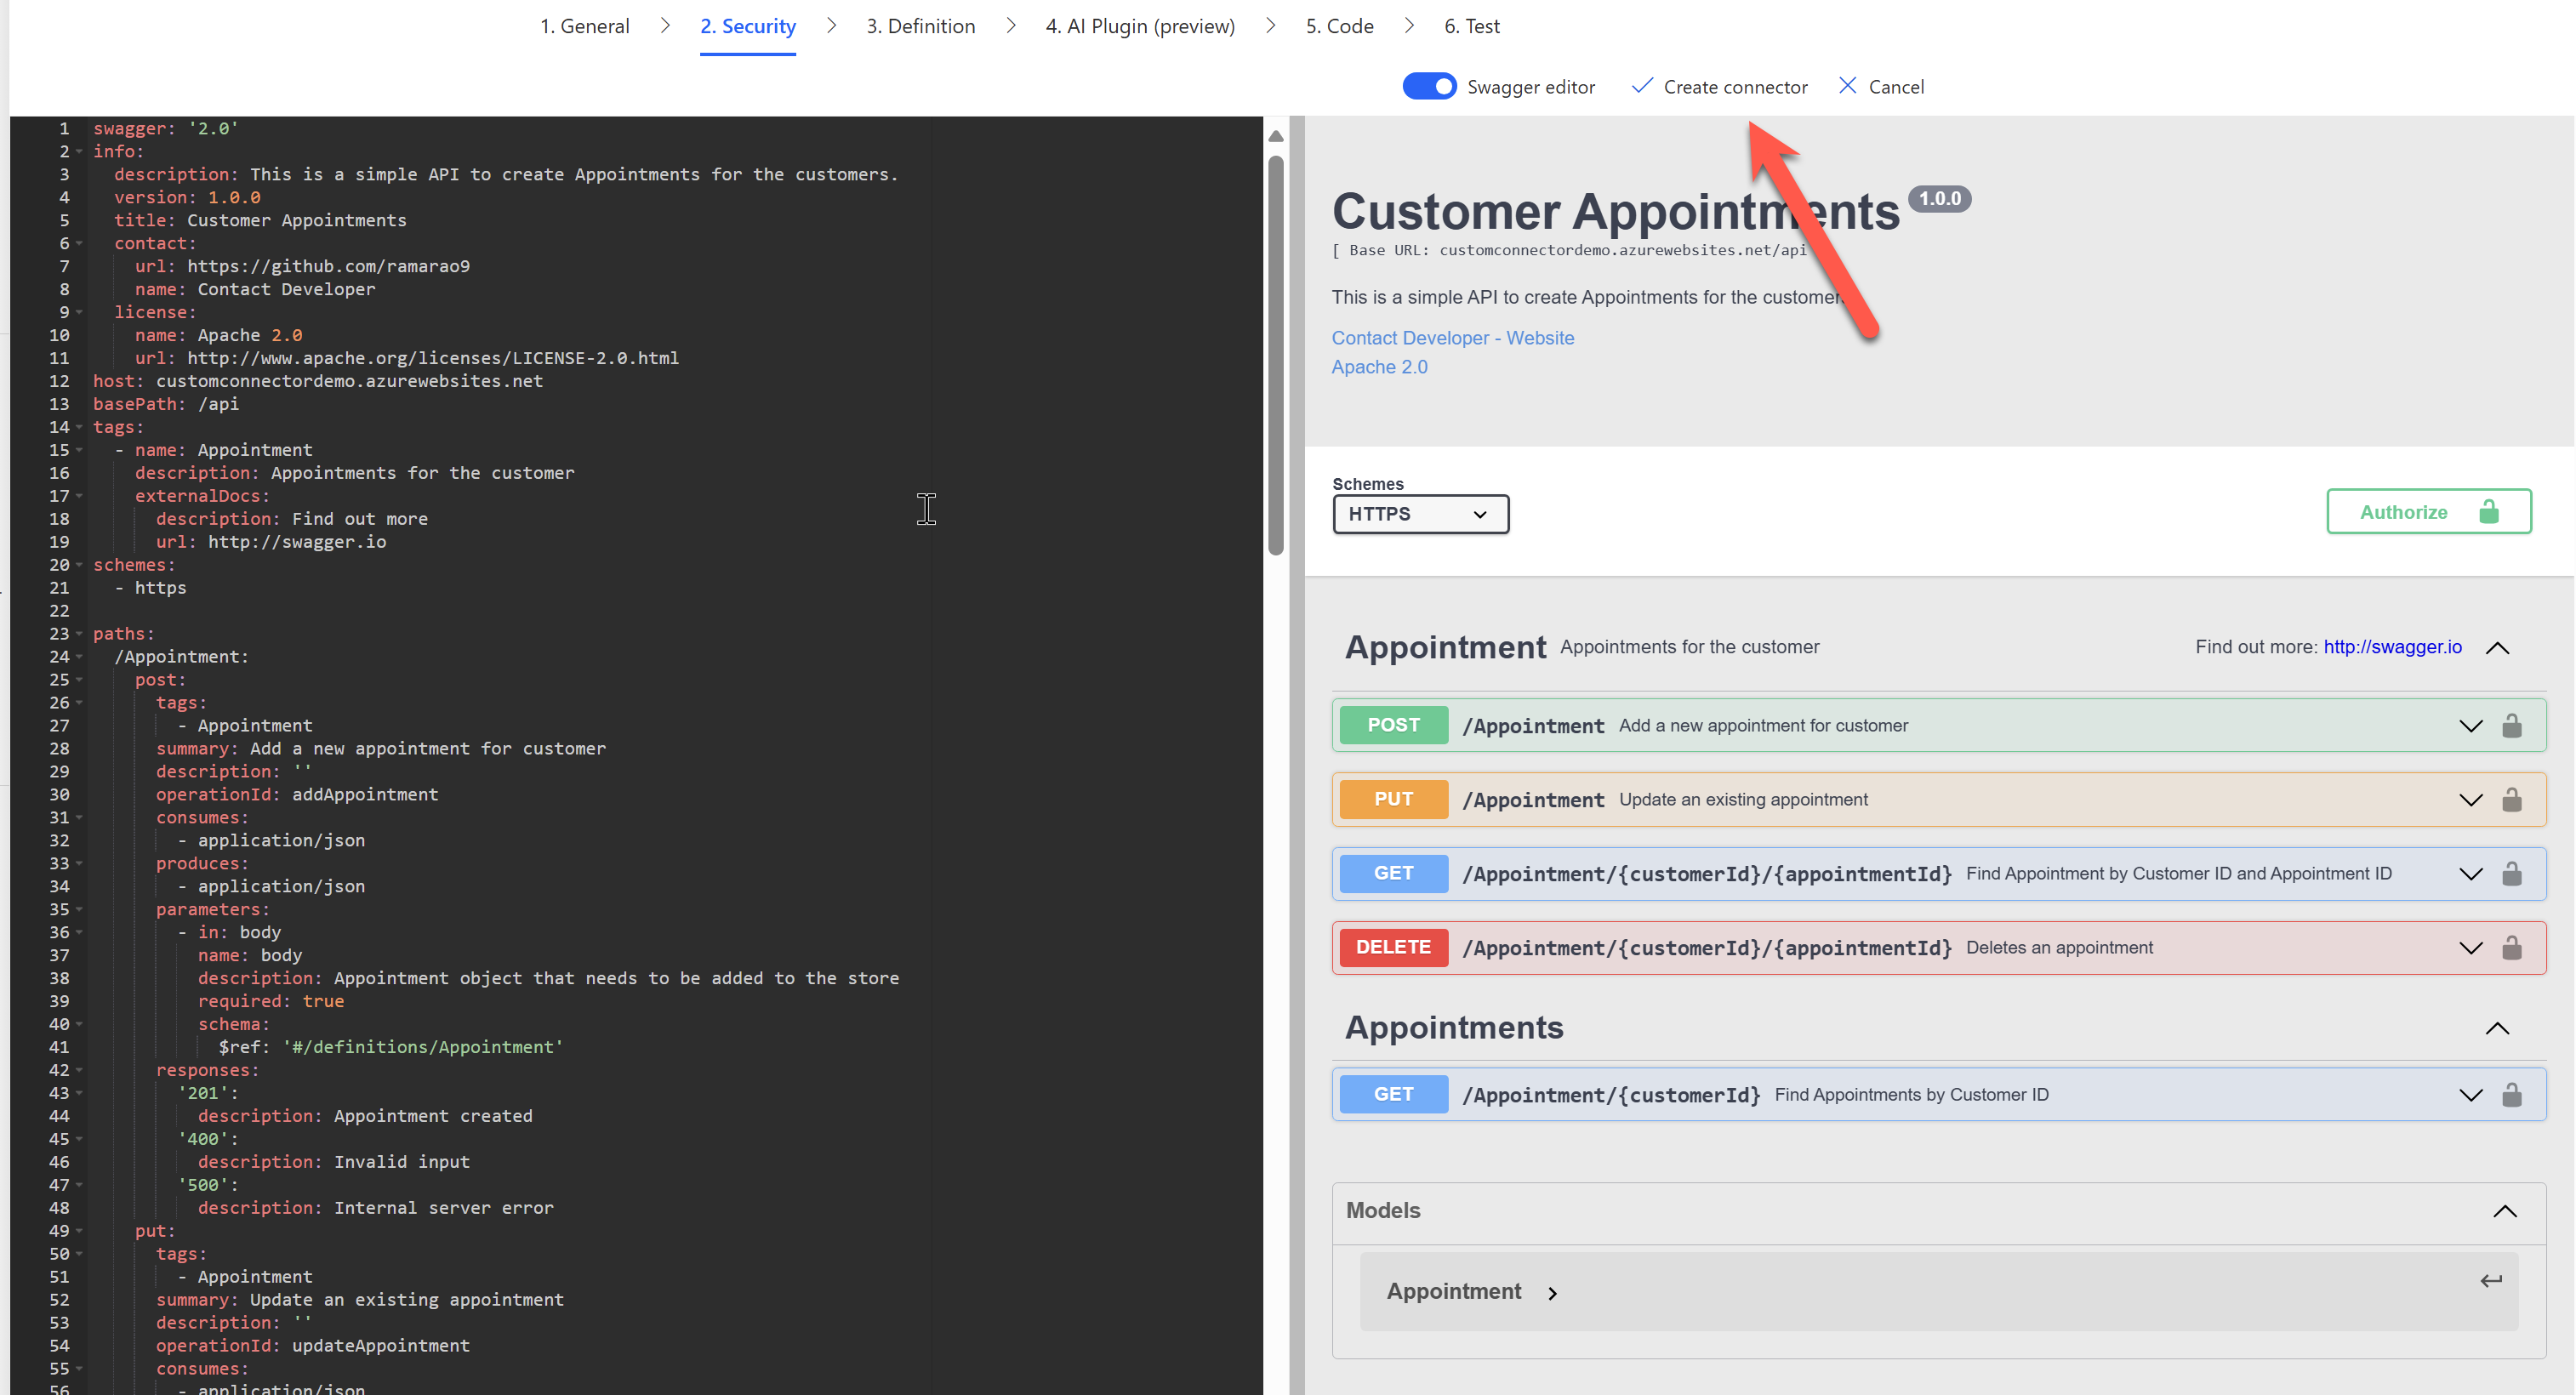
Updating Custom Connector with Open API Specification
Now paste the updated definition into the Swagger editor and click Create connector.
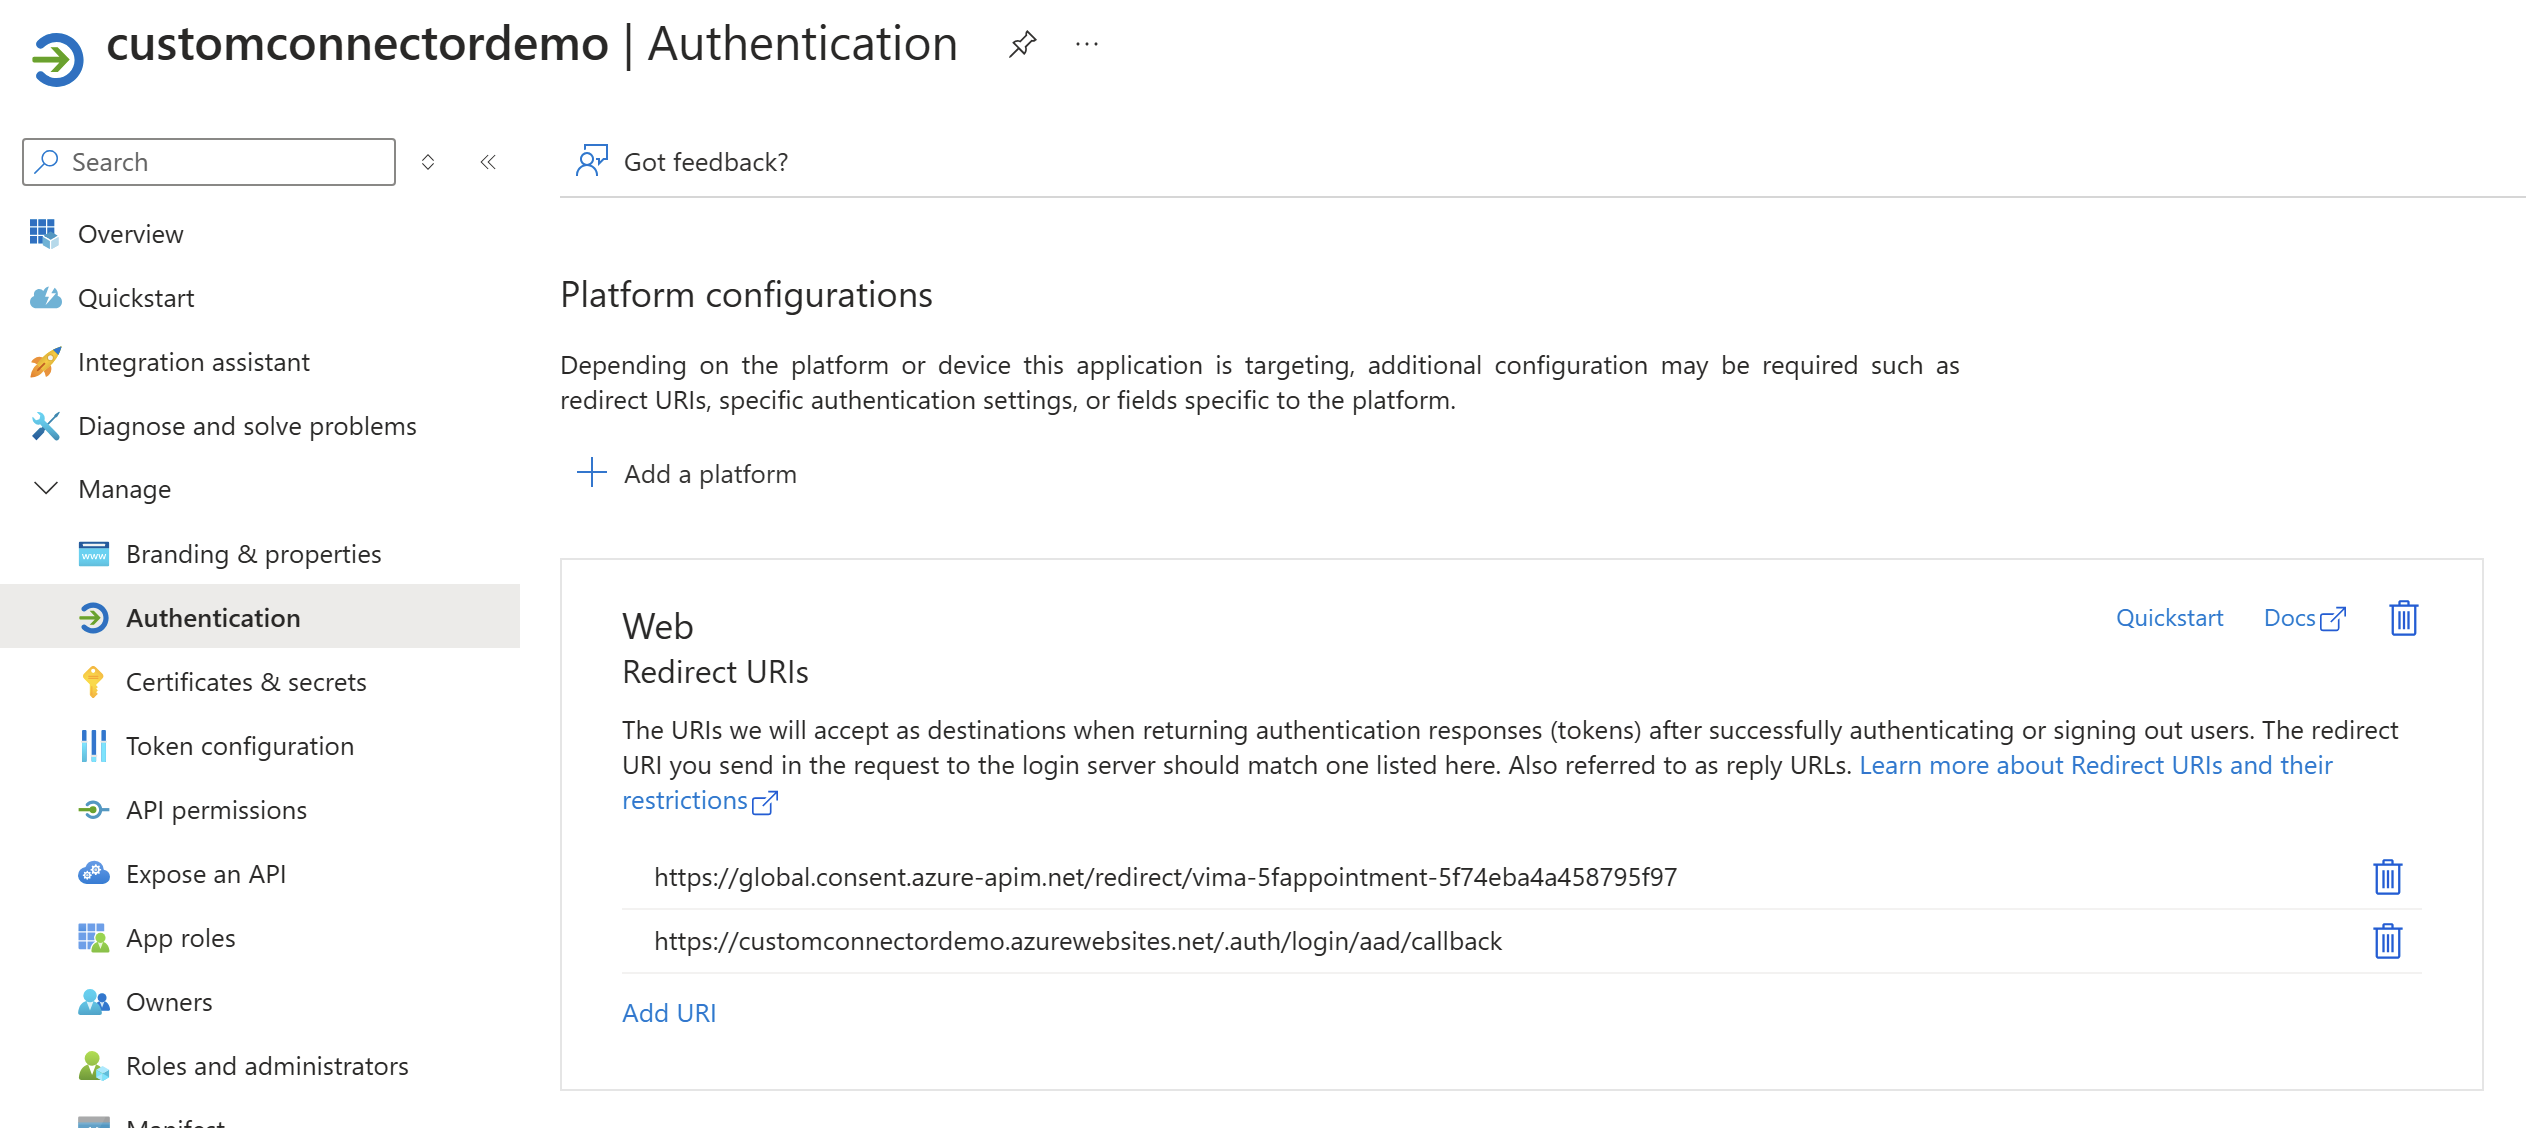
Once the custom connector is created, we should now see a Redirect URL under the security section.
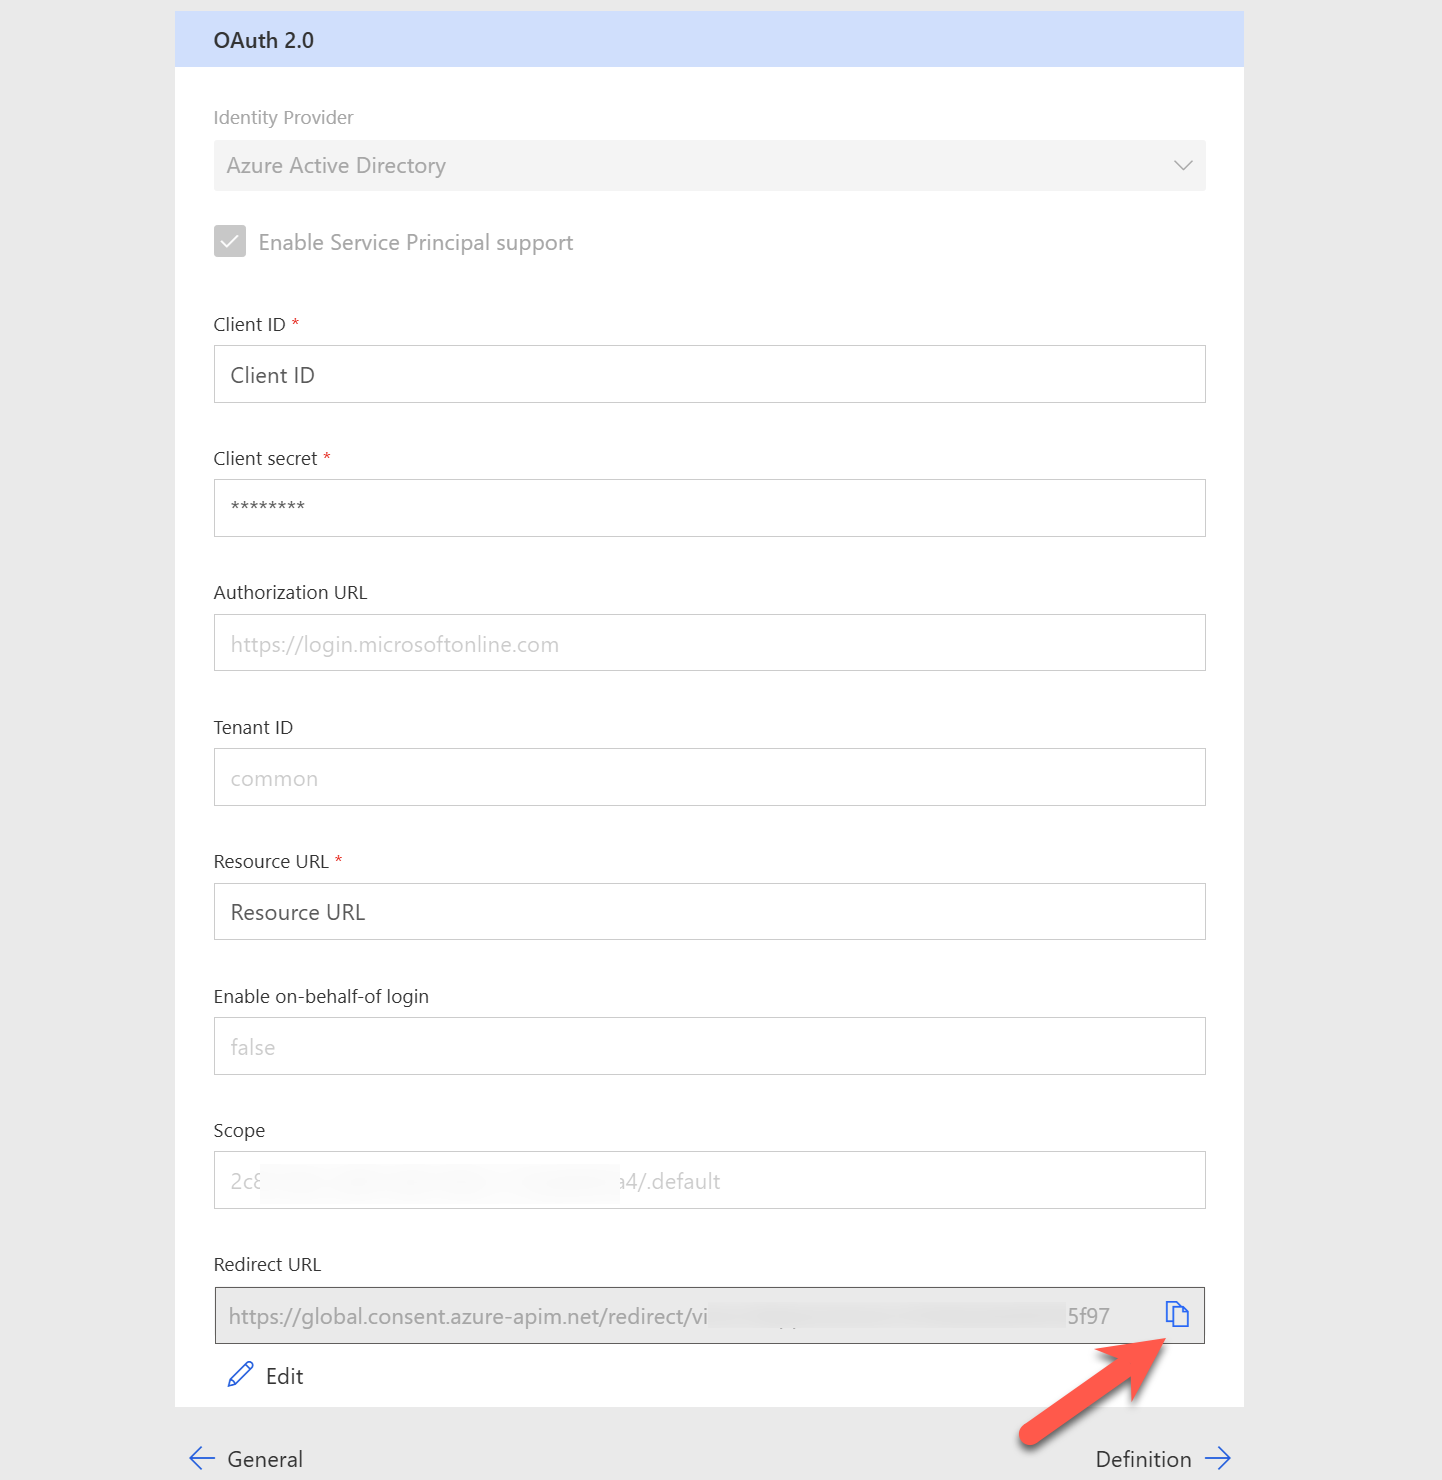
Copy the Redirect URL and paste it on the Redirect URI on the app registration. This is required as mentioned in the documentation.
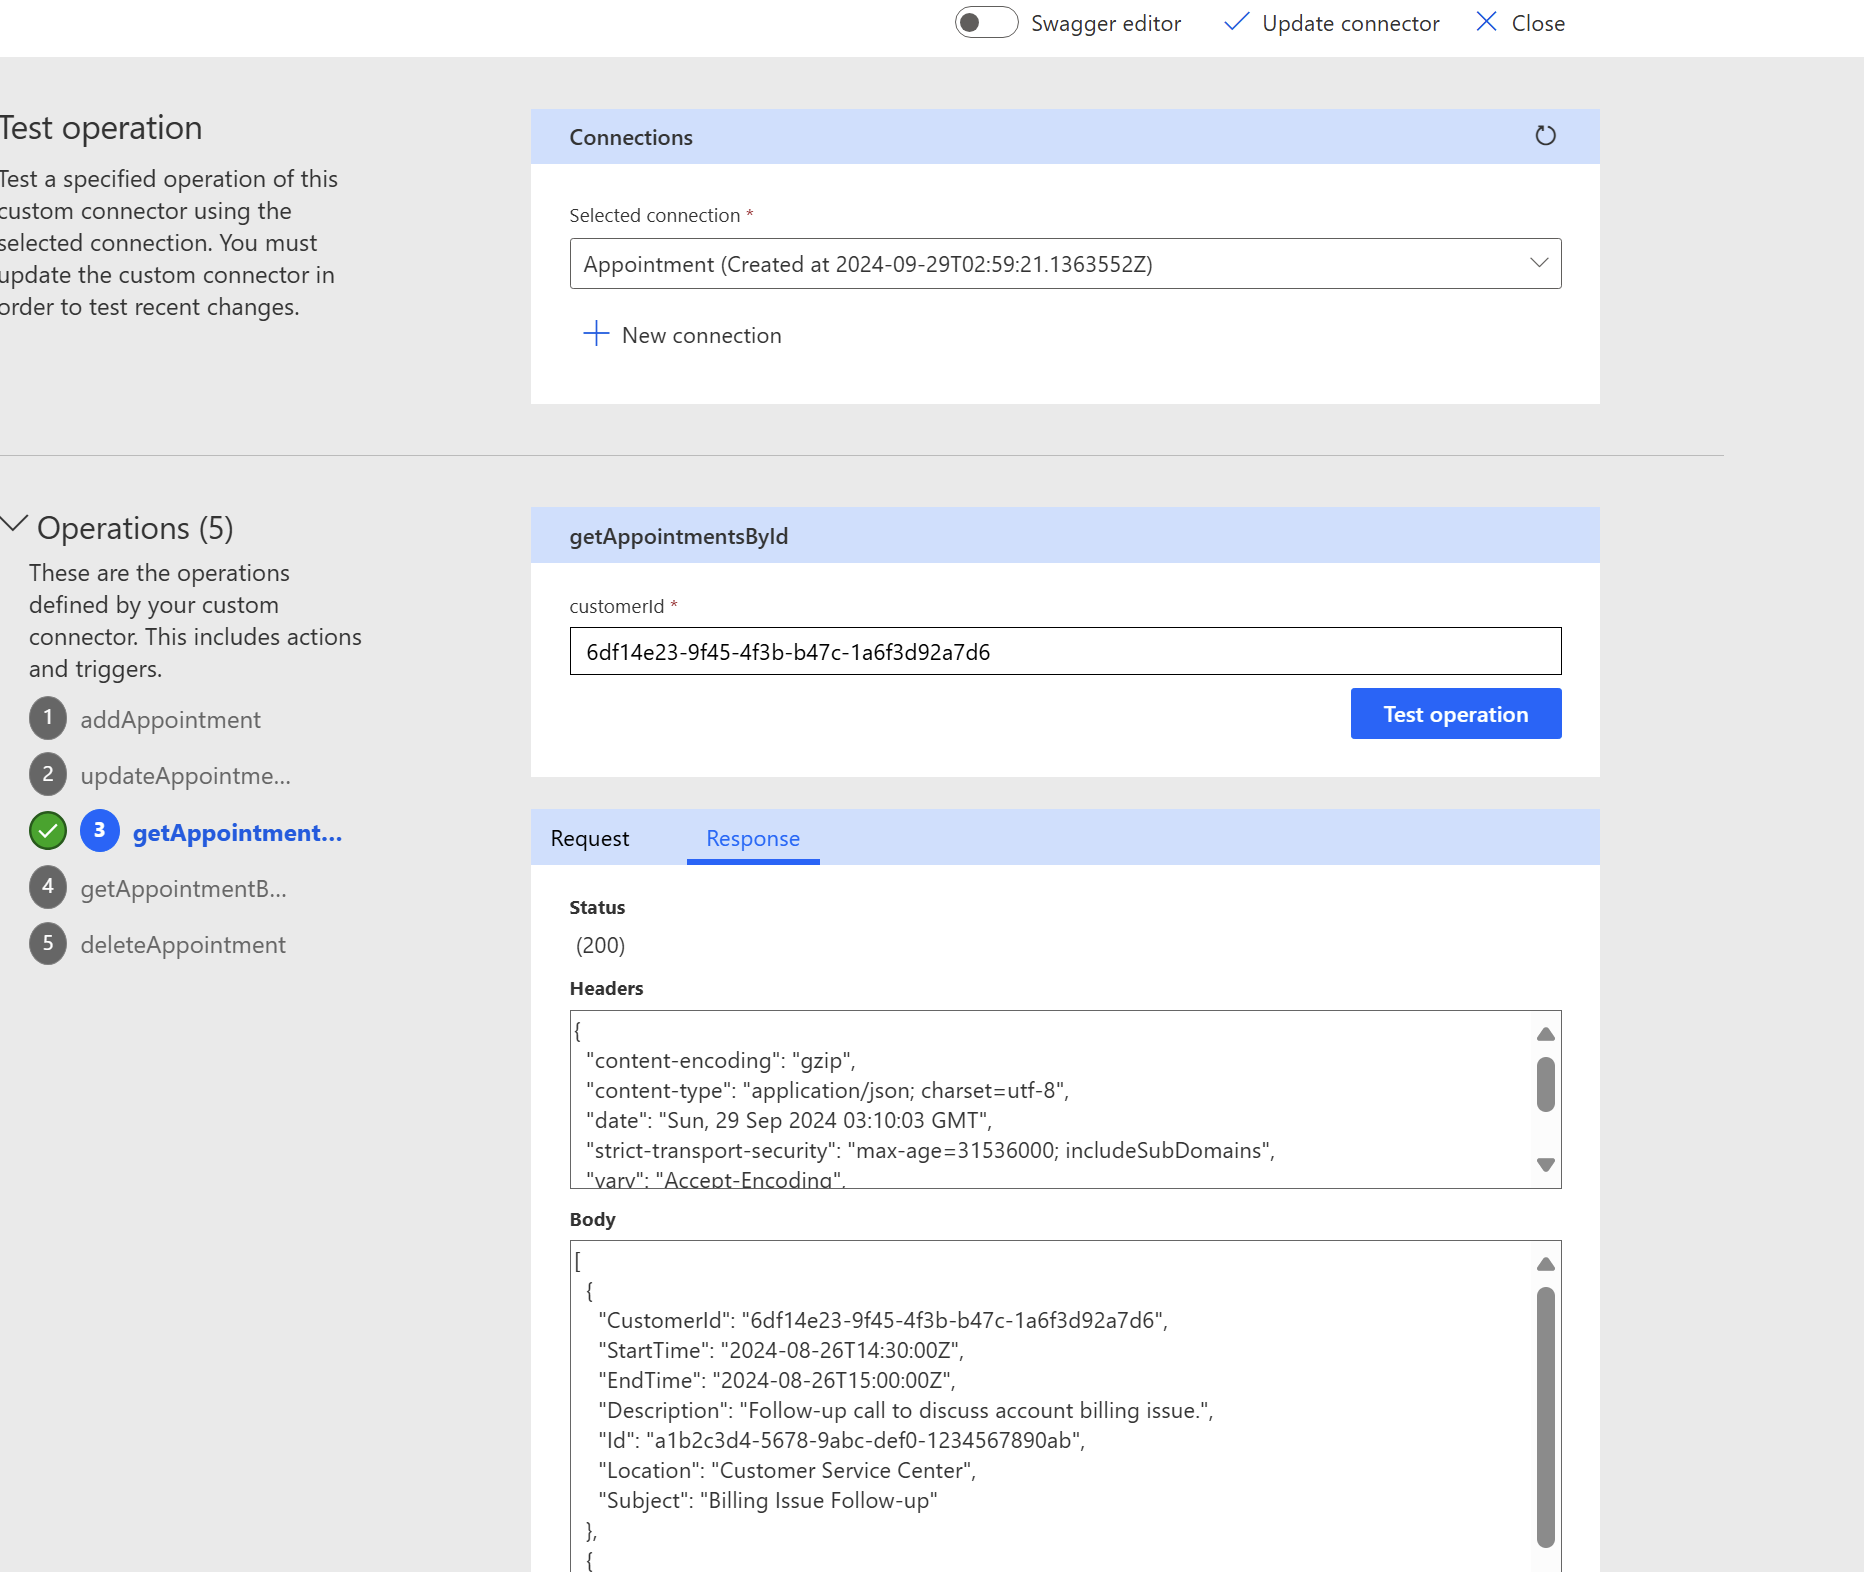
After the Redirect URL is updated, go to the Test section and create a new connection using the service principal. We can then use the connection to test the endpoint like below.
At this point our connector is ready for use in PowerAutomate.
Testing Custom Connector
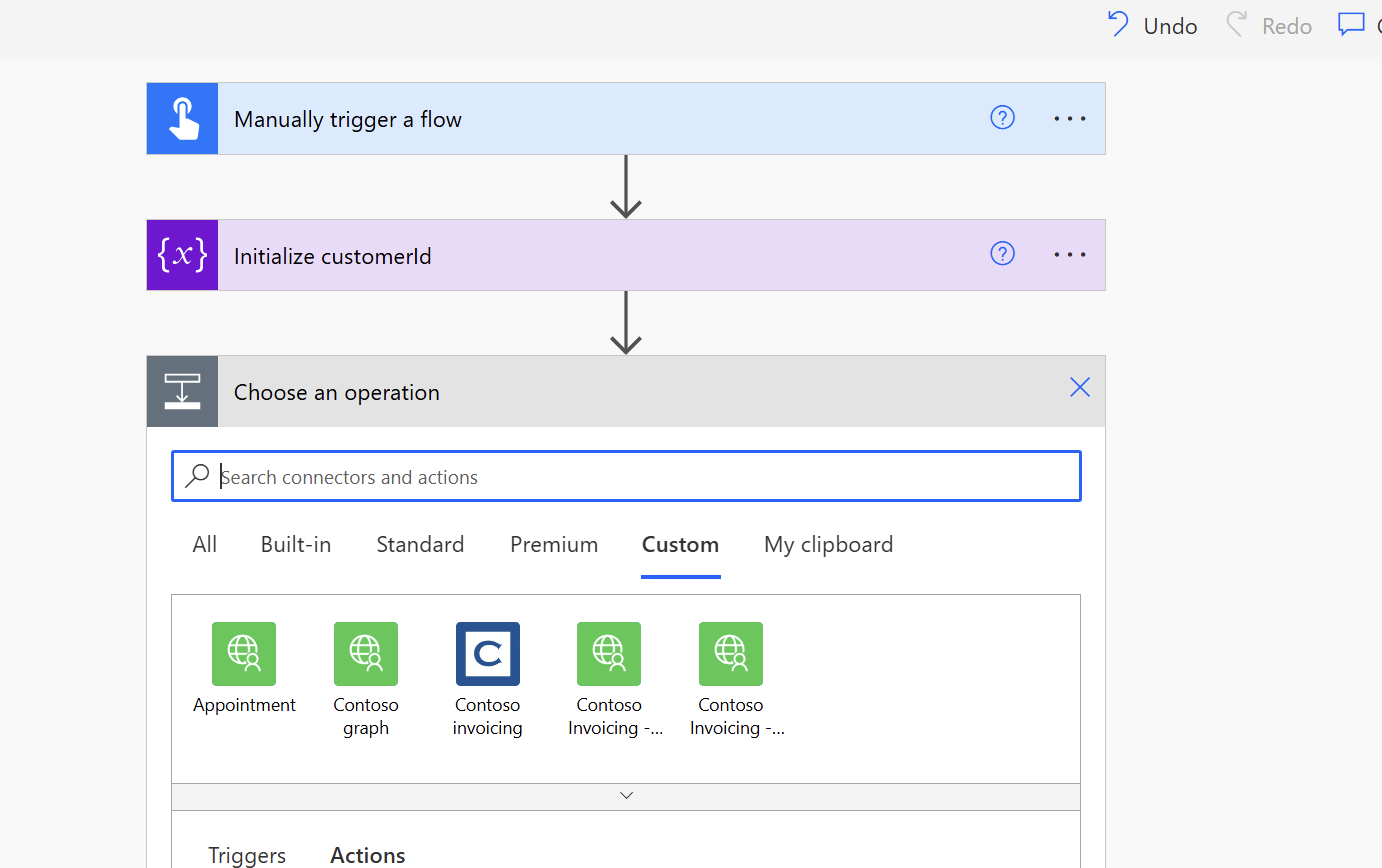
Create a new flow and add an action. We should now see our custom connector under the Custom section.
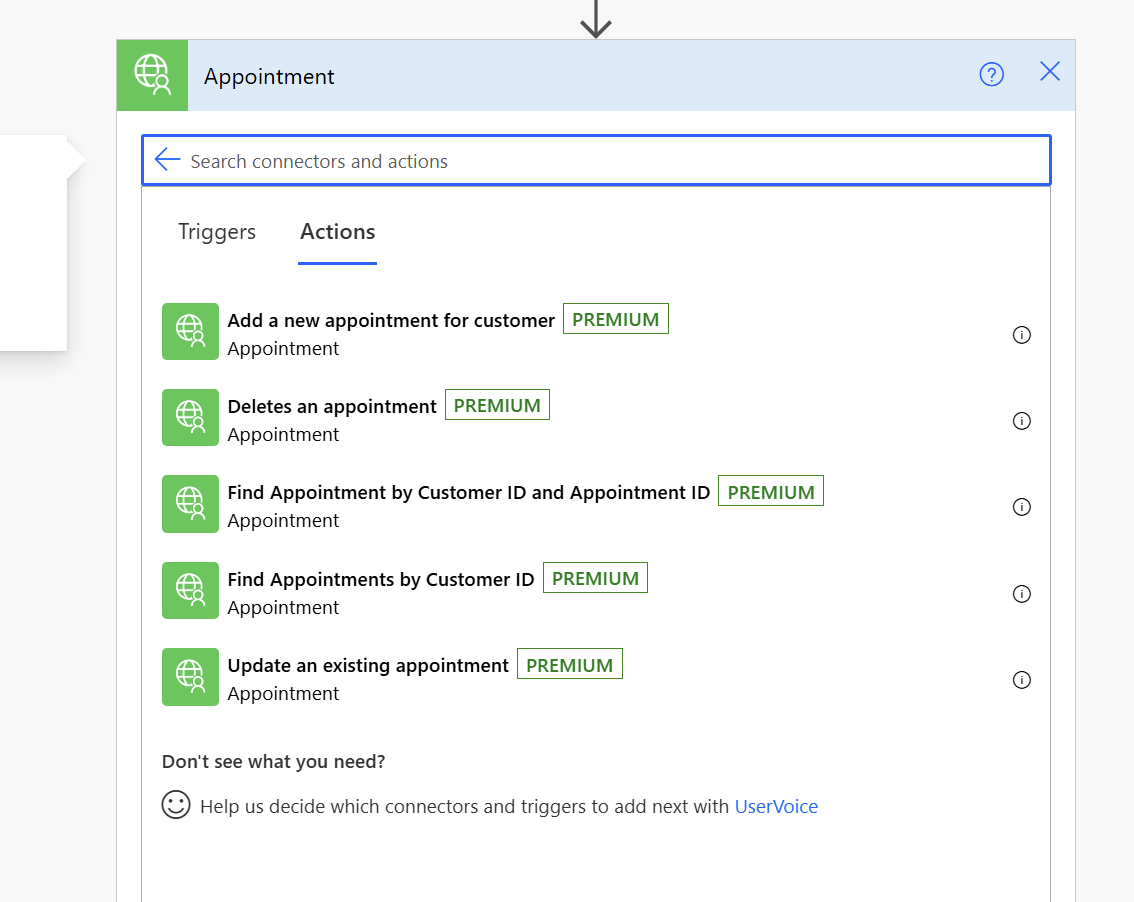
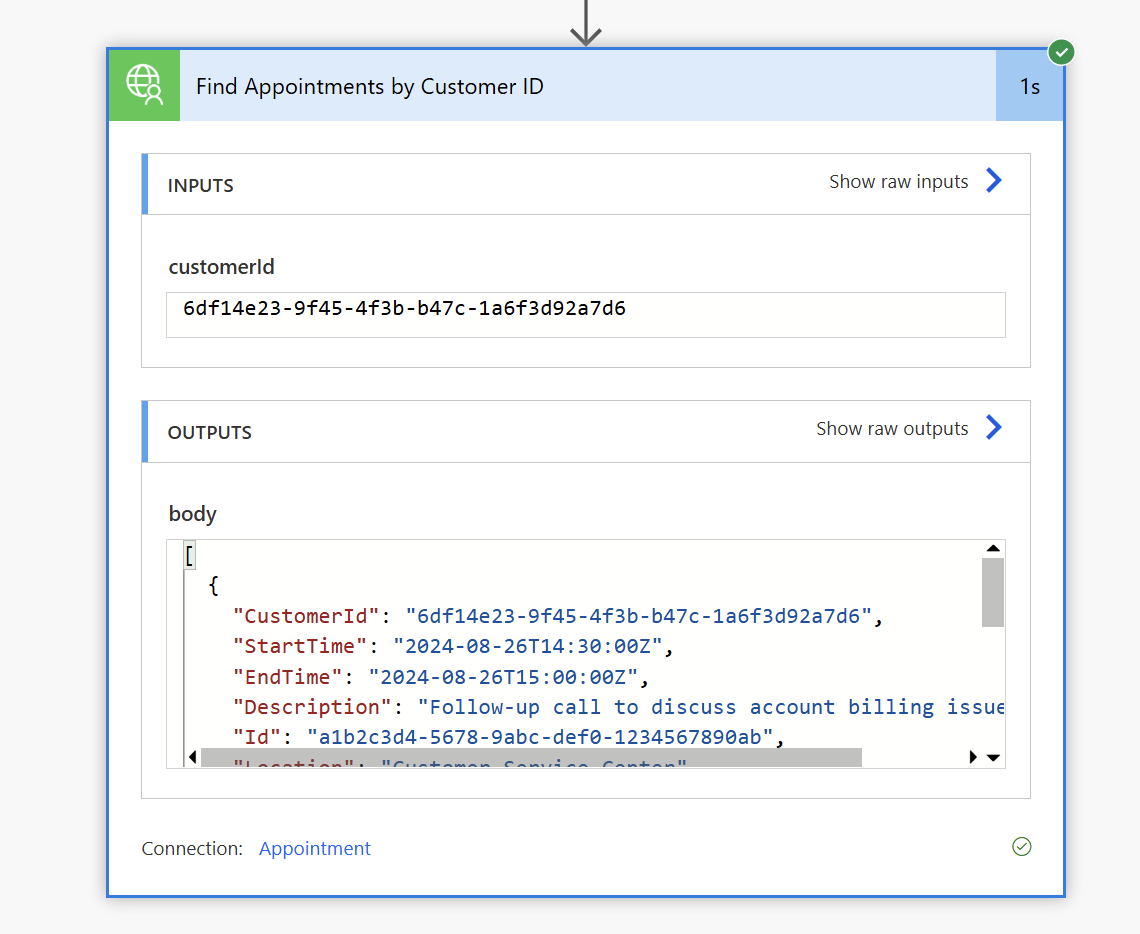
Select the connector and we should now see our actions. For the sake of simplicity, I'm choosing the Find Appointments by CustomerId using an existing CustomerId for a customer record that I have already created an appointment before.
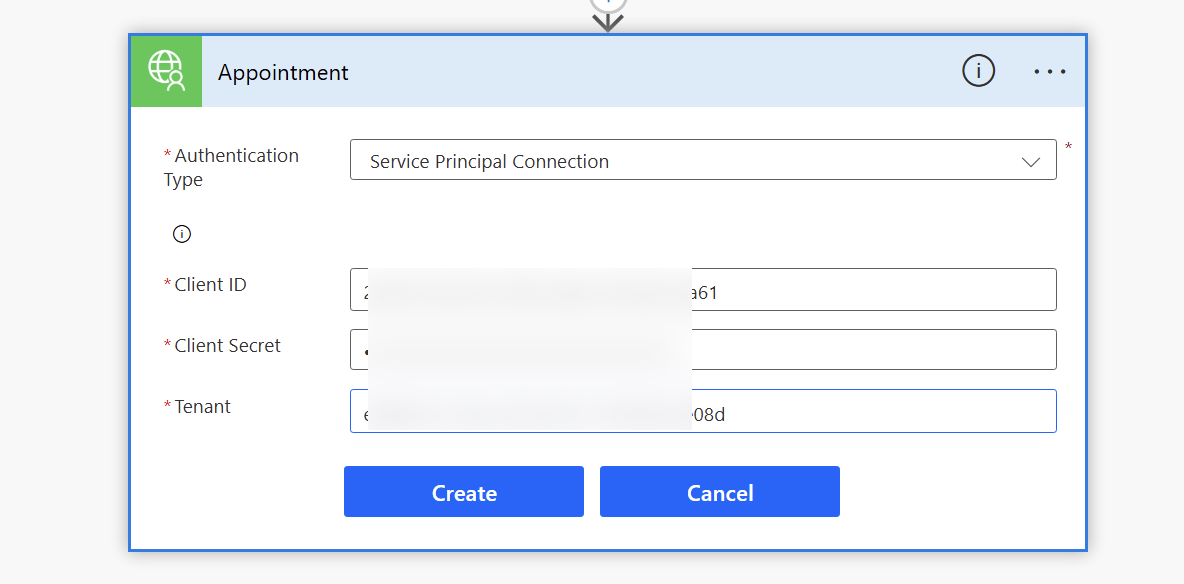
Specify the details for the connection and we should be able to create our connection using the Service Principal. If you have previously created a connection using the Test section of the connector, you could reuse the same connection.
Test the flow and we should now see the action returning the data as expected.
Final Thoughts
While the Service Principal support is pretty straight forward it seems to be mostly targeted towards certain APIs like Microsoft Graph but when using something like Azure function with Microsoft Entra ID the service principal connection doesn't work as seamlessly. This could be simply resolved by providing additional examples in the documentation on how to properly pass the right parameters when building the Custom Connector. Hopefully this helps with your custom connector if using the Service principal approach.