Use Postman with Dynamics 365 for WebAPI
Recently when working on Dynamics 365 I had to quickly test a couple of actions and make sure they are working as expected. Traditionally I would have done this either using a console application or within the web client.
With Dynamics 365 and introduction of Web API there are now better ways to quickly test CRUD operations. There are tools which we could leverage to accomplish this task Ex:- Postman, Soap UI etc. My favorite tool to quickly perform testing is using the Postman desktop client. In this post I will be showing the steps to the following tasks.
- Setting up an Environment
- Configure Authorization on the Collection
- Generating Access Token using Authorization Code flow
- Generating Access Token using Authorization Code flow (Microsoft Application ID)
- Generating Access Token using Client Credentials
- Quickly make calls to Web API endpoint
Setting up an Environment
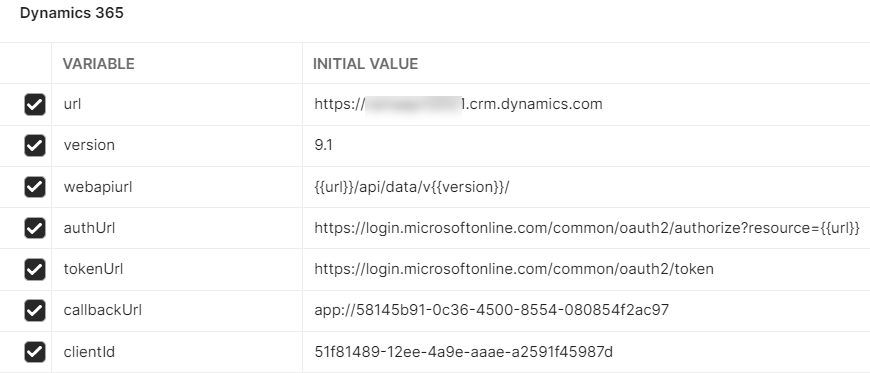
Your environment should have the following variables
- url:- https://{orgname}.crm.dynamics.com
- version:- Version of the Web API you want to target.
- authUrl:- The url to the Azure Authorization endpoint if using the authorization code flow for generating the token
You could get the auth url by clicking the Endpoints

tokenUrl:- The url to the Azure token endpoint by clicking the Endpoints in the previous image, as shown below.

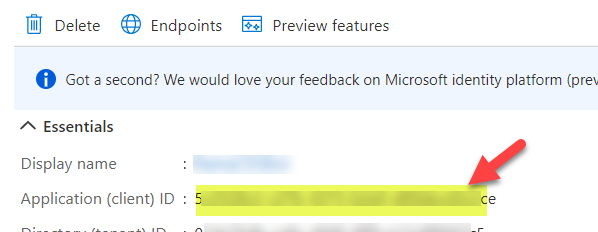
clientId:- This is the Application (client) ID in the Overview of the App Registration
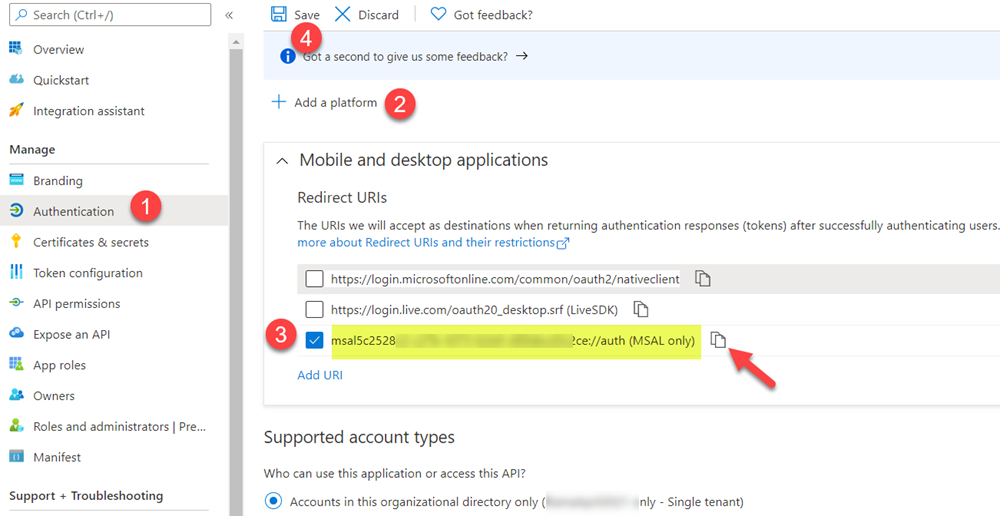
callbackUrl:- Since we are using the desktop client we can just use the recommended URI provided by Azure in our app registration as shown below.
tenantId: The Id of the Azure tenant in which your Dynamics365 org and the app registration exist.

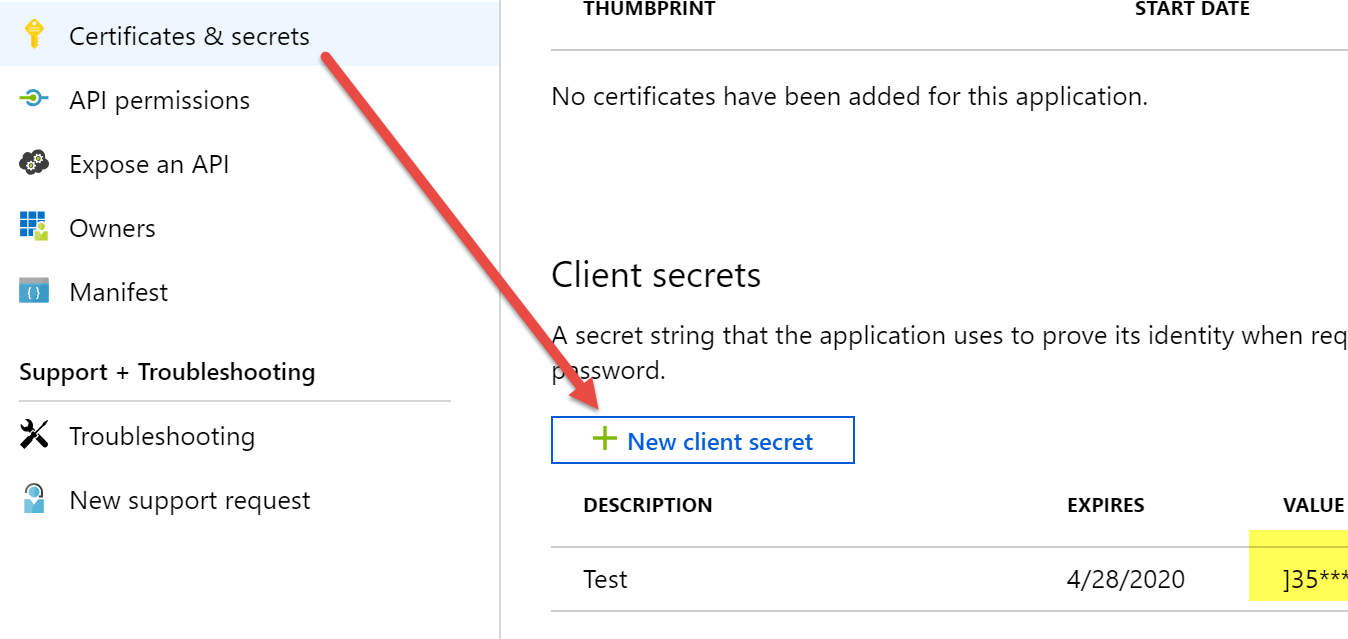
clientSecret :- Generate a secret for your application as shown below. This is required for the Client Credentials flow only.
scope: The scope would be in the following format
http://{orgname}.crm.dynamics.com/.default
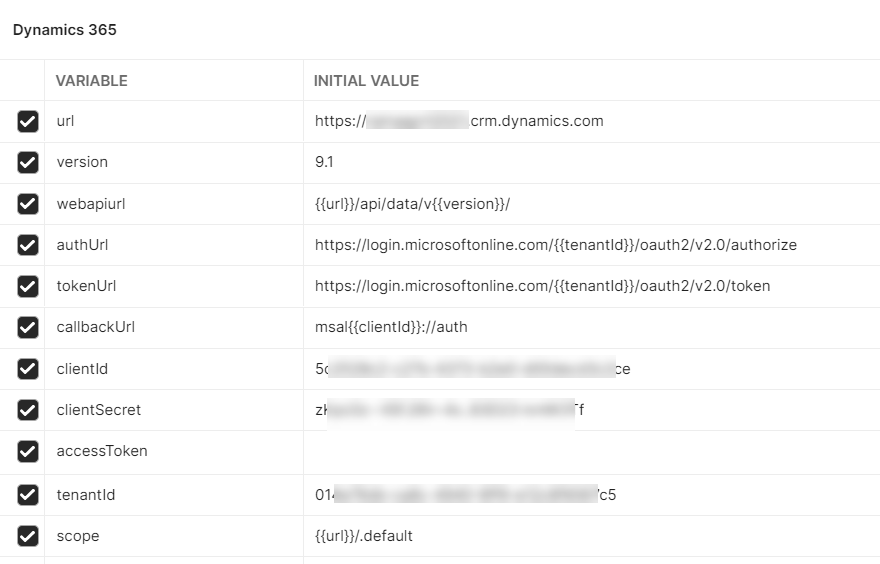
Your environment should now look something like below. I made some additional tweaks, so we need to only change few variables when targeting a newer environment later, when creating a duplicate environment in Postman.
Configure Authorization on the Collection
Now that we have our environment configured we could now generate our access token. Before we do this let's create a collection for all our Dynamics 365 Requests.
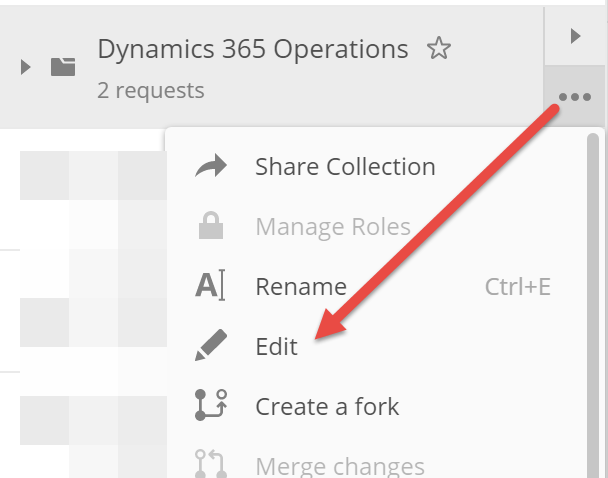
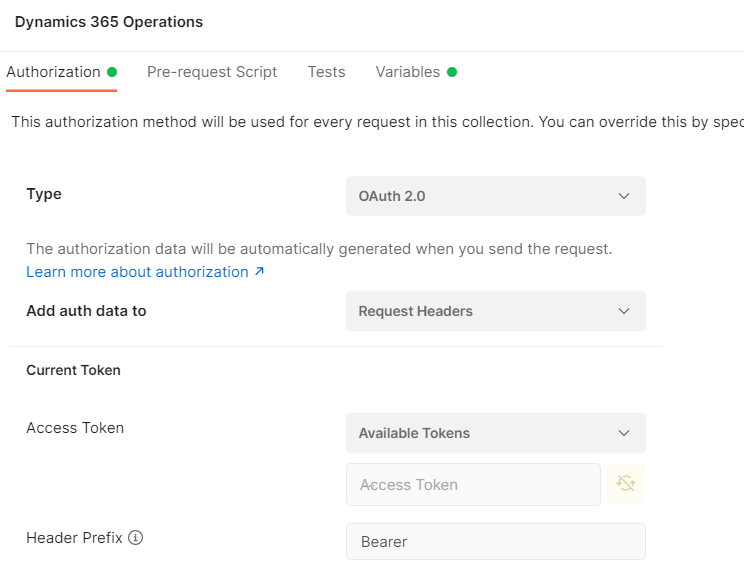
I have created a new collection as above and clicked on Edit collection to set the OAuth token generation at the collection level. This would help us not set the access token on every request and can manage it from one place.
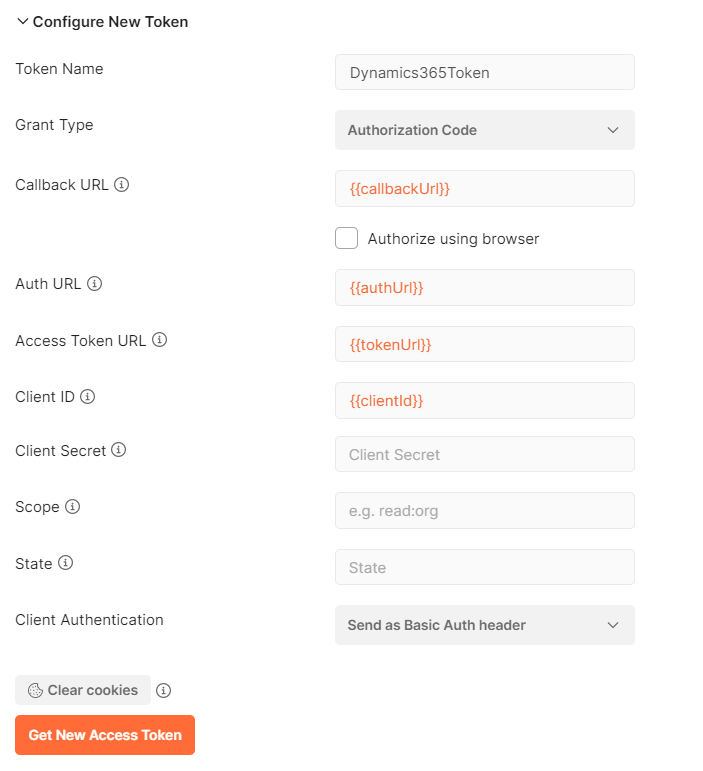
Generating Access Token Using Authorization Code
When using the Authorization Code flow, we would require Admin Consent for this to work if we are using our own App Registration in our Azure tenant.
This might not be ideal for some environments and you might better off using one of the other two flows described later in this post.
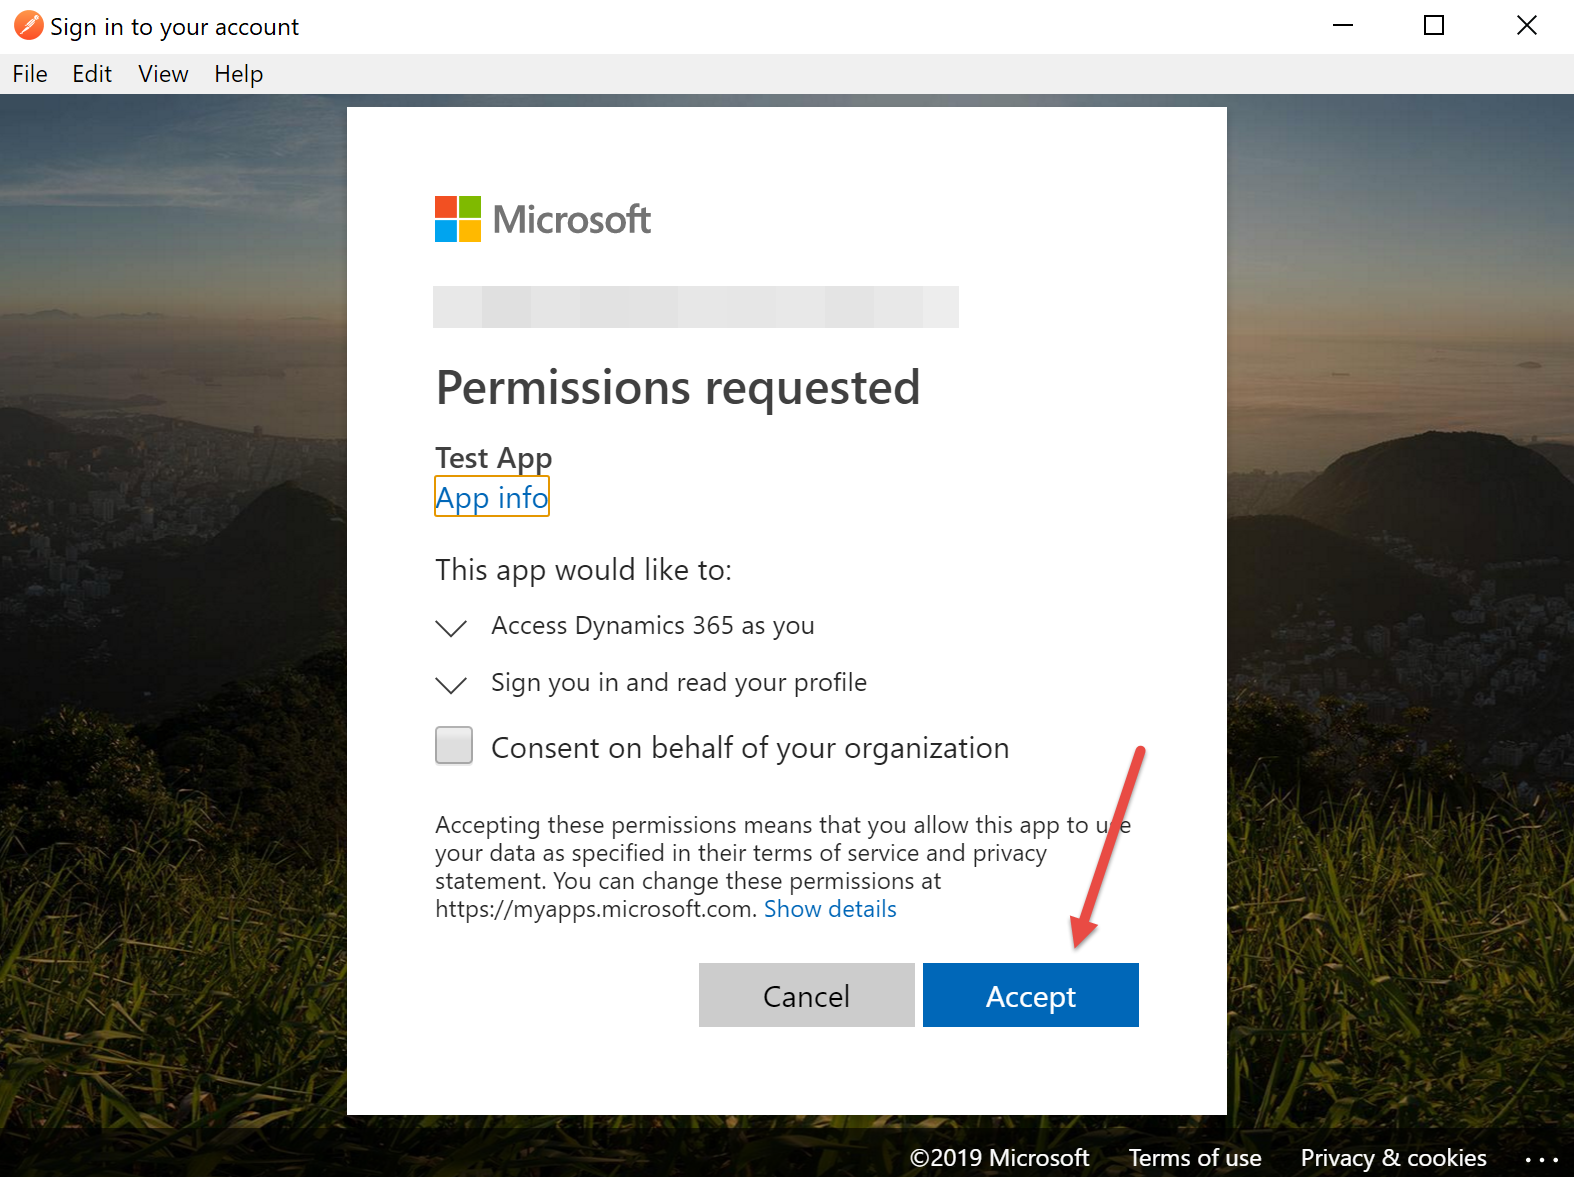
This will open the login window for your organization and you can login with your credentials. After the login you will see the below message, click accept and your token will be generated. This will work with MFA as well.
This will generate the token and open it in a new window like below. Click 'Use Token'
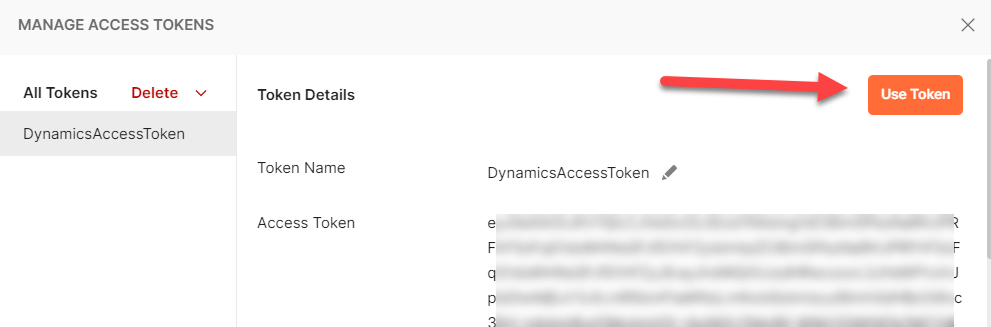
We should now see the token being added. Save the collection, so the access token will be applied to the requests.
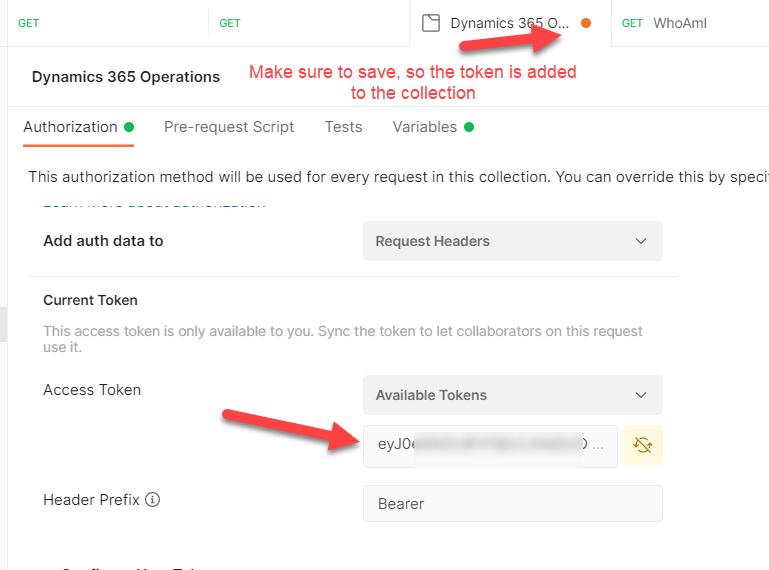
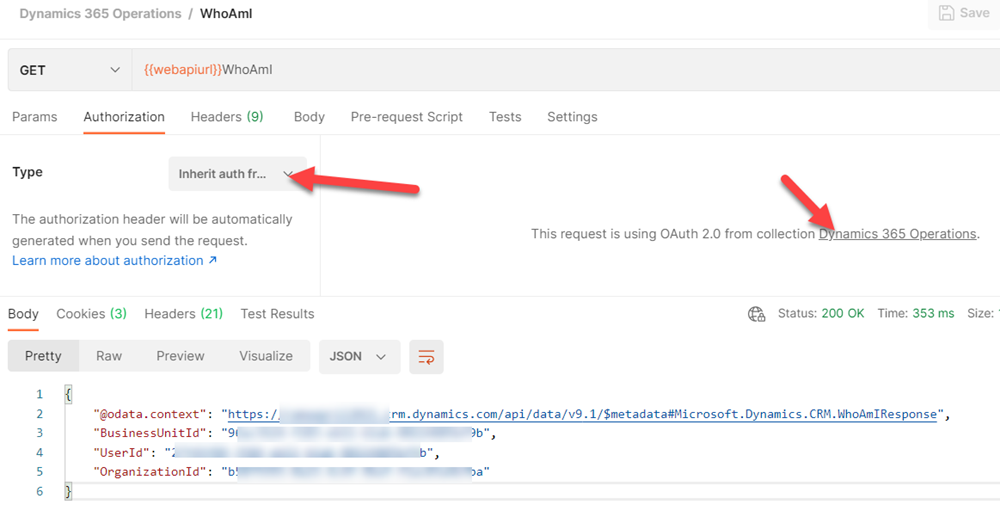
Now any requests we make under this collection will automatically use this token for authentication.
Since the token expires after an hour, you might have to request new token if it expires on the collection and continue testing your requests.
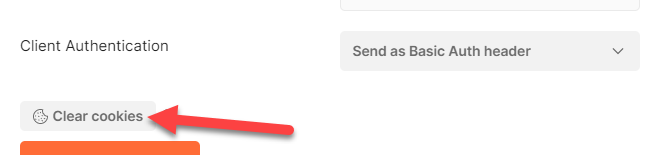
If you want to reset the authorization process, you can clear cookies to start the token generation process again. This might be useful when there is a password change.
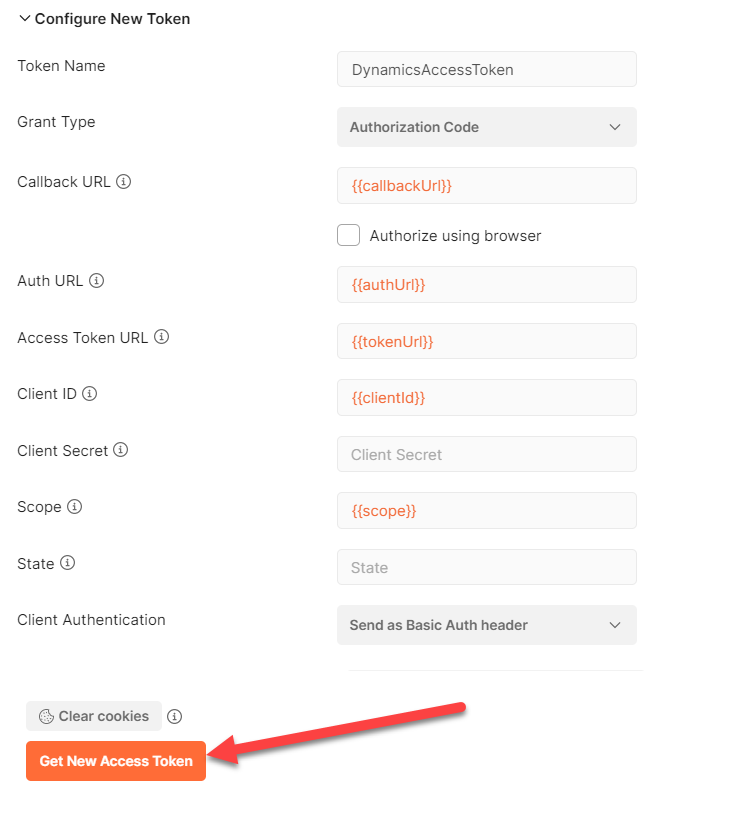
Otherwise, just click the 'Get New Access Token' and it will generate a new token without having to login again.
Generating Access Token using Authorization Code Flow(Microsoft Application ID)
This is the flow Plugin Registration tool uses with the Microsoft Application ID. The official documentation doesn't provide the callback URL at the time of this writing and this is something I had to find using the Fiddler trace on the Plugin Registration tool. It also uses Implicit flow instead of the Authorization code flow.
The advantage of this flow is that it doesn't require the admin consent and we can still use our credentials to generate a token to access Dynamics 365 securely.
Client Id: 51f81489-12ee-4a9e-aaae-a2591f45987d
Callback URL: app://58145b91-0c36-4500-8554-080854f2ac97
Our environment setup will look like this
Note: The callbackUrl has to be all lowercase, otherwise Postman will not be able to redirect.
Now the collection needs to be set as below. There will be no scope parameter set as this uses the v1 endpoint.
Clicking the 'Get New Access Token' would prompt for credentials and the token will be generated, similar to the previous flow.
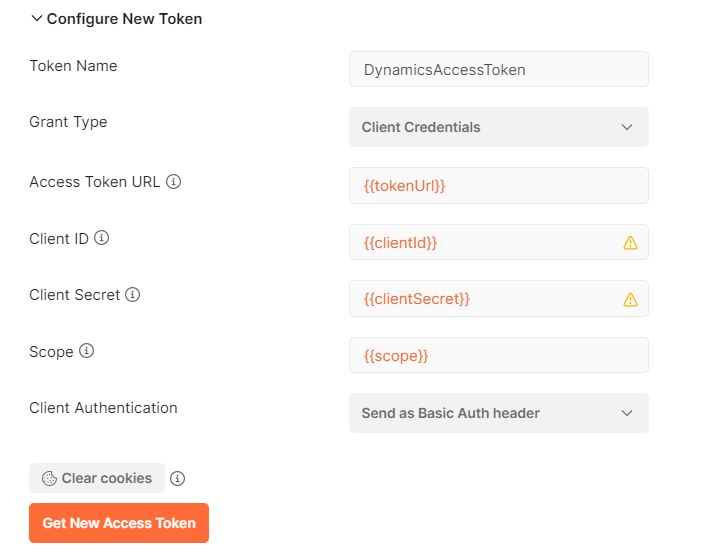
Generating Access Token using Client Credentials Flow
Client Credentials require the application user created in CRM and granted a security role.
The process of generating a token is quite simple when using Client Credentials. It's very similar to the authorization code, but in this case since we will not be using our login and it's the application user, we will not require admin consent as well.
Let's change our token configuration as below
Click 'Get New Access Token' and save the collection. We can now start using the token in our requests.
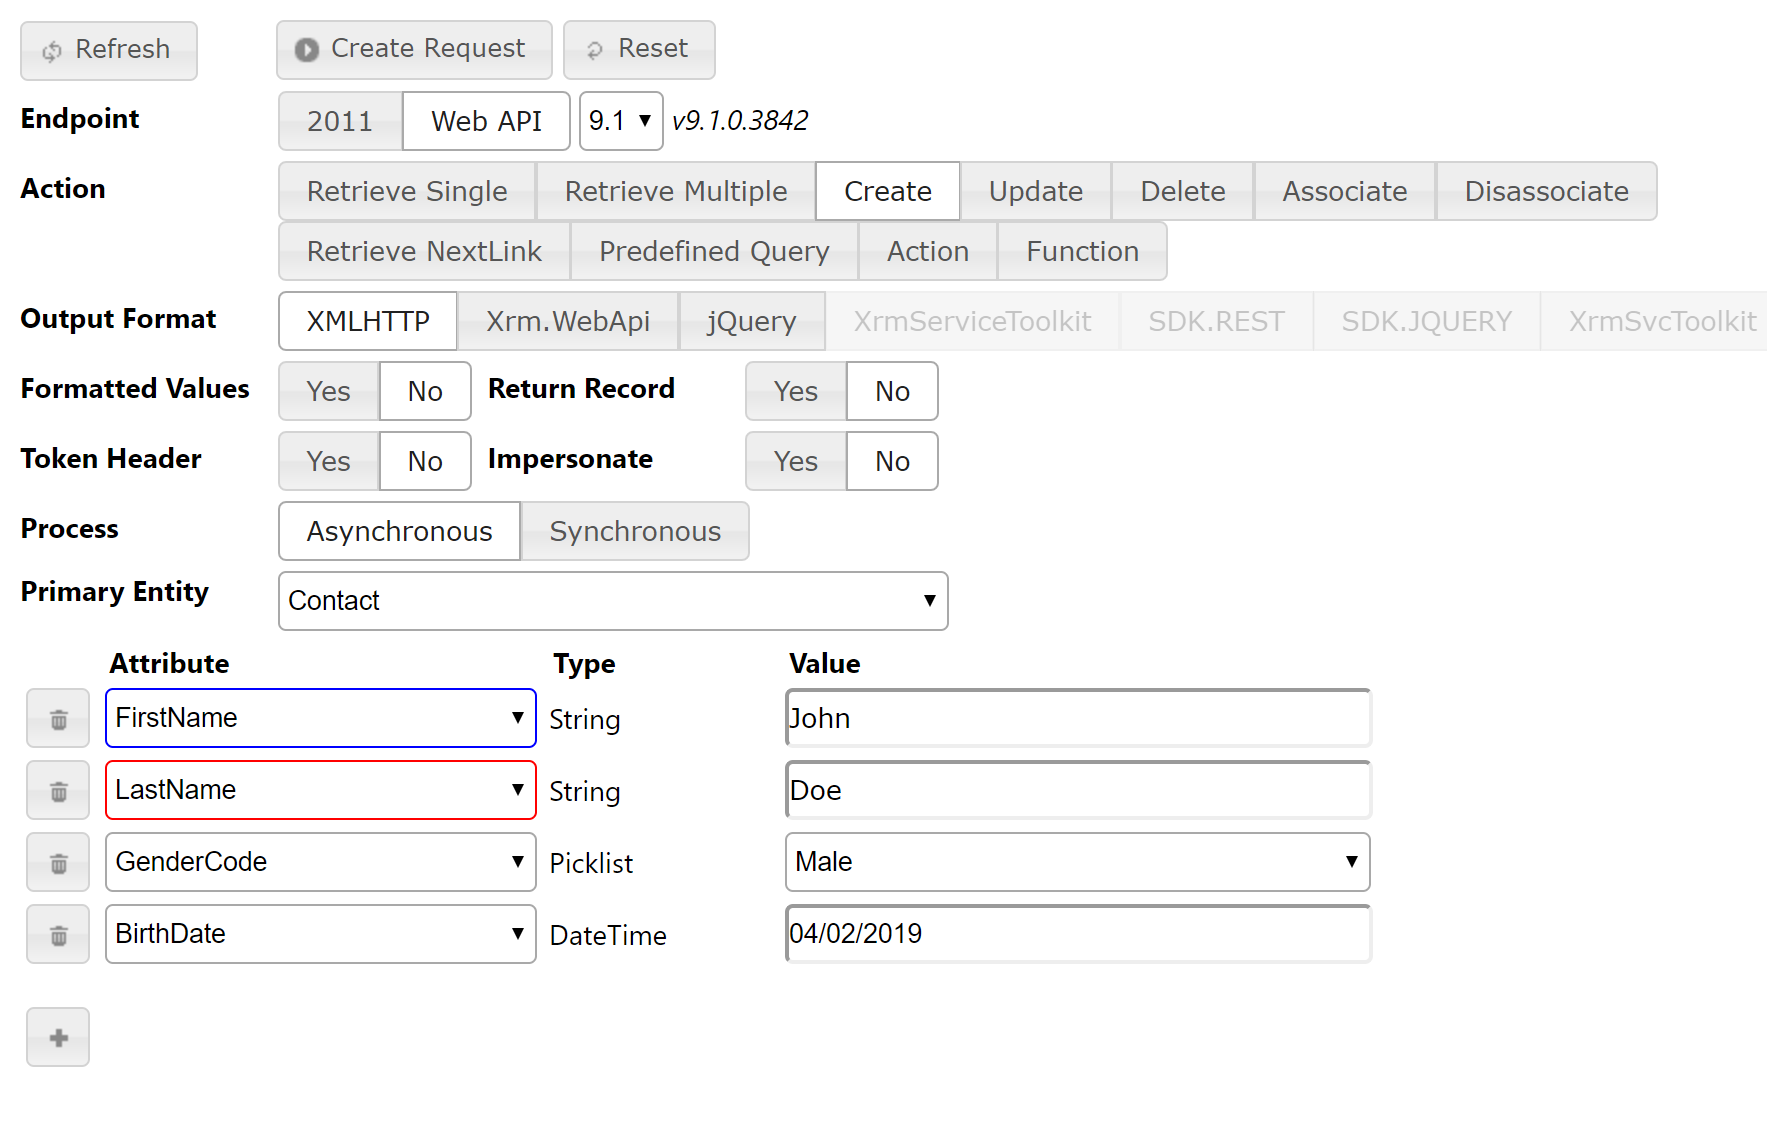
Quickly Make Calls to Web API endpoint
Now that we have generated our access token let's look at how we can quickly create some operations. For this purpose I'm using the wonderful tool REST builder , if you cannot install this solution in your org than you might have to manually build the web API requests, which isn't bad but not the quickest.
Let's say we want to do a create request, we could set up as below and click Create Request
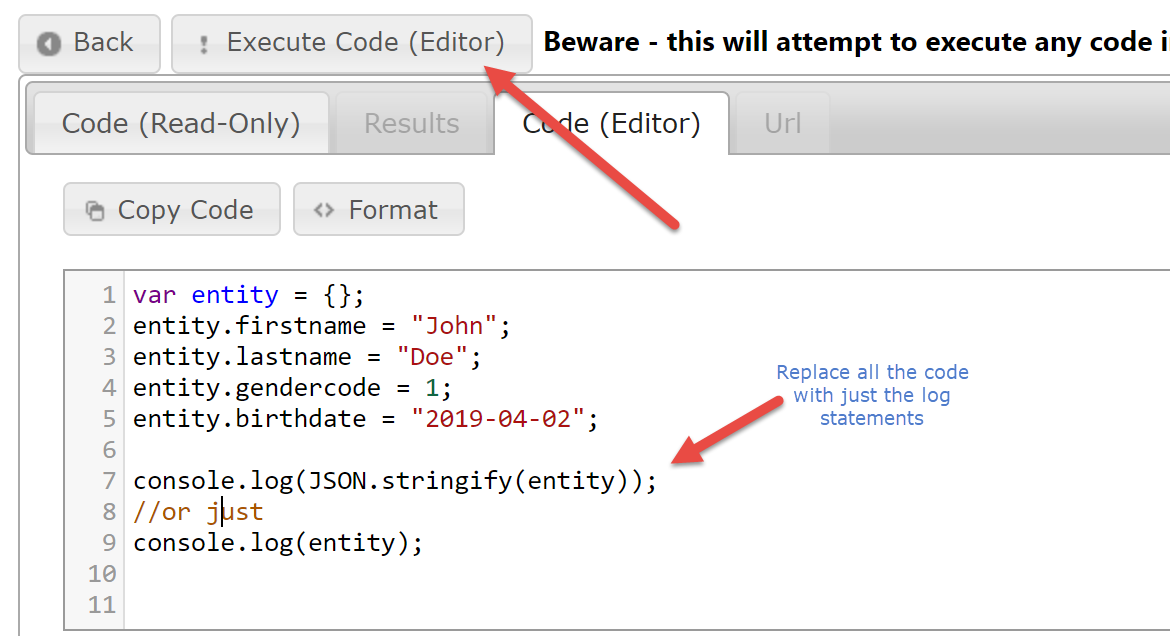
Now, go to the code editor and change it to below and execute code
The advantage of using REST builder like above is you do not have to worry about making sure you have the right logical names, typos etc.
We can now quickly grab the JSON body needed for Postman.

You could argue why even bother using Postman at this point and just use the REST builder. You could if you just want to run the test only once, but often times that's not the case and people who want to perform tests would like to store their requests and be able to easily run them at a later point. Examples include testing custom actions, plugin changes, workflows etc.
The response is below

Using the above approach, you can now quickly generate test scripts in Postman without having to rely on console applications or using the web client. Since we are using access token this approach is secure as we are not storing the user credentials anywhere.
Postman also has a lot of capability in terms of creating pre-request scripts, tests, workflows, run collection etc. This link is worth a look for beginners.
Hope this helps with your testing!