Copilot Studio - Hand off to Live Agent in Customer Service Workspace

Copilot Studio provides an intuitive interface for managing customer interactions, while Customer Service Workspace Live Chat ensures real-time support for your users with a human agent. Together, they streamline the transfer process, ensuring that customers receive timely and personalized assistance from a live agent when needed. In this post, I will guide you through the process of transferring a chat session from a Copilot bot to an agent.
Overview
Here is an overview of the process:
- Prerequisites
- Configuring Copilot in CSW
- Connecting to the CSW Chat
- Pre-Conversation Survey Variable Mapping
- Triggering Agent Transfers
Prerequisites
To follow this blog, the following prerequisites are required:
- Configure Omnichannel for Customer Service Chat Channel as described here
- Configuring the Copilot to start the conversations instead of a live agent requires certain steps to be completed as described here.
- Install the Omnichannel Power Virtual Agent Extension for access to Pre-Conversation Survey variables.
- A custom Copilot that is published and ready to use in the same environment as the Omnichannel for Customer Service.
Configuring Copilot in CSW
I have created a new Copilot in my trial environment with no additional topics on it.
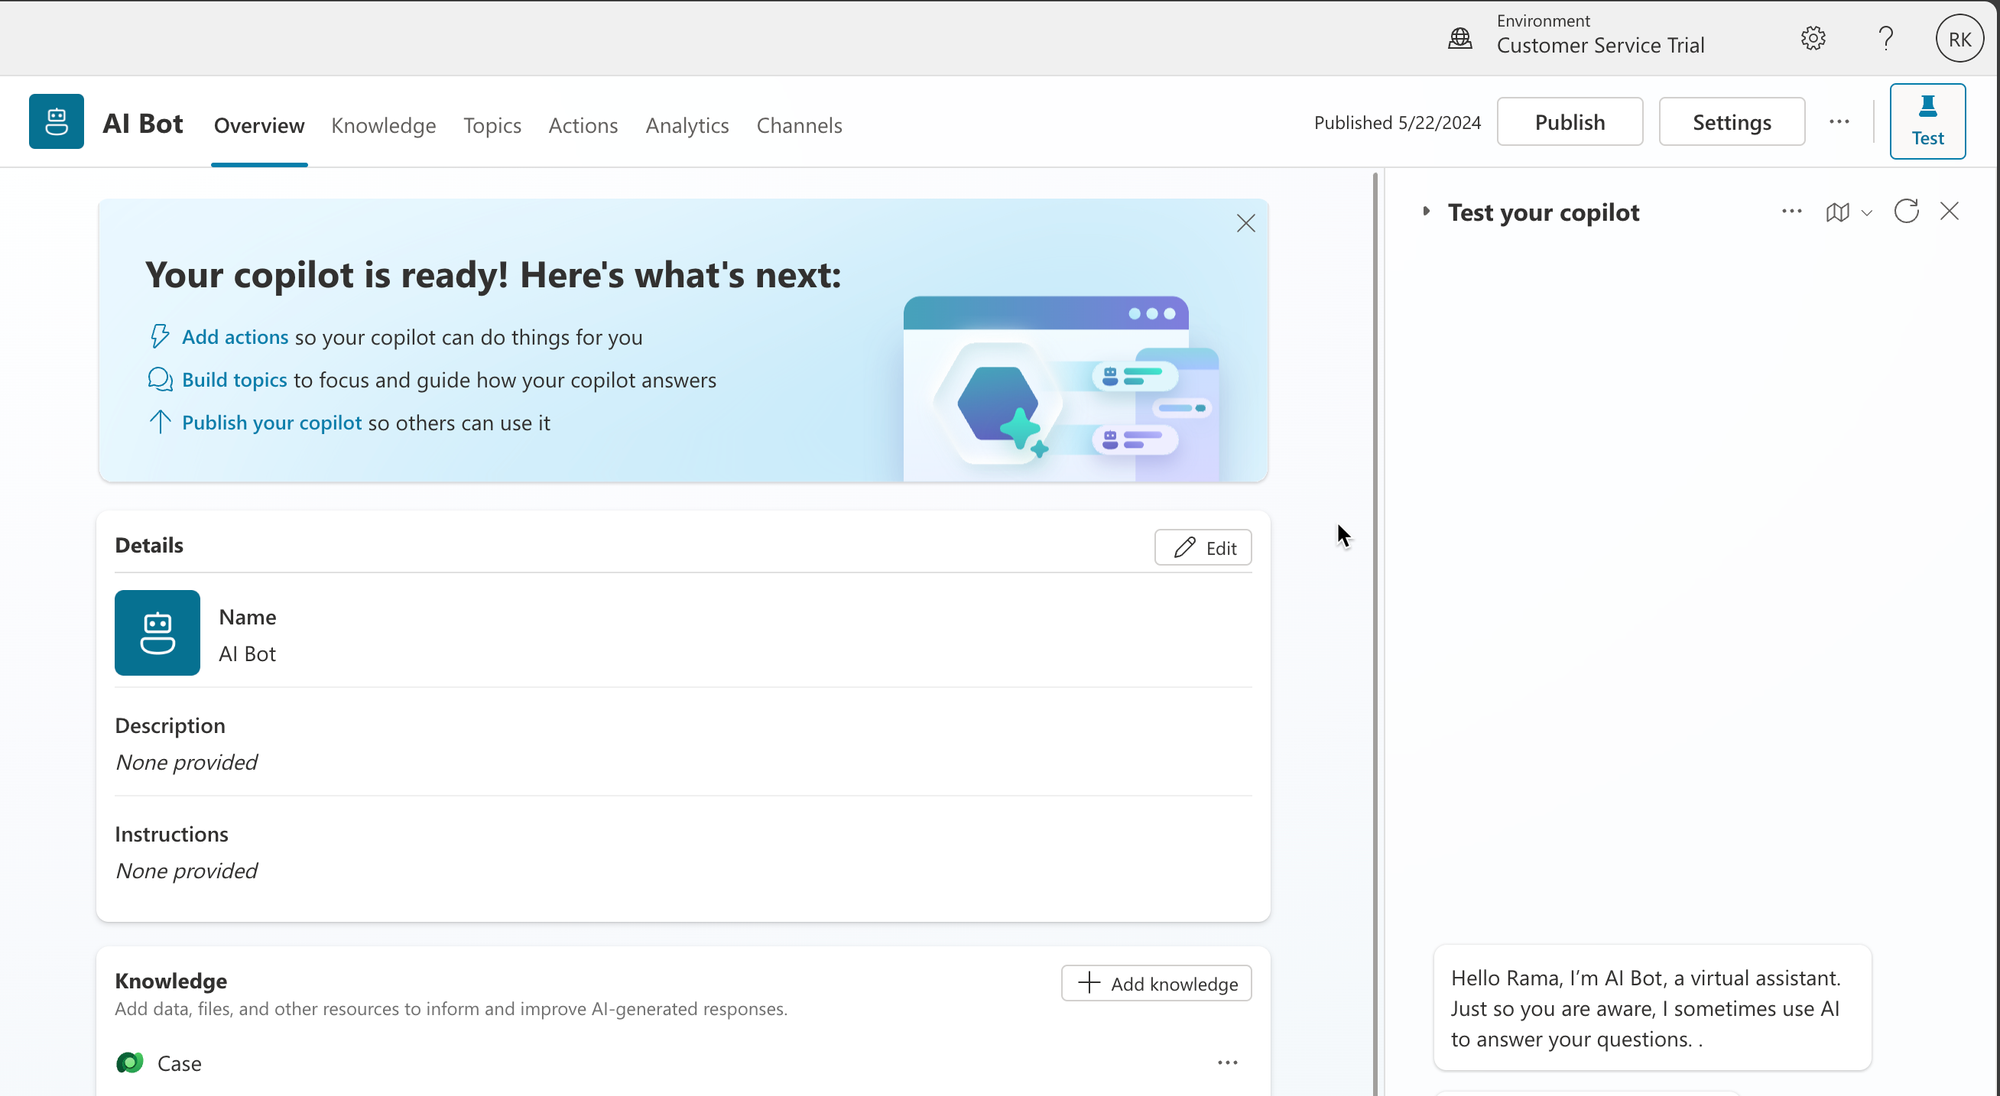
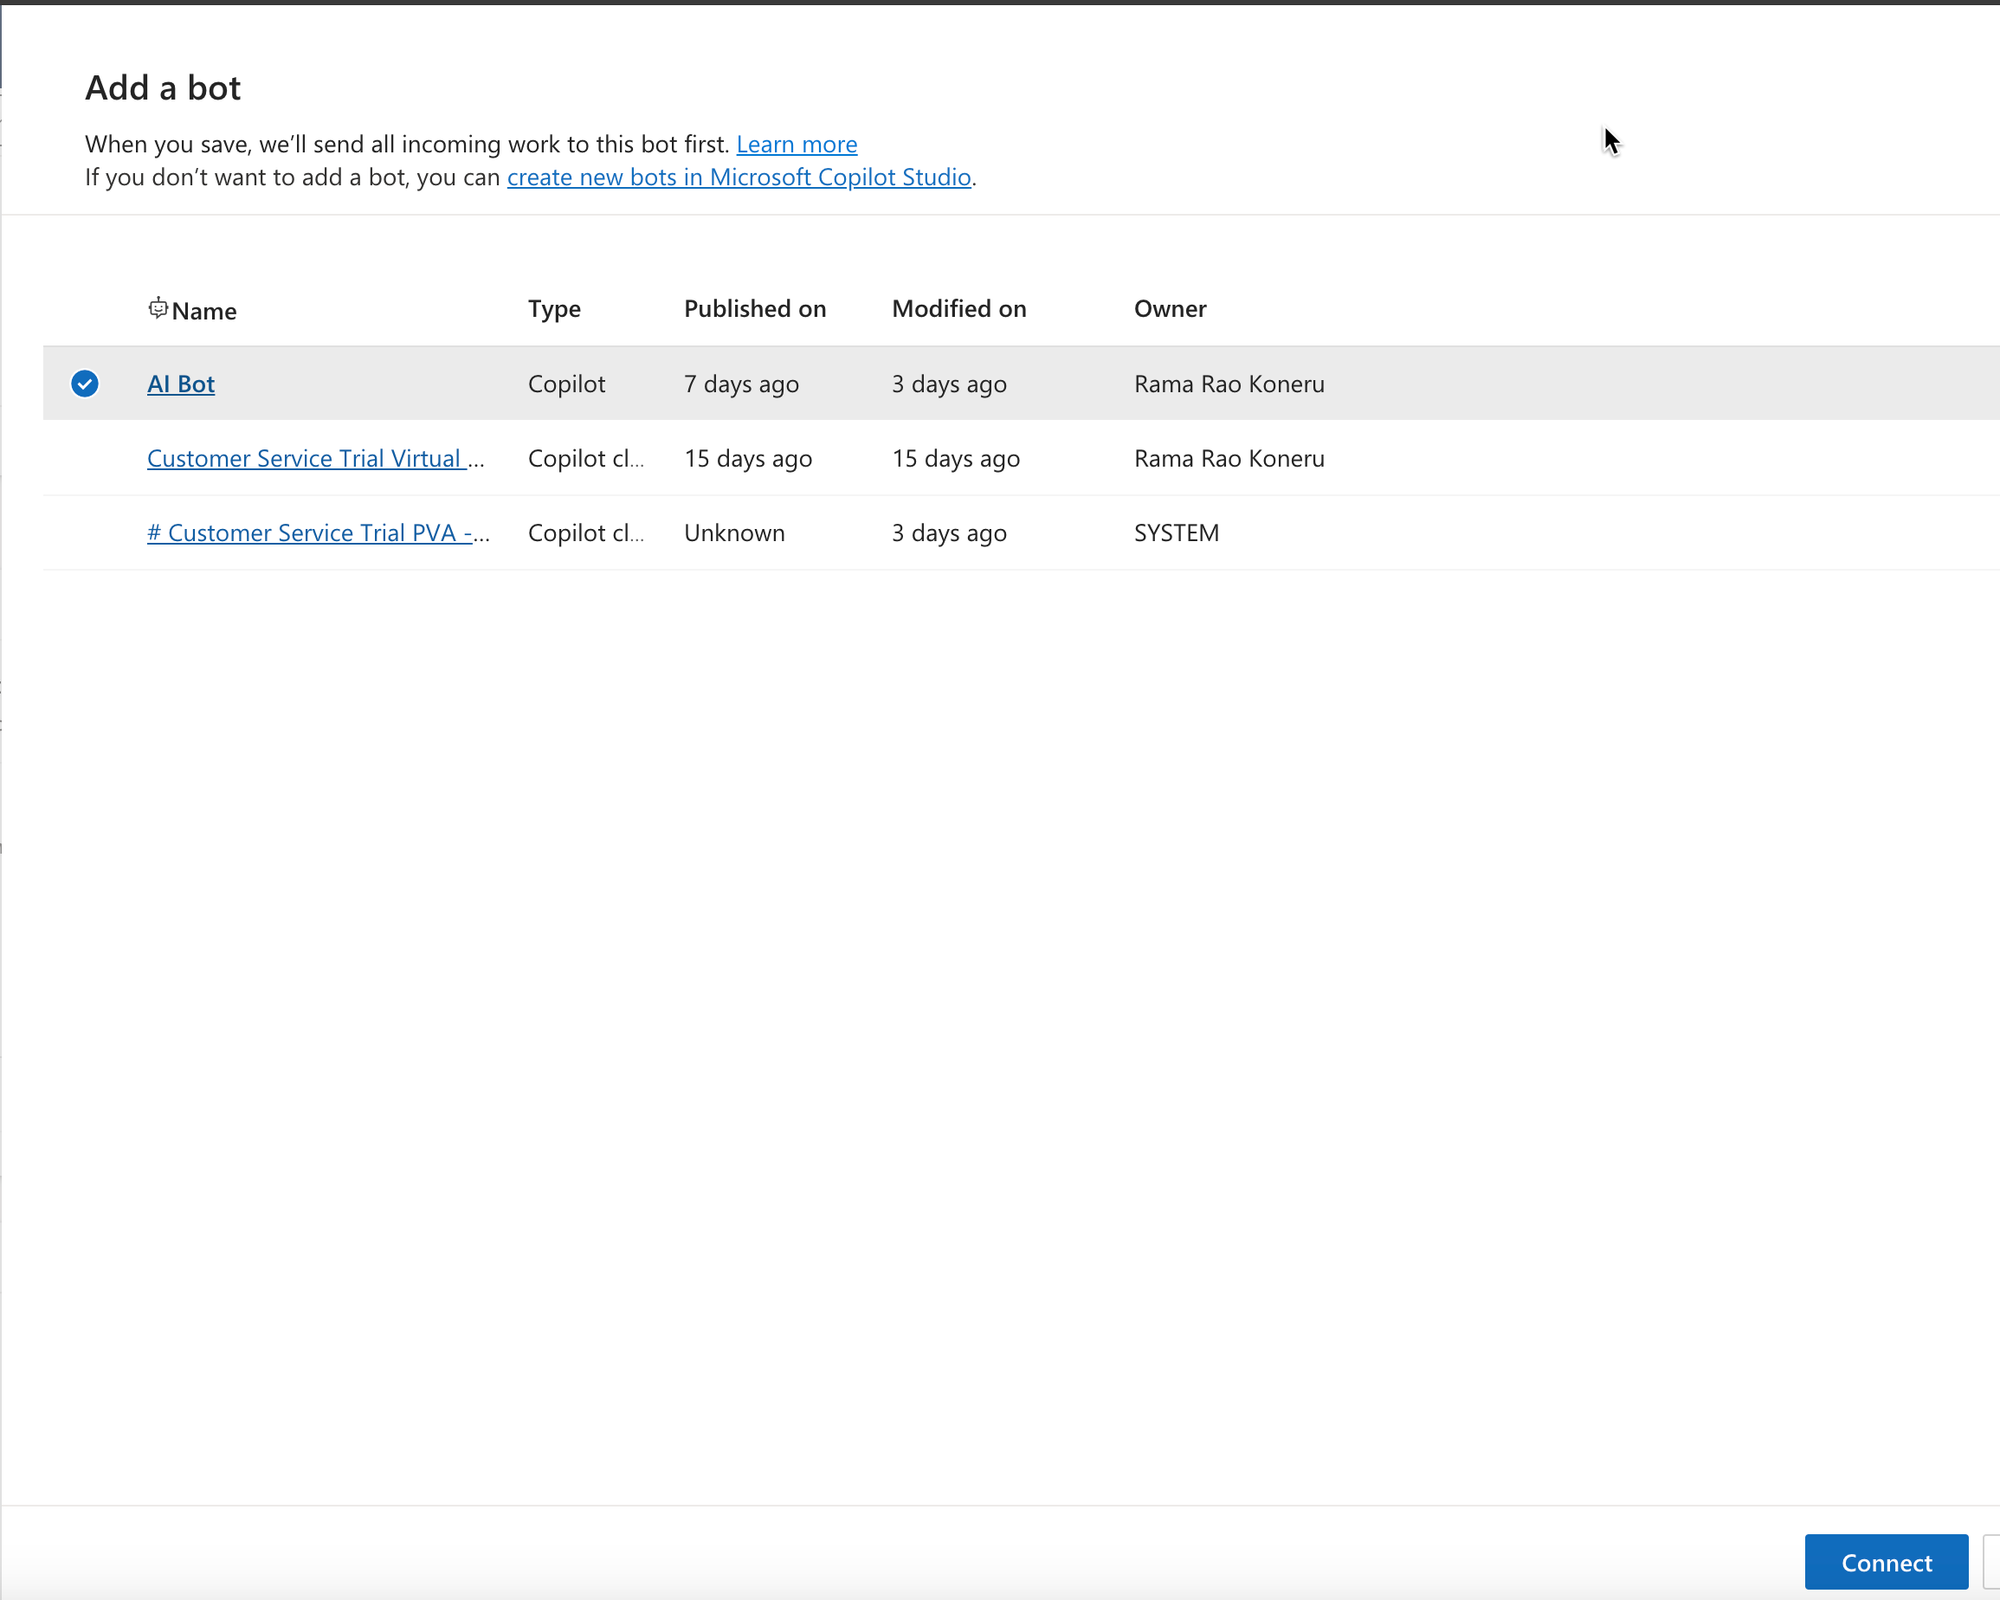
Once the Copilot is published, we should now be able to see this in the Customer Service Workspace and connect as a Bot under the Bots section. Since our bot is already created and published, let's select 'Connect existing bot'
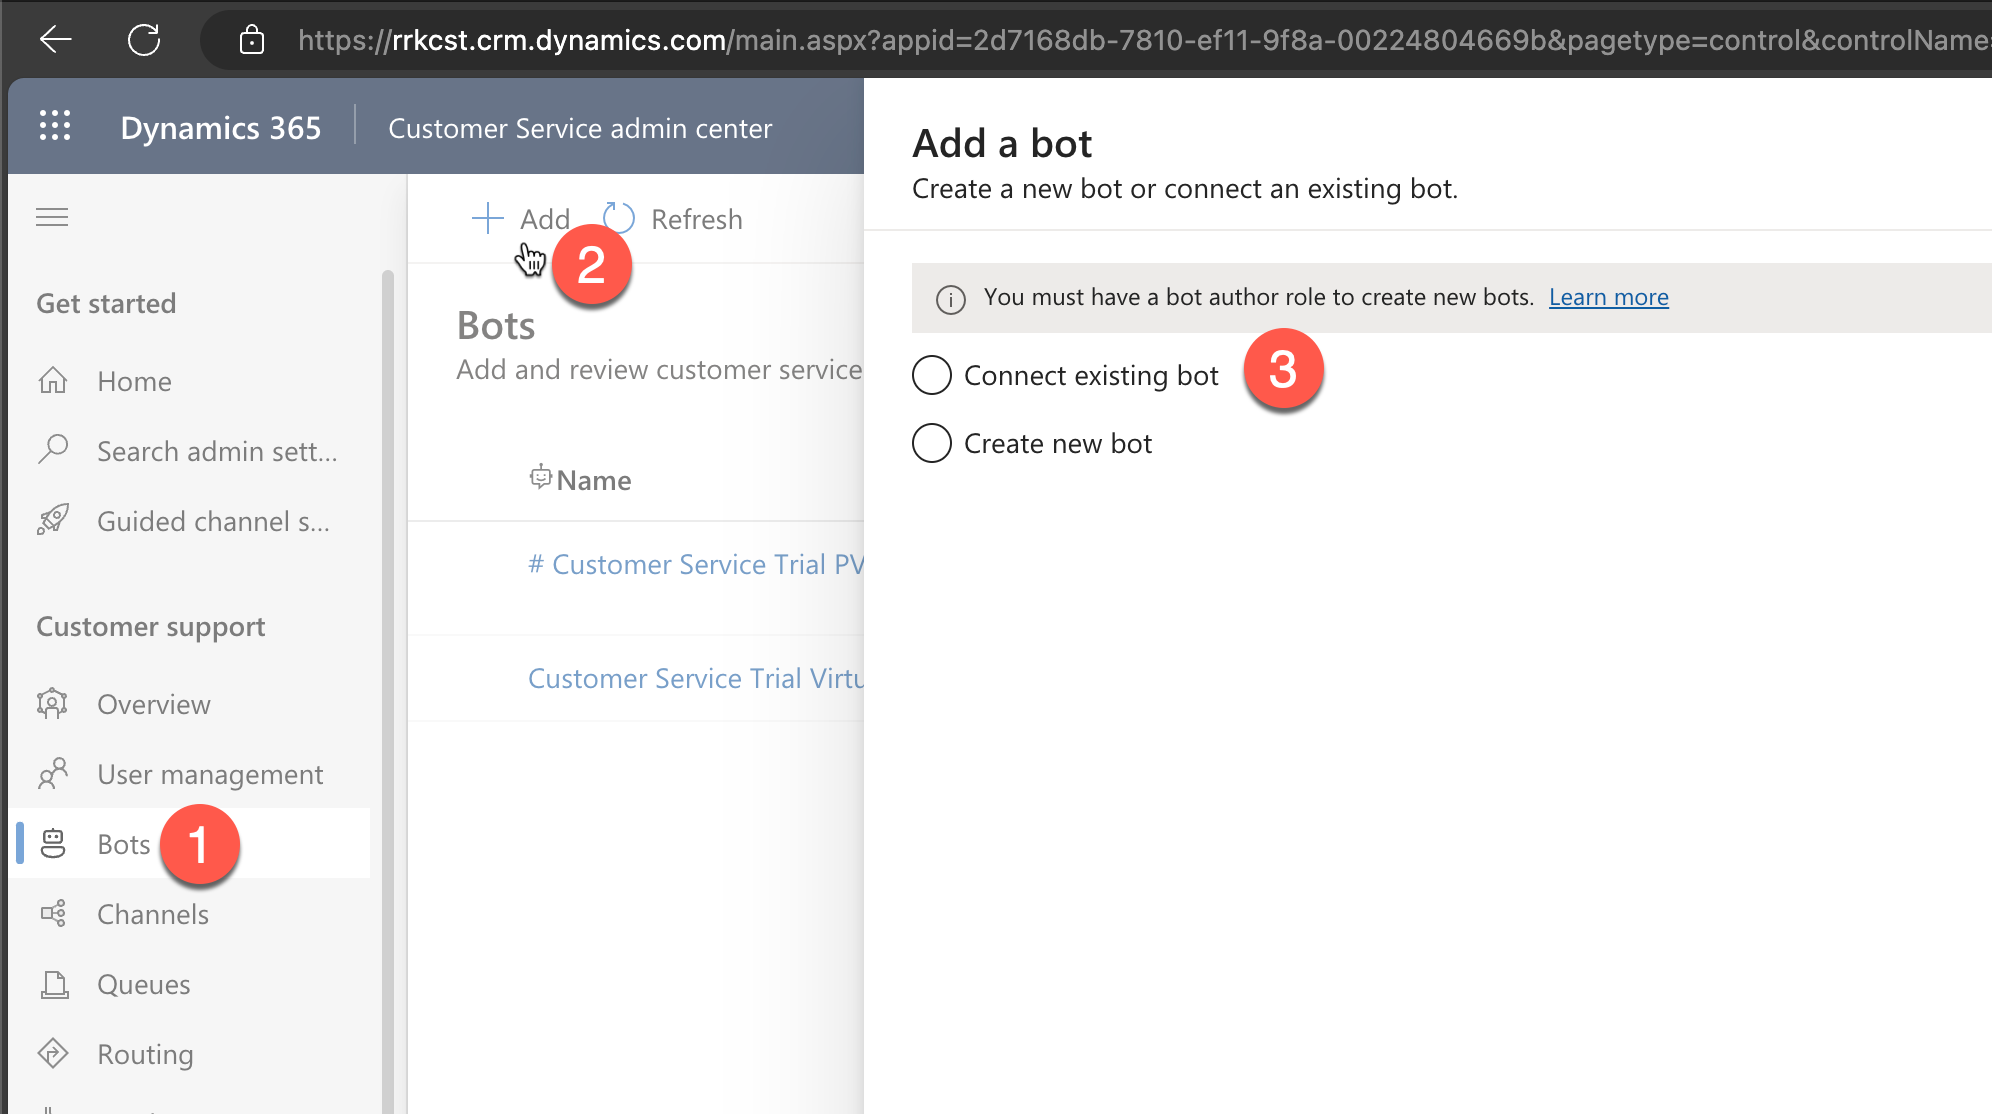
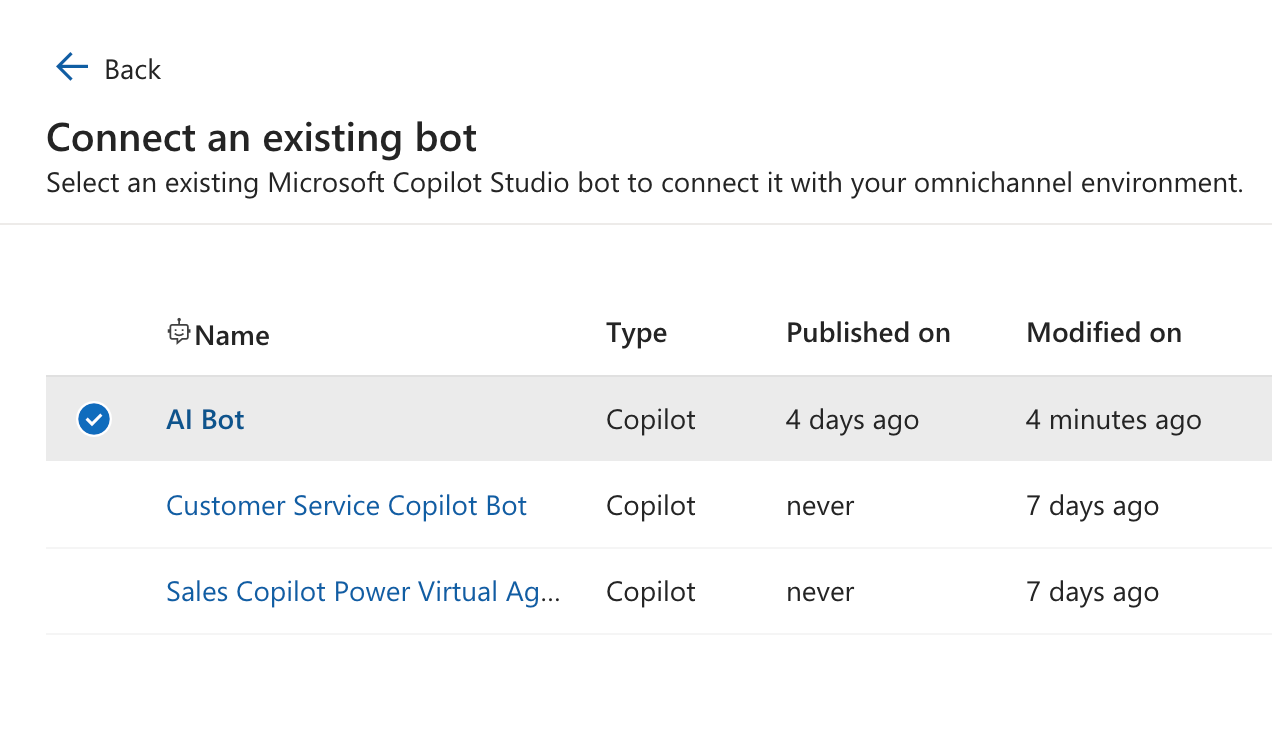
Let's select our bot and click Connect
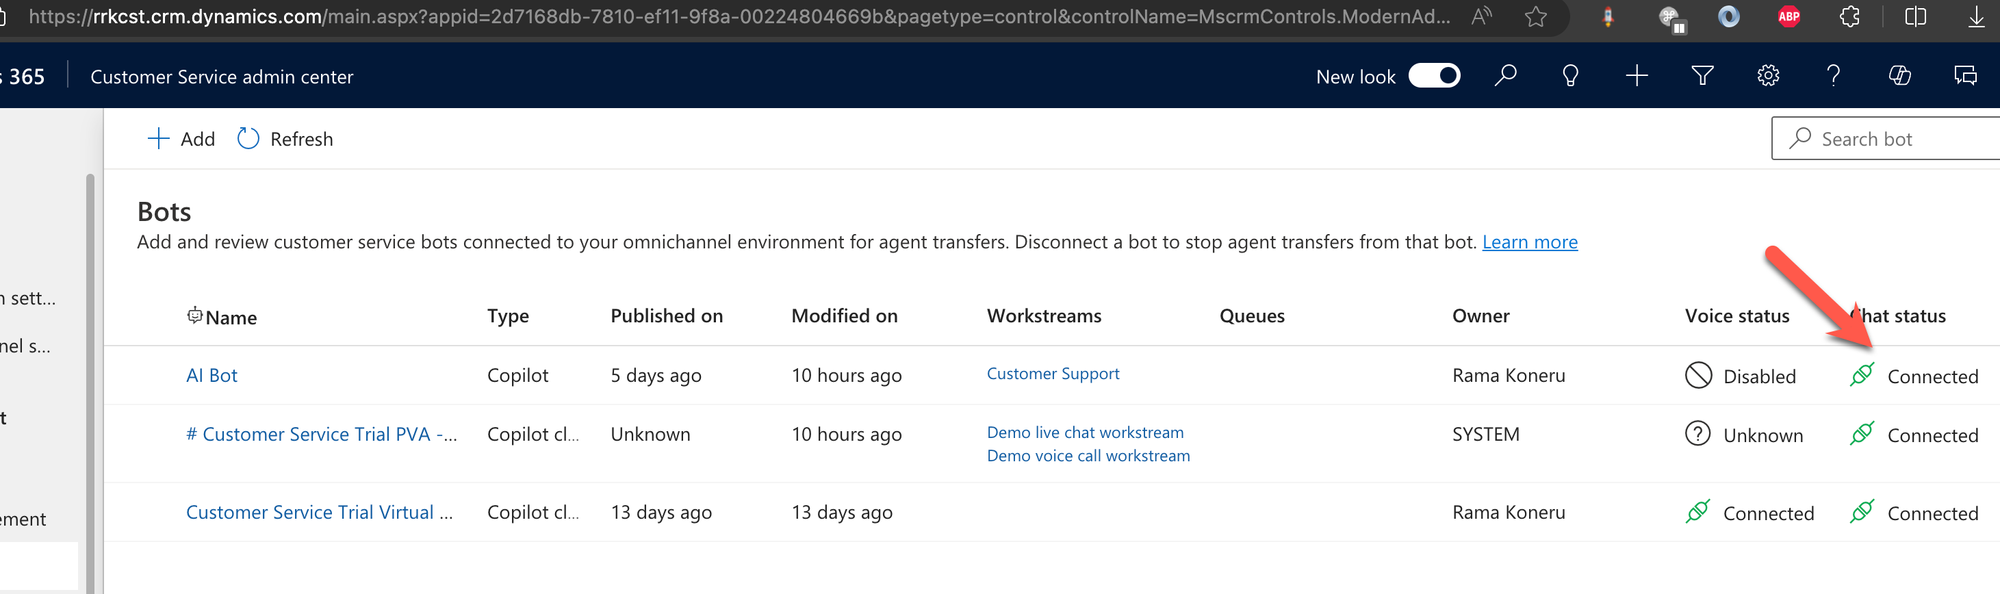
We should now see 0ur Bot as Connected after a few minutes
Alternatively, we could also connect the bot from the Copilot Studio under Channels by selecting Dynamics 365 Customer Service.

Connecting to the CSW Chat
Next, let's look at configuring the Chat Channel to use the Bot to interact with the live chat. This will route any incoming conversations to the live chat to be first routed to the bot. I have used minimum configuration in my trial environment to set up a chat channel and workstream.
Open the workstream associated with the live chat channel and if we scroll down, we should be able to add our Copilot that we have previously configured as a bot.
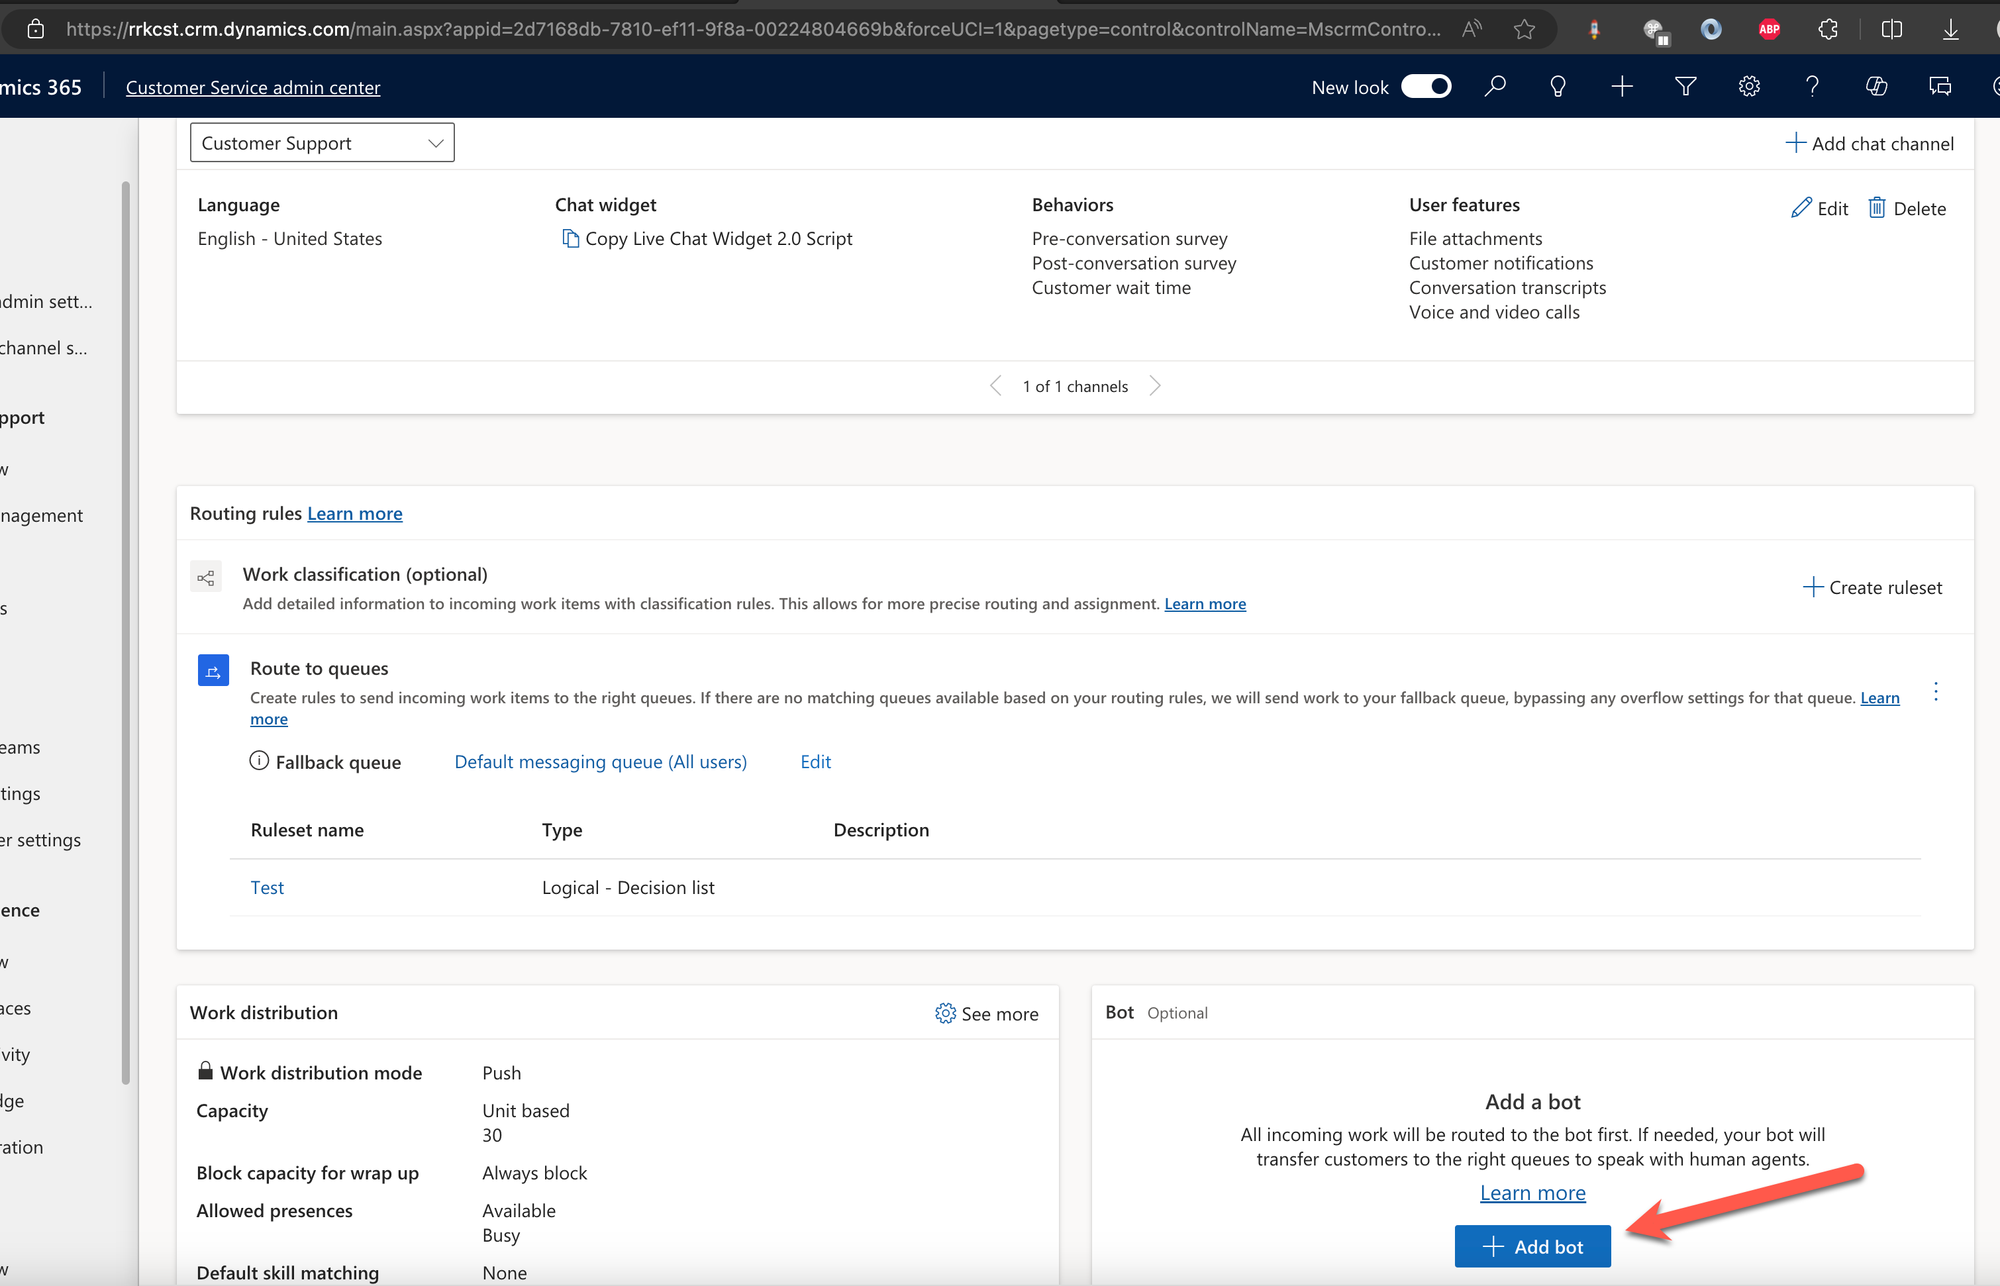
Select the Copilot and click Connect.
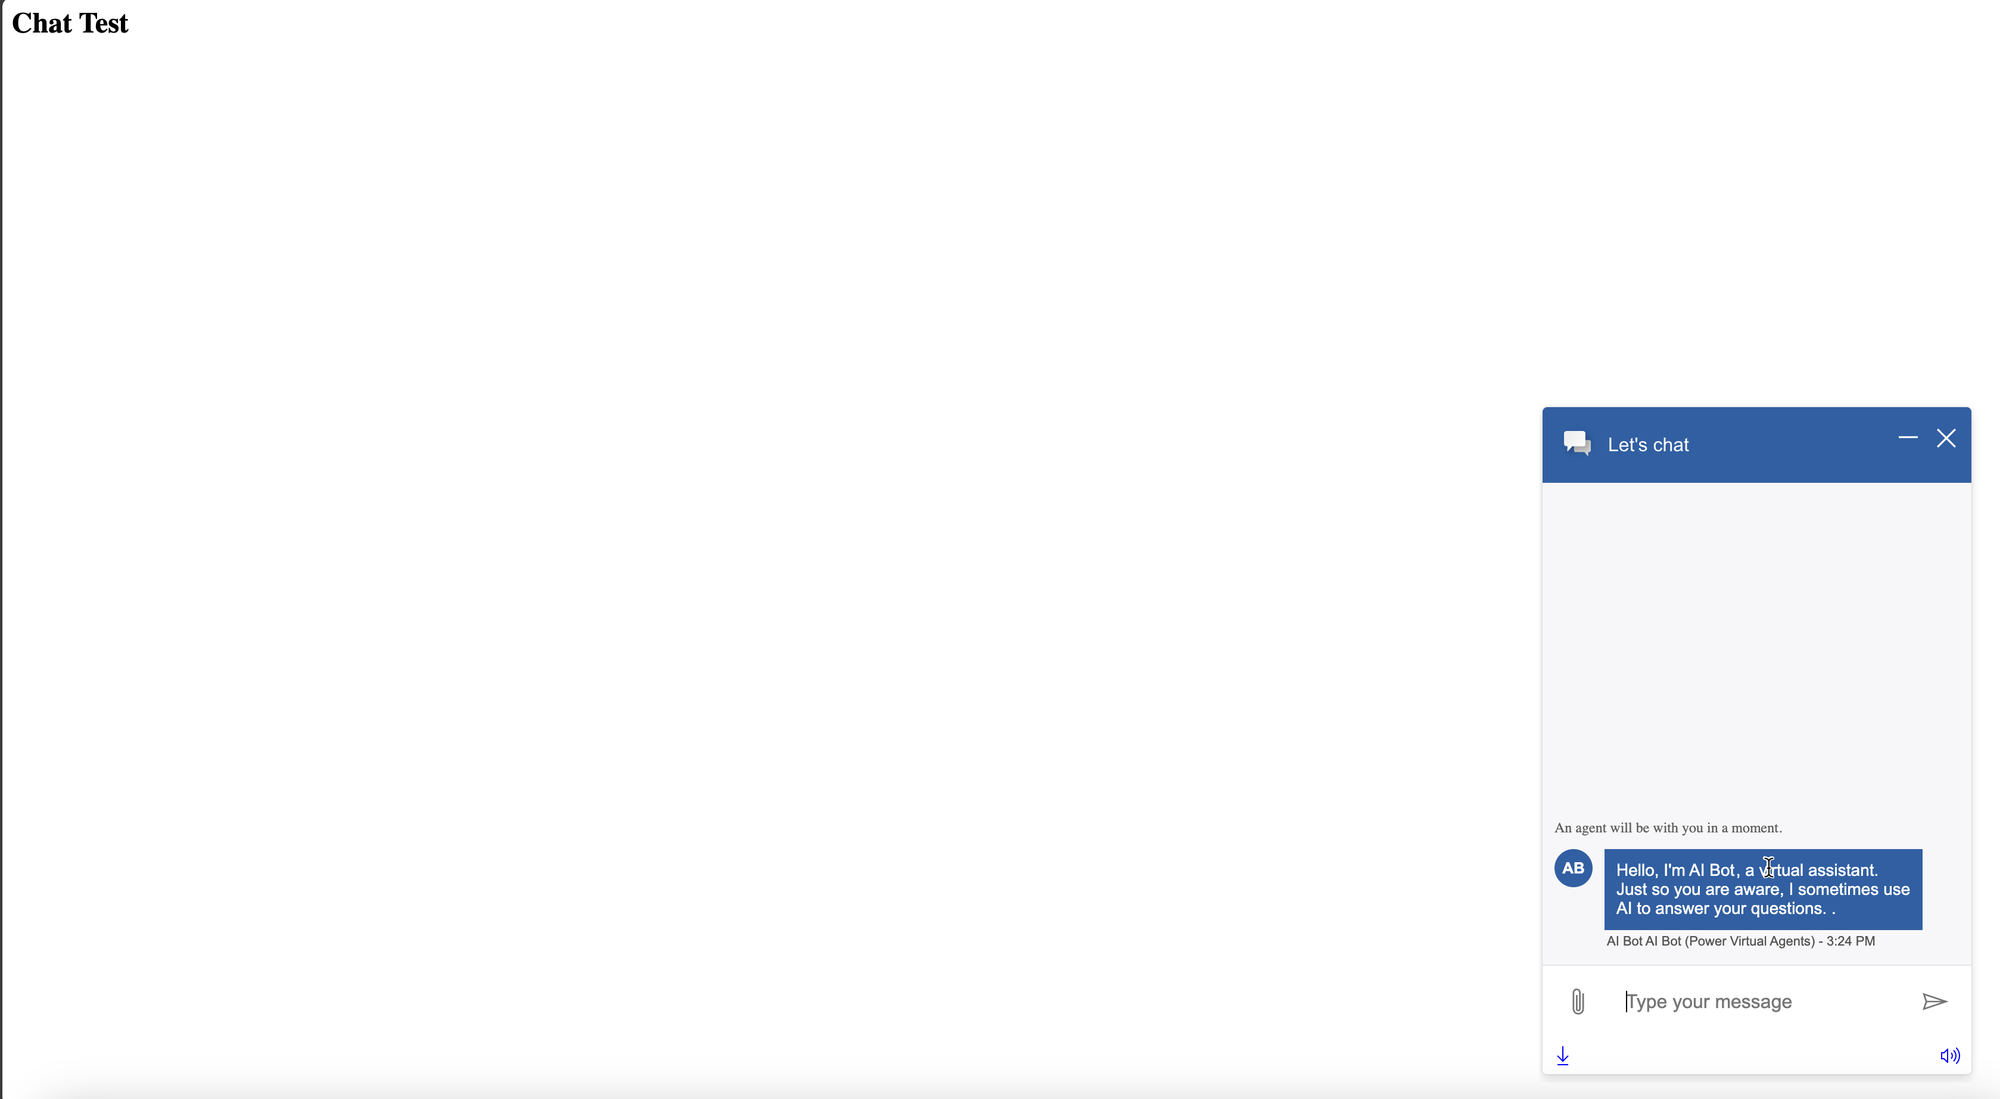
At this point, our Live Chat is connected to our Custom Copilot and is ready to handle any incoming conversations. Let's do a quick test. First, let's create a basic HTML file using a code editor of your choice or just use Notepad and paste the below HTML as shown below.
<html>
<head>
   <!-- Paste Chat Widget Script Below -->


</head>

<body>
    <h2>Chat Test</h2>
</body>

</html>
Next, copy the Chat widget script from the workstream and paste it into the HTML file.

For example, you should have something like the one below. Note that I have replaced the valid values from my script with some garbage text in the script tag.
<html>
<head>
<script v2 id="Microsoft_Omnichannel_LCWidget"
src="https://oc-cdn-ocprod.azureedge.net/livechatwidget/scripts/LiveChatBootstrapper.js"
data-app-id="zz" data-lcw-version="prod"
data-org-id="zz"
data-org-url="https://unq743zz-crm.omnichannelengagementhub.com"></script>
</head>
<body>
<h2>Chat Test</h2>
</body>
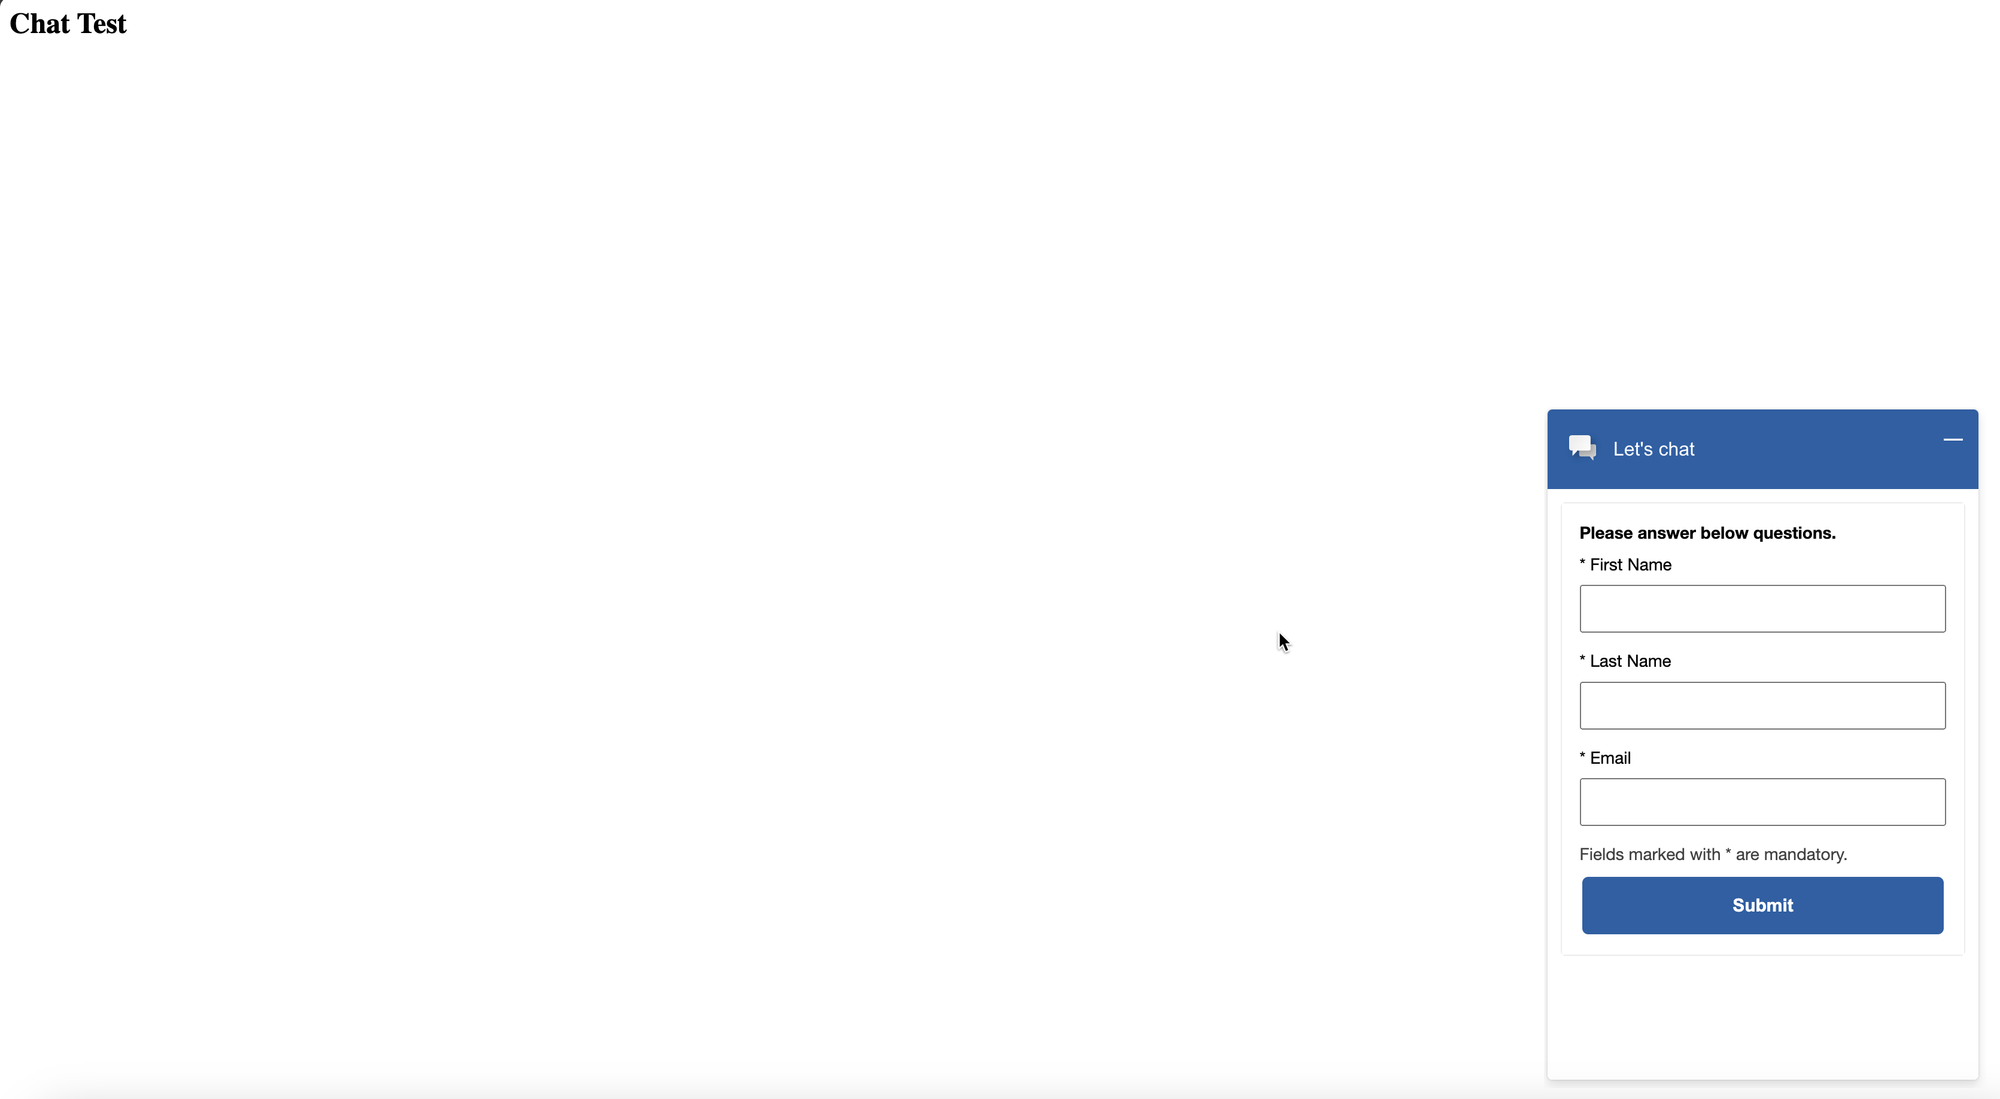
</html>Save the HTML file and open it in the browser, after a few seconds we should see a widget in the bottom right corner. Click on the widget and we should see the AI Bot sending the welcome message as shown below.
Pre-Conversation Survey Variable Mapping
At this point, we have successfully handed off the conversation to a bot, but we still haven't configured the agent handoff. Before we configure this, let's set up pre conversation survey to capture some information from the user that could be useful to automate some tasks before the conversation is handed off.
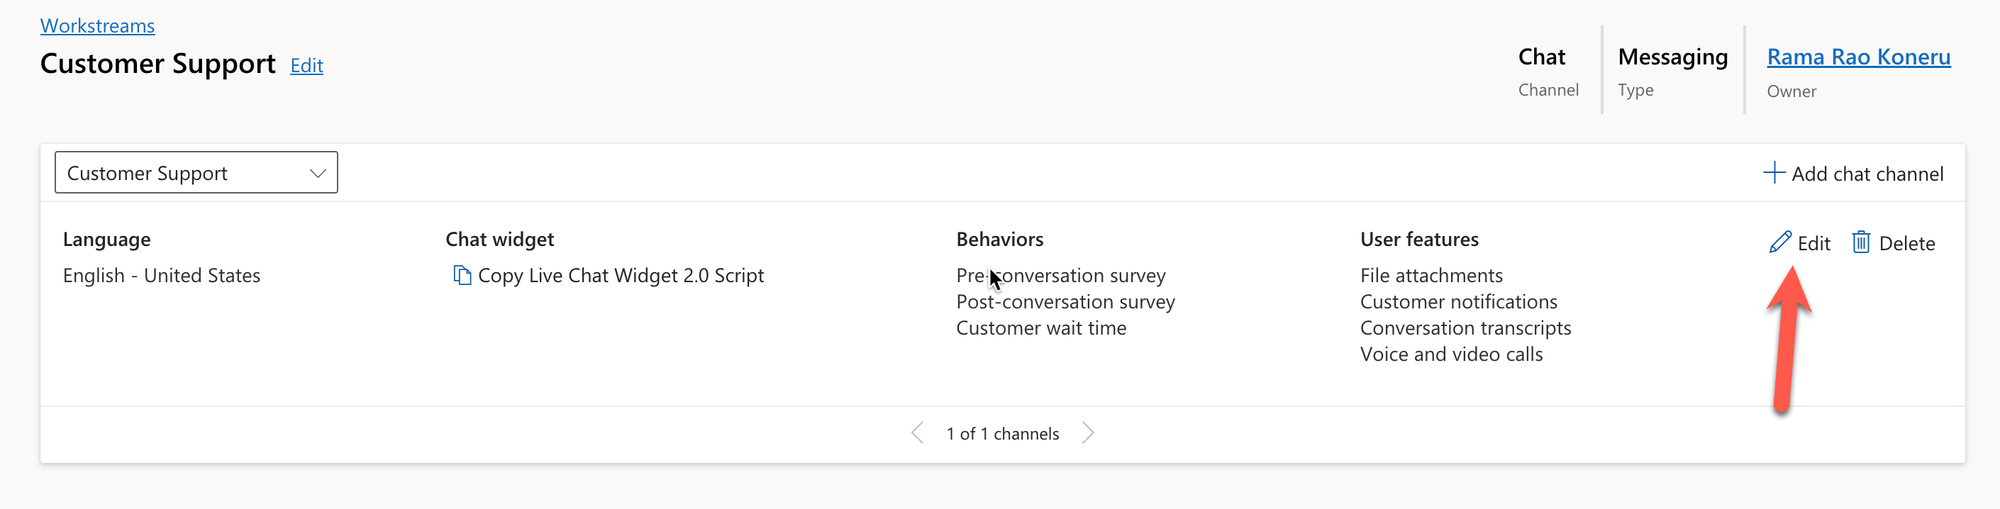
We can open the Chat channel settings directly by selecting the chat or through the workstream. In my case, I have opened it from the Workstream.
I have setup the following questions that will possibly help us identify a contact in the system if one exists.
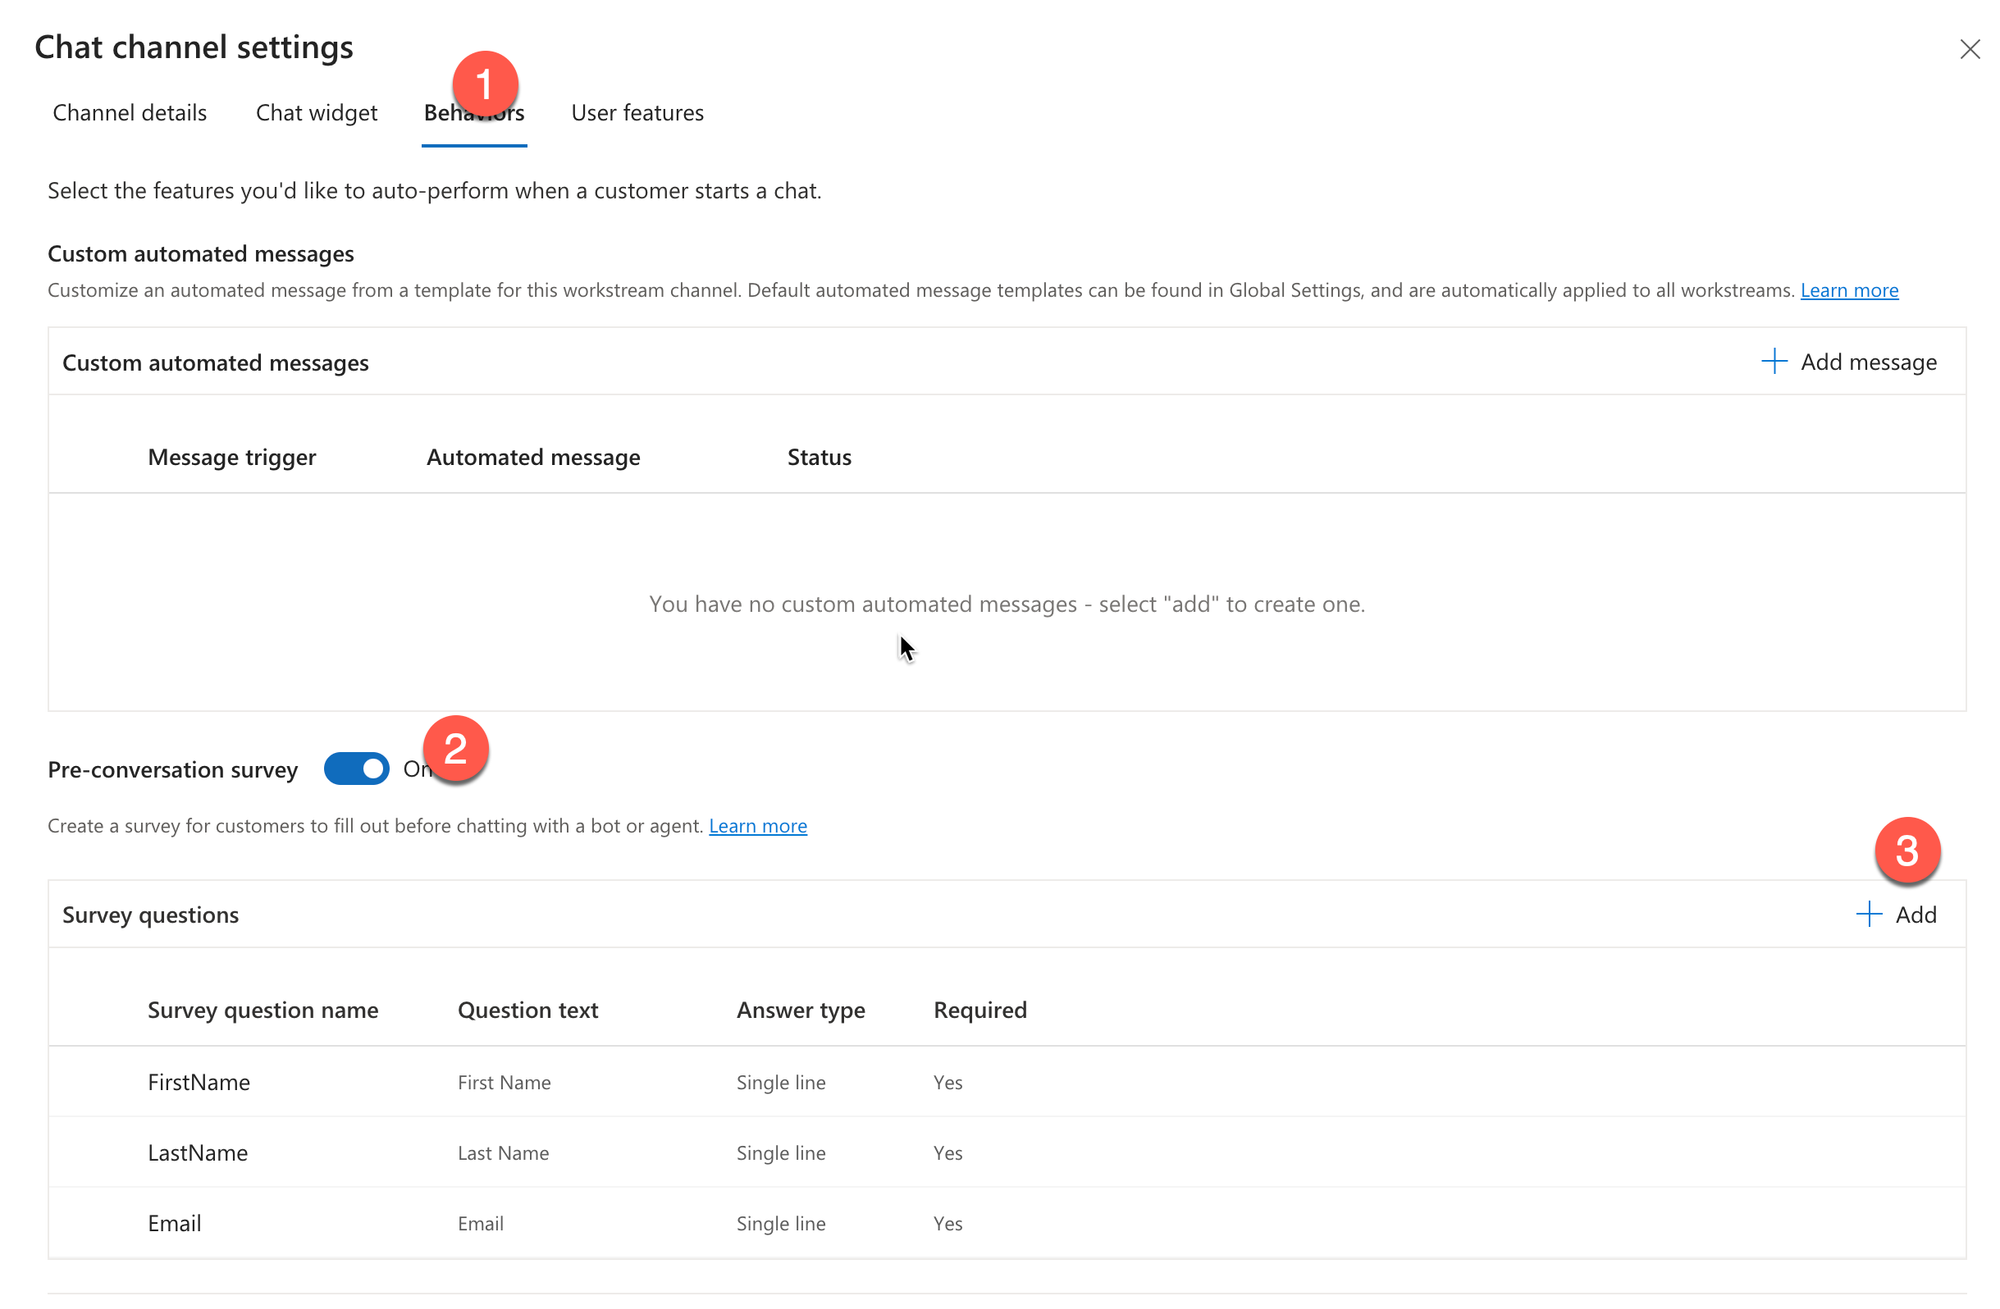
Let's click Save and Close. After a few minutes, refresh the test HTML file that has our chat widget in the browser, and we should see the pre survey questions.
Now, let's open our Copilot bot and update the Conversation Start topic as shown below.

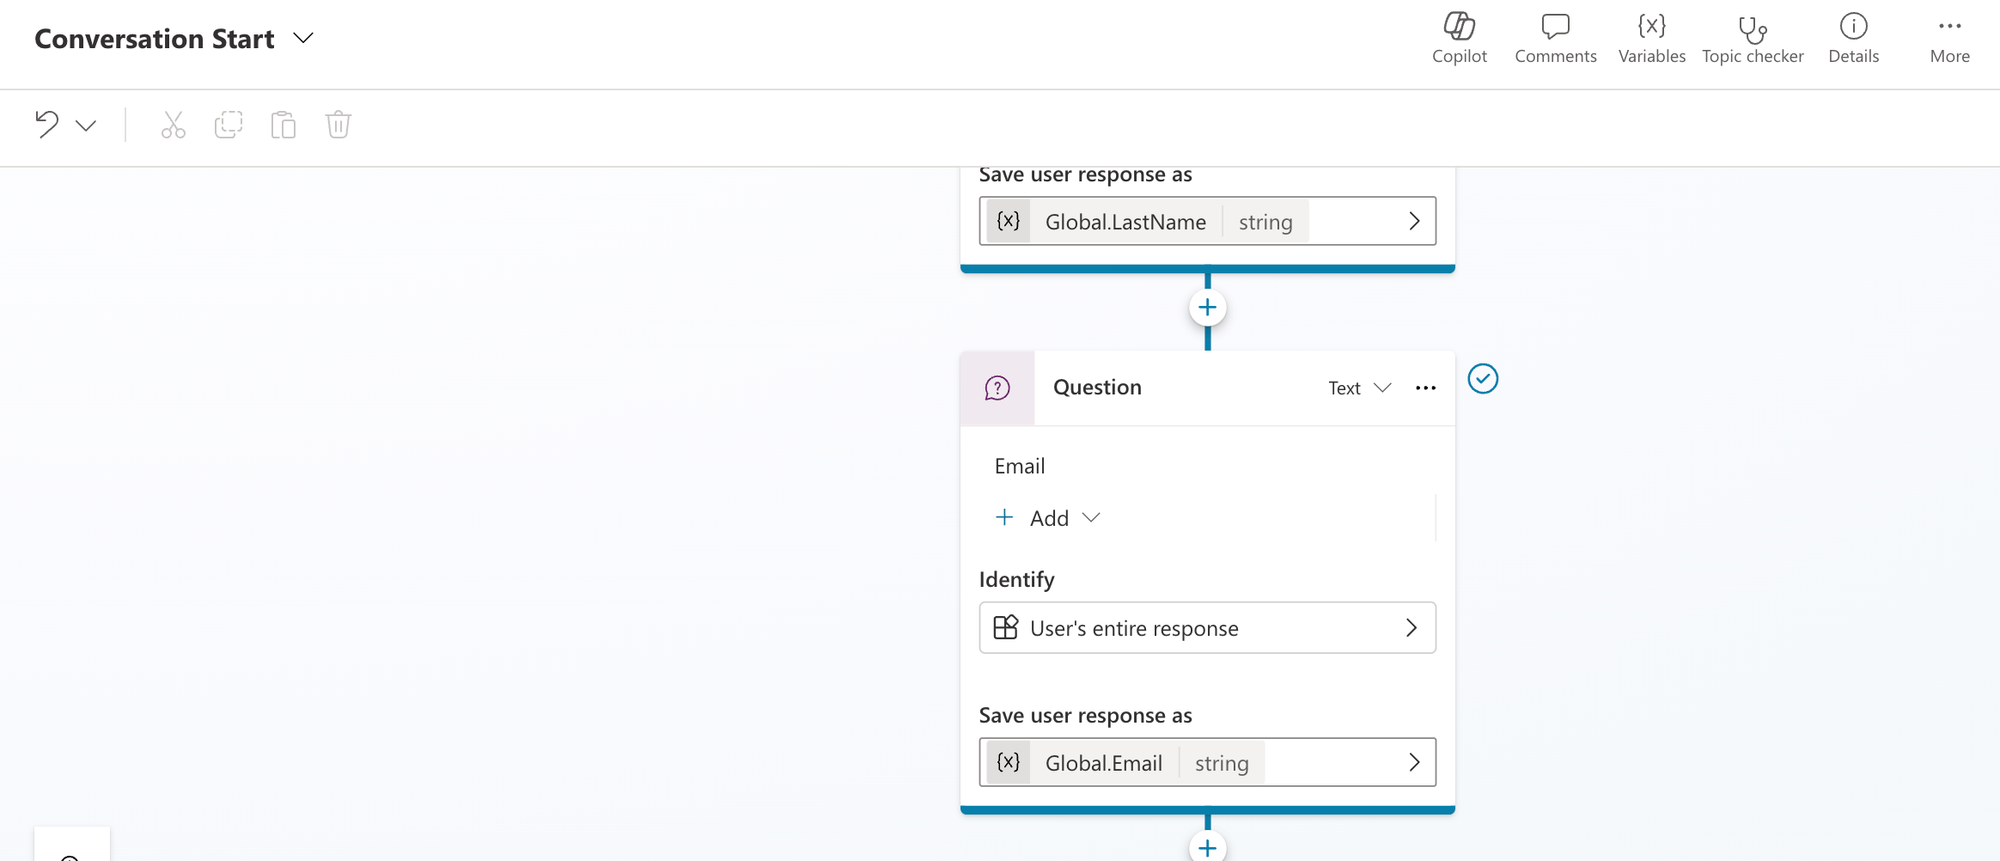
I have added the Ask a question node and captured the response into three variables for the First Name, Last Name and Email questions. This the how we can capture the pre conversation survey question responses as variables in our Copilot as described in the documentation. This will be really useful when you want to perform automations within the Copilot itself before passing it off to the Agent. For example, if we need to Create a Case and associate to a Customer.
In addition, if we installed the Omnichannel Power Virtual Agent Extension we would also have the below variables available to us. This is really useful in situations, where you want the Copilot to create a case and associate it to the Conversation when there is no need to pass it to an agent.

Triggering Agent Transfers
We can trigger the transfer to an agent in one of two ways by either an implicit or an explicit trigger as described here.
Implicit Trigger
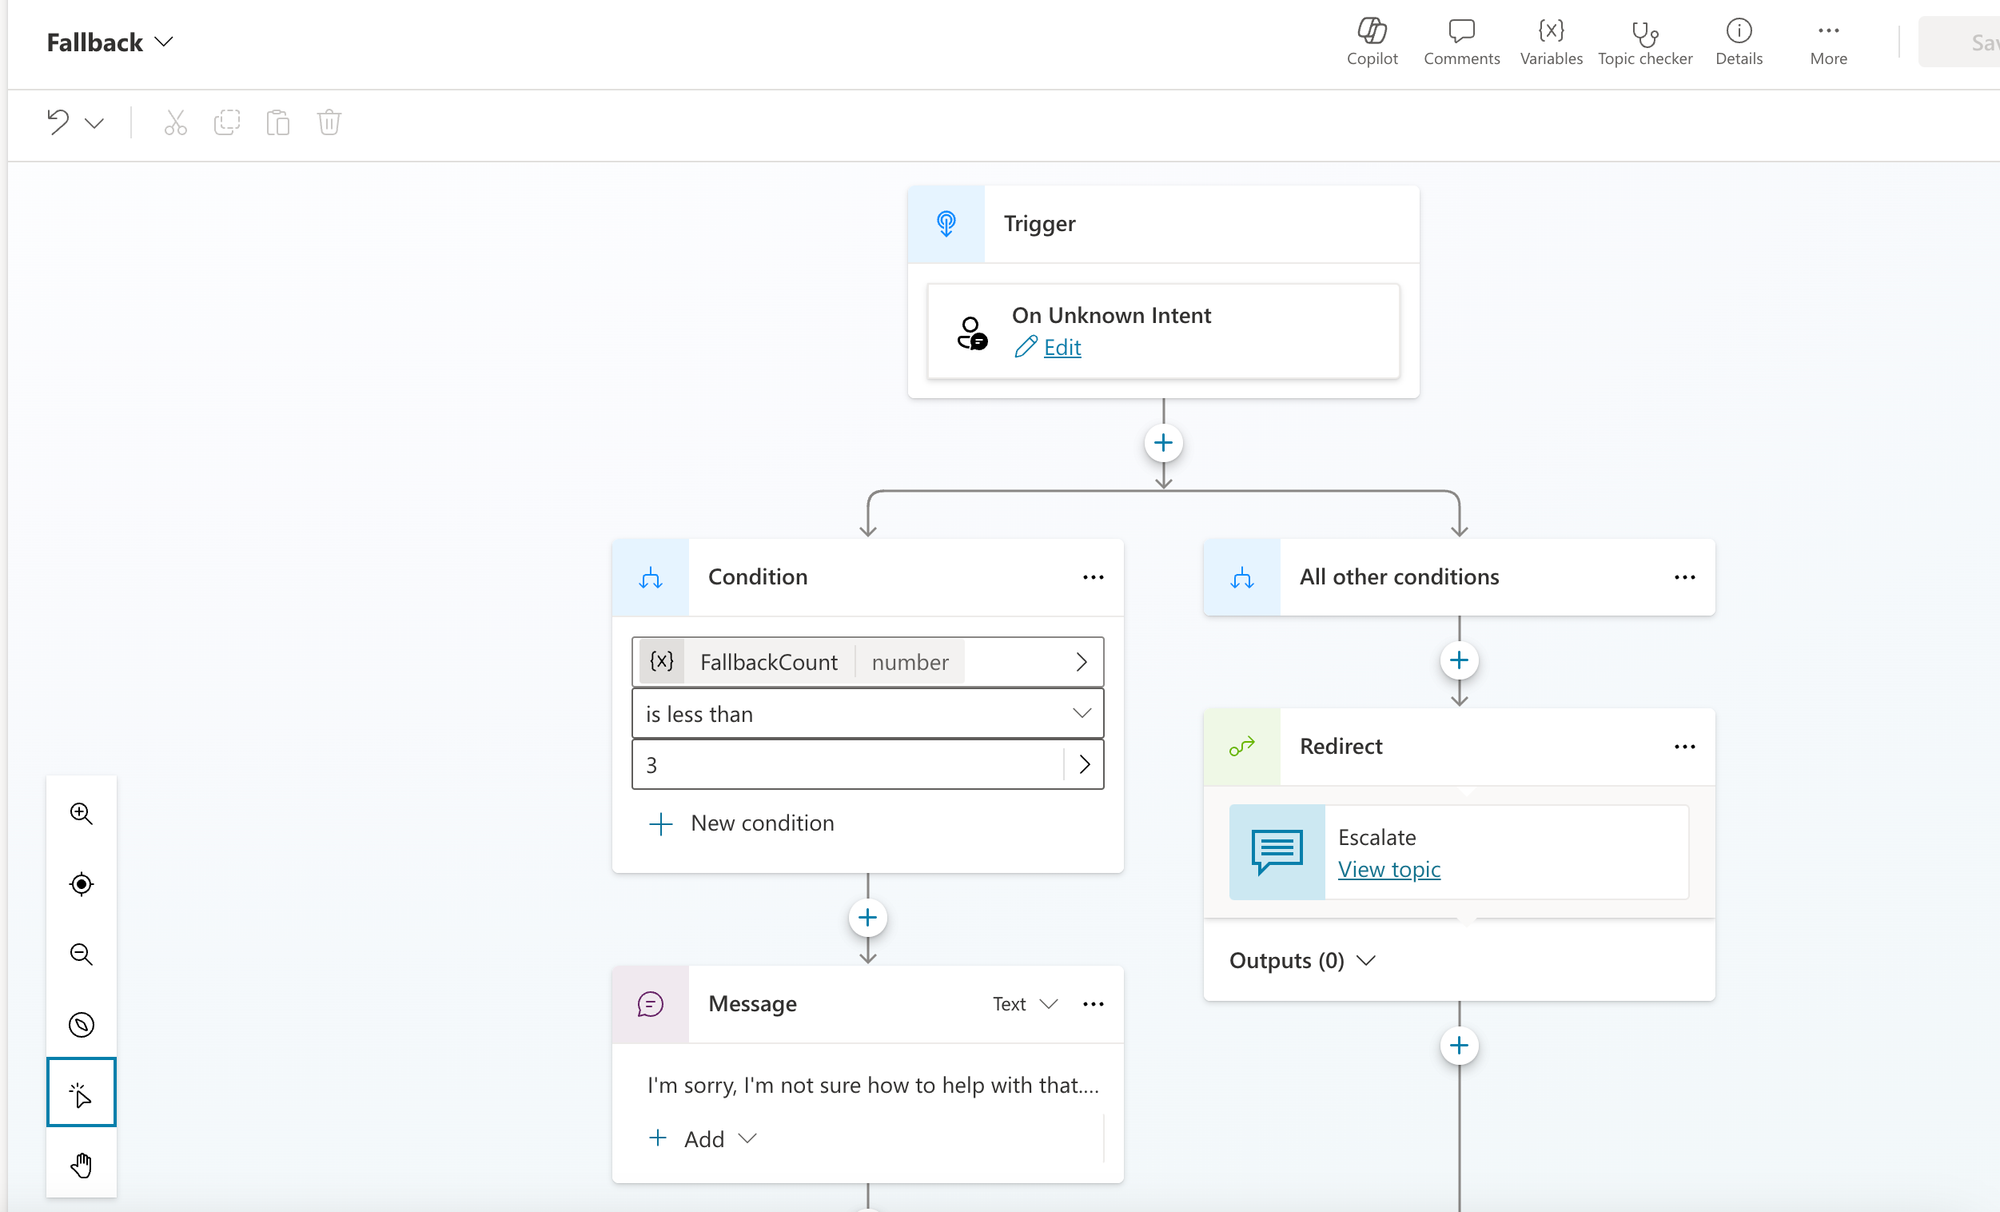
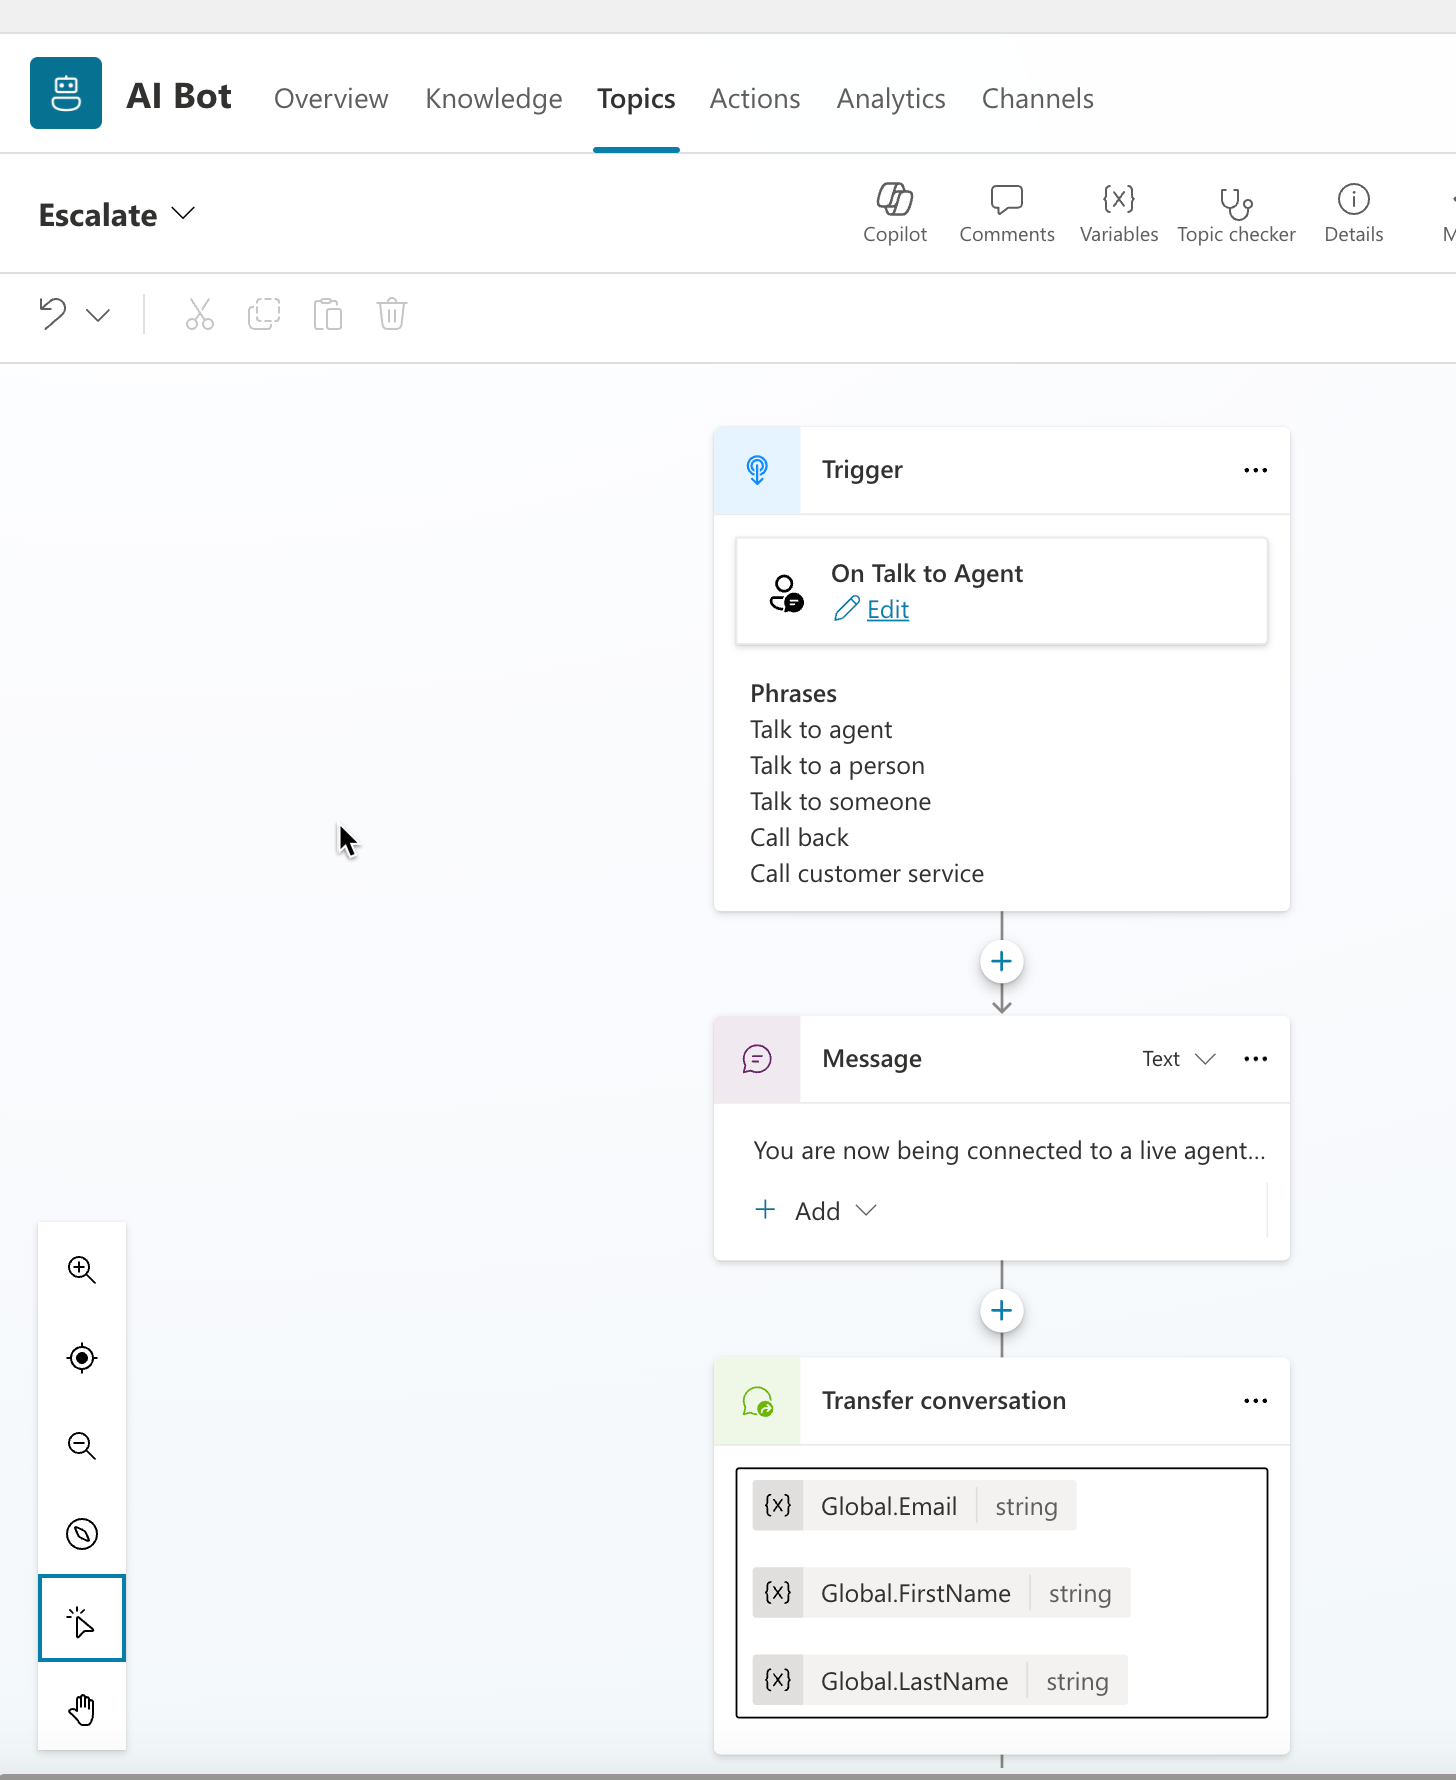
For an implicit trigger, the Copilot does this using the Fallback system topic or the default Escalate topic. If the user is asking for something the Copilot has no topic for or is unable to understand even after multiple tries from the user, the Fallback topic automatically routes it to Escalate topic which transfers it to the live agent.
If the user just enters "talk to agent" or similar, the below topic would automatically be triggered and transfer the conversation.
Let's look at these scenarios with an example
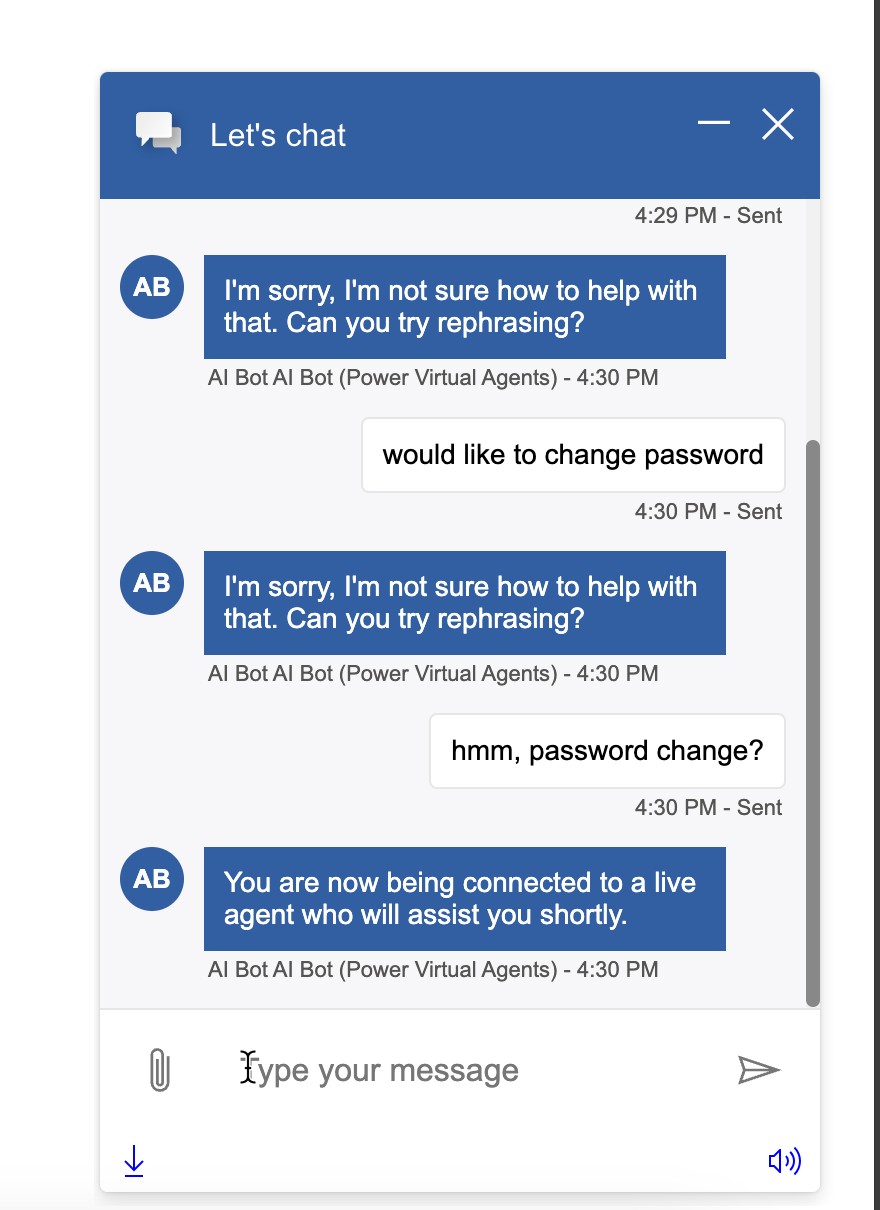
Fallback
In the below example, the user has to request a password change multiple times before being transferred to a live agent. This is due to the fact that we have FallbackCount variable in the Fallback topic set to 3. We can customize this number as needed in the topic.
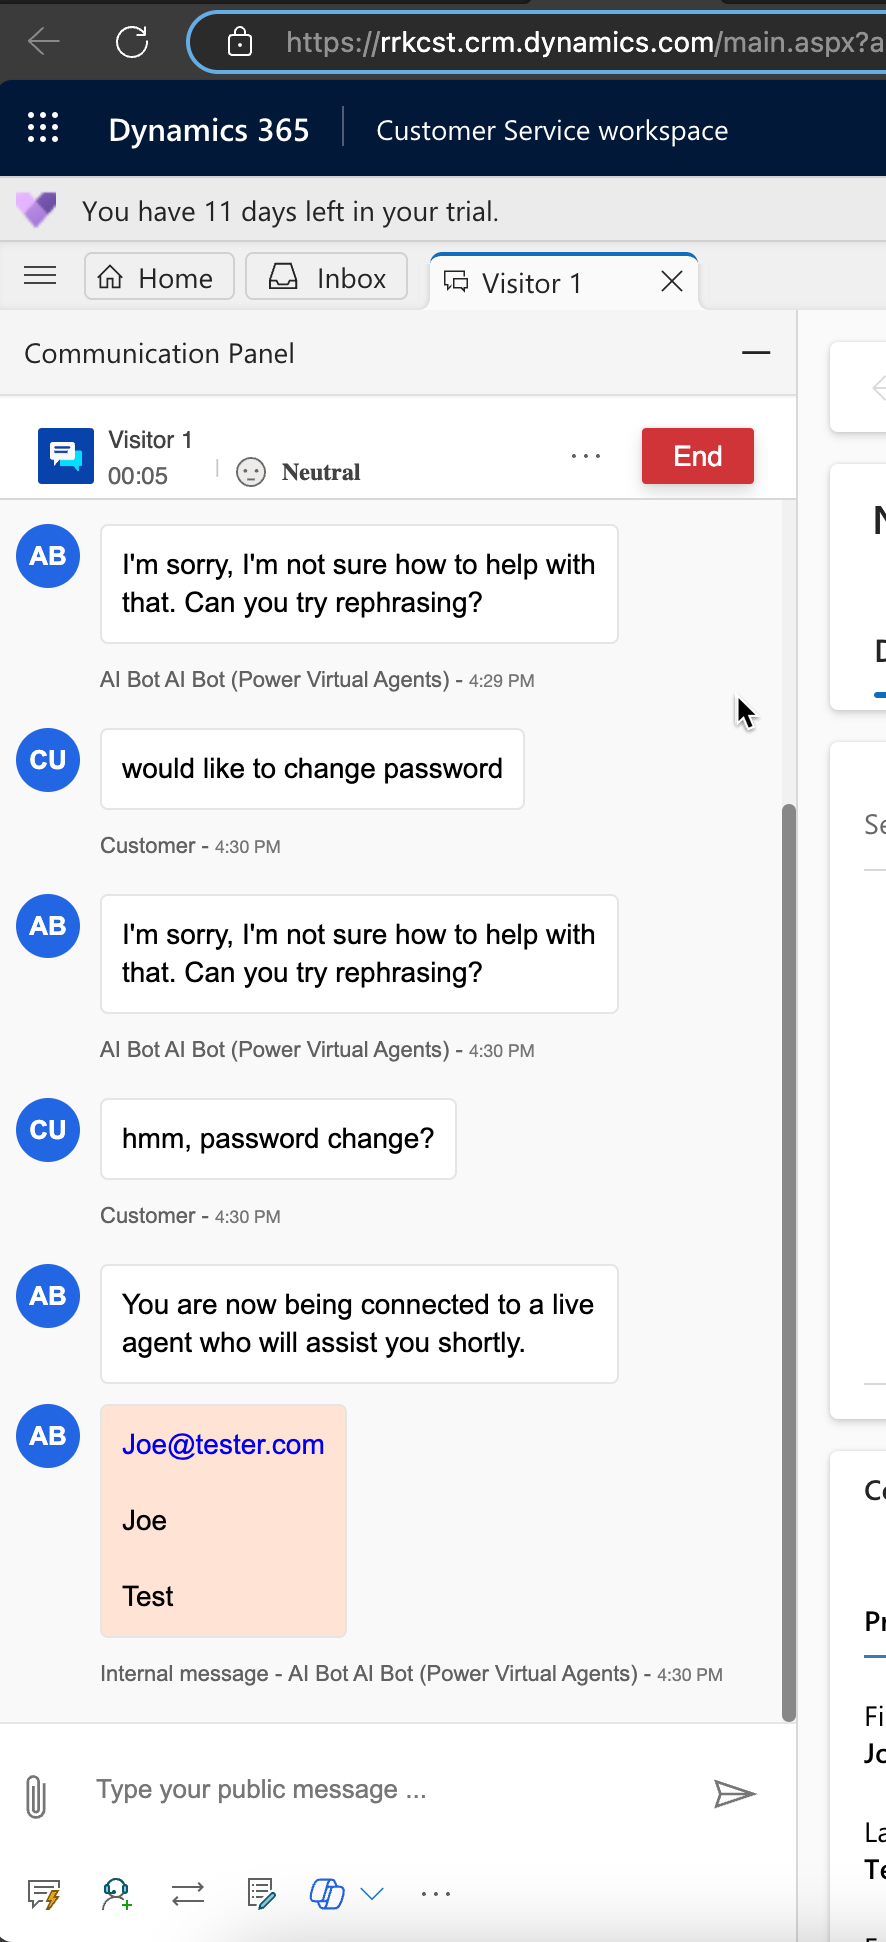
Chat details sent to the agent
Escalate
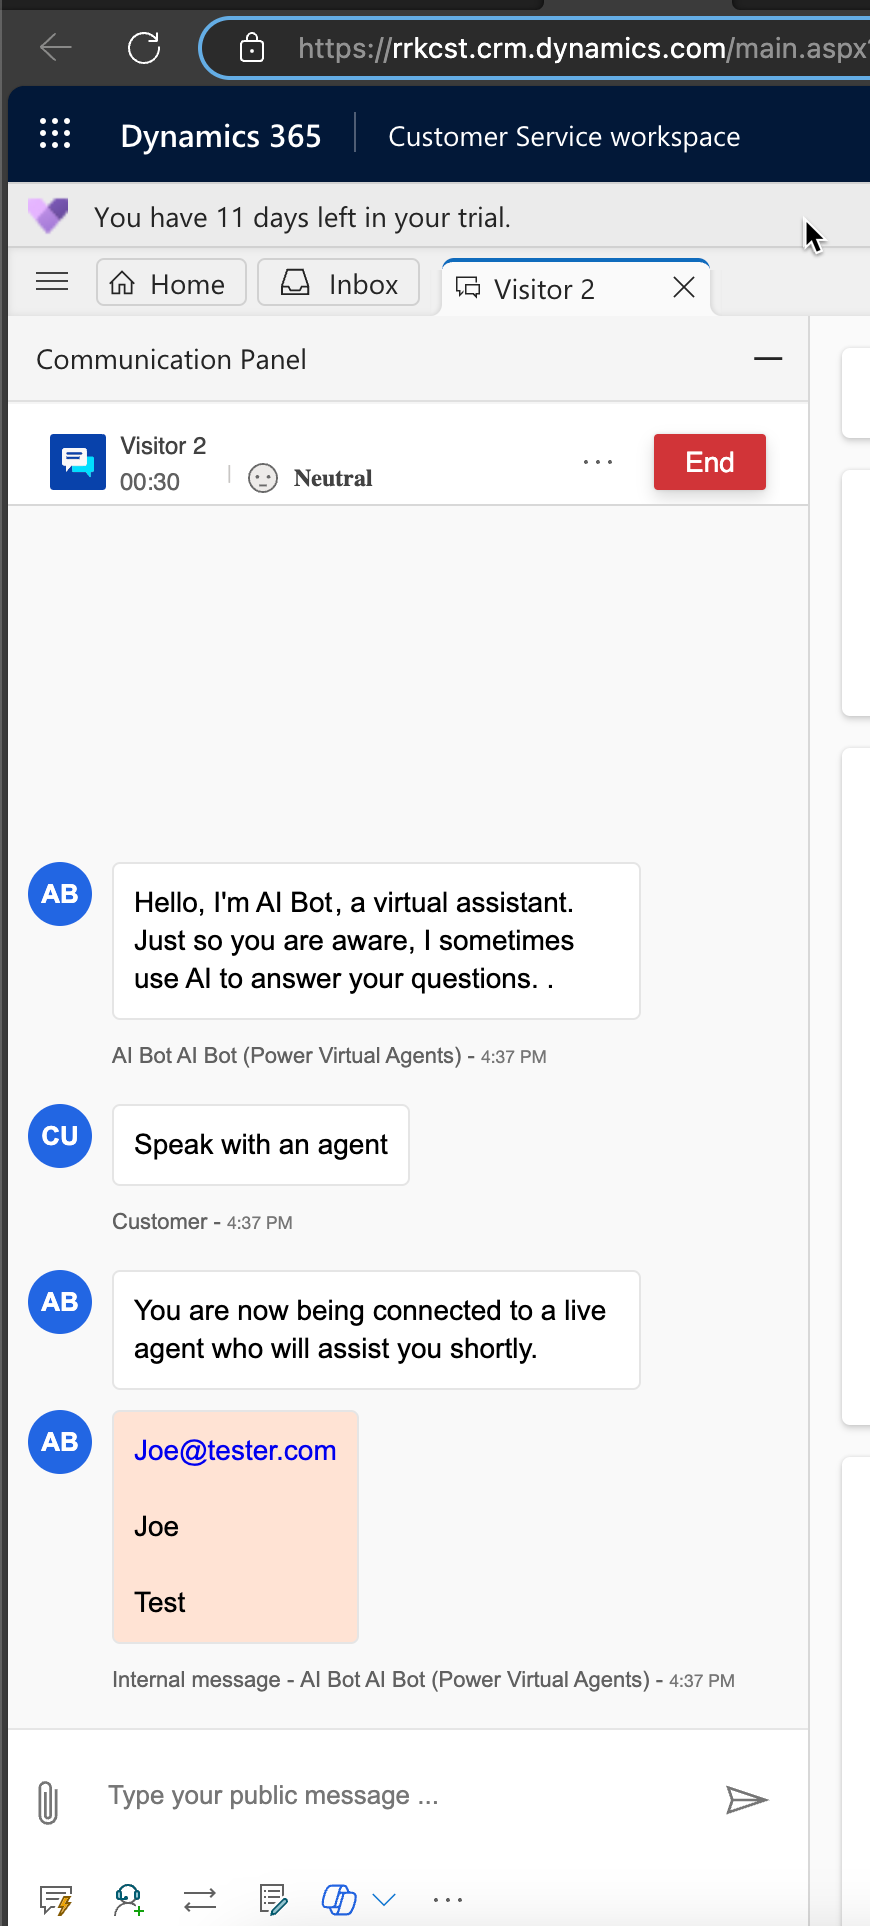
In this scenario, the user straight away requests to talk to an agent.
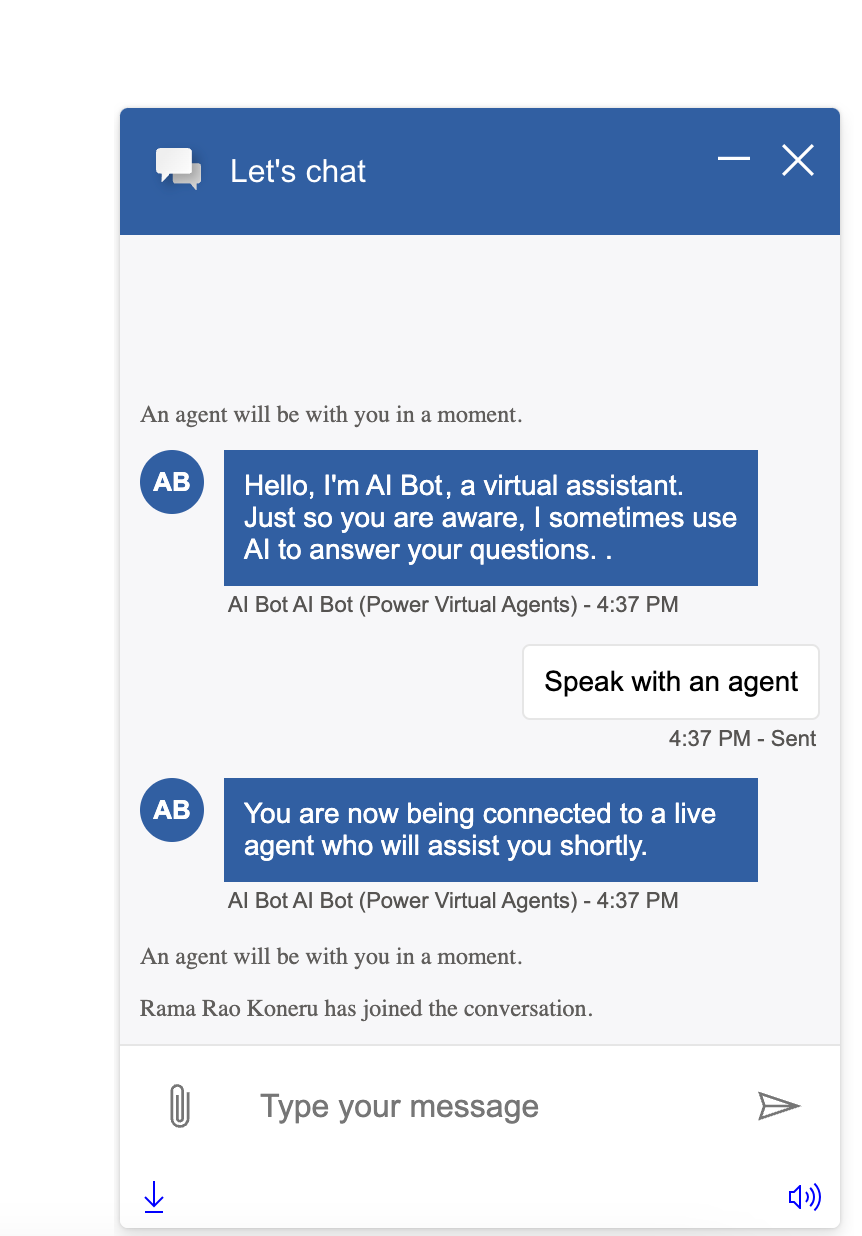
As we can see, the bot directly routes to the live agent immediately.
Explicit Trigger
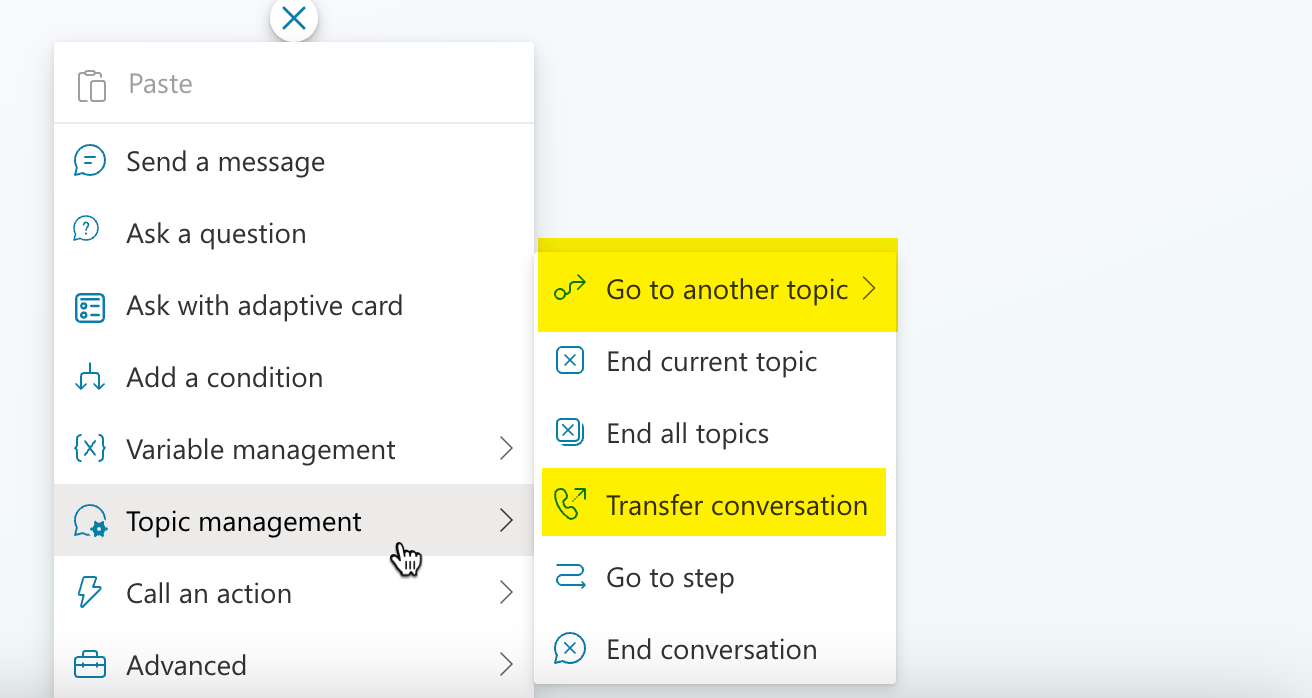
If we have scenarios where we want to control how and when we escalate to an agent for certain topics, this would be an explicit trigger. In these scenarios, we could either add the Transfer Conversation node or the Go to another topic and trigger the Escalate system topic which will in turn transfer the conversation.
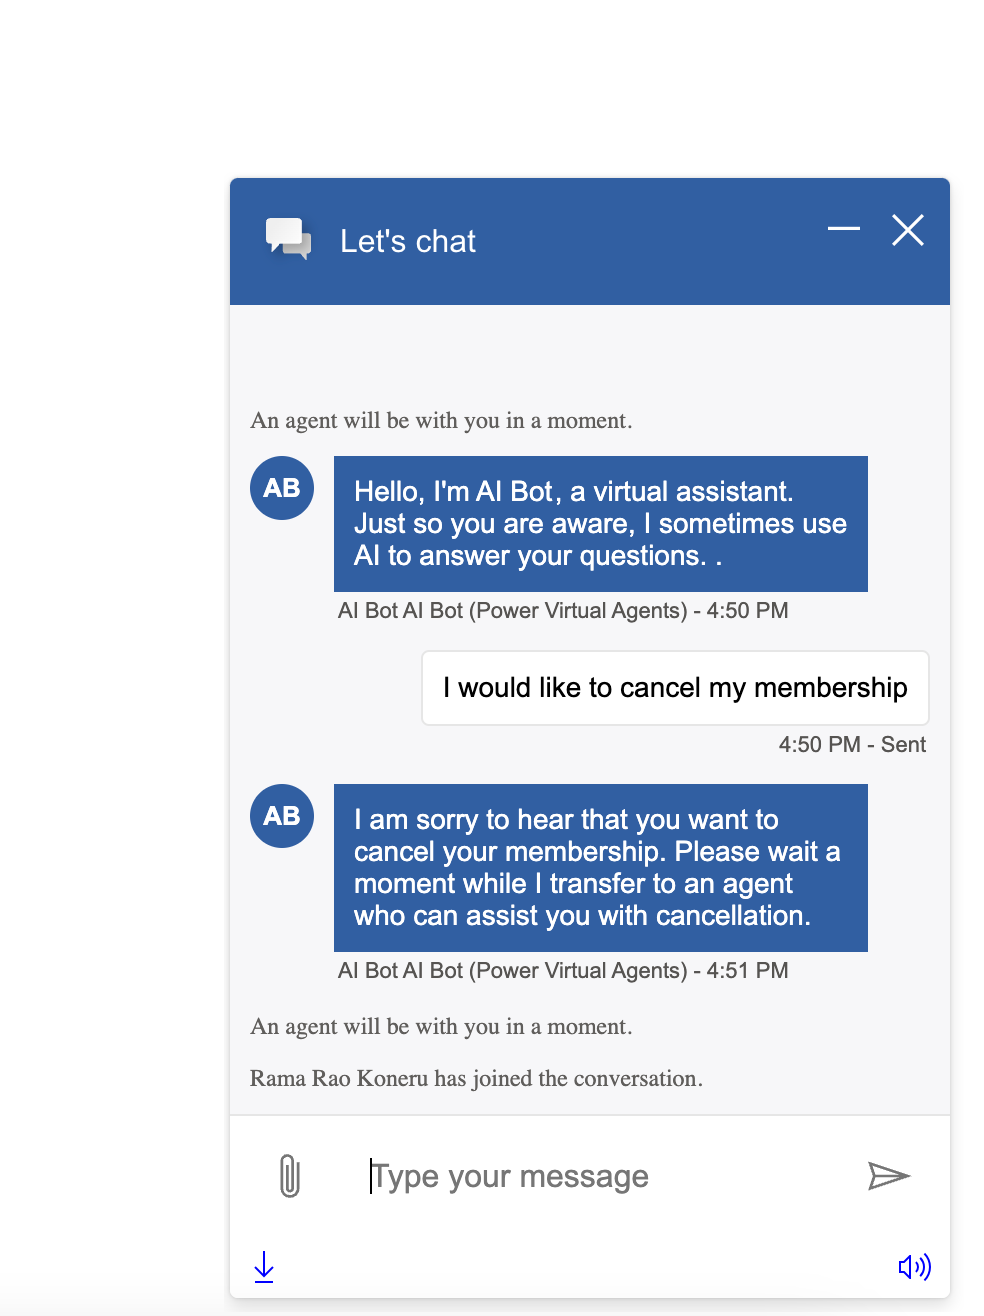
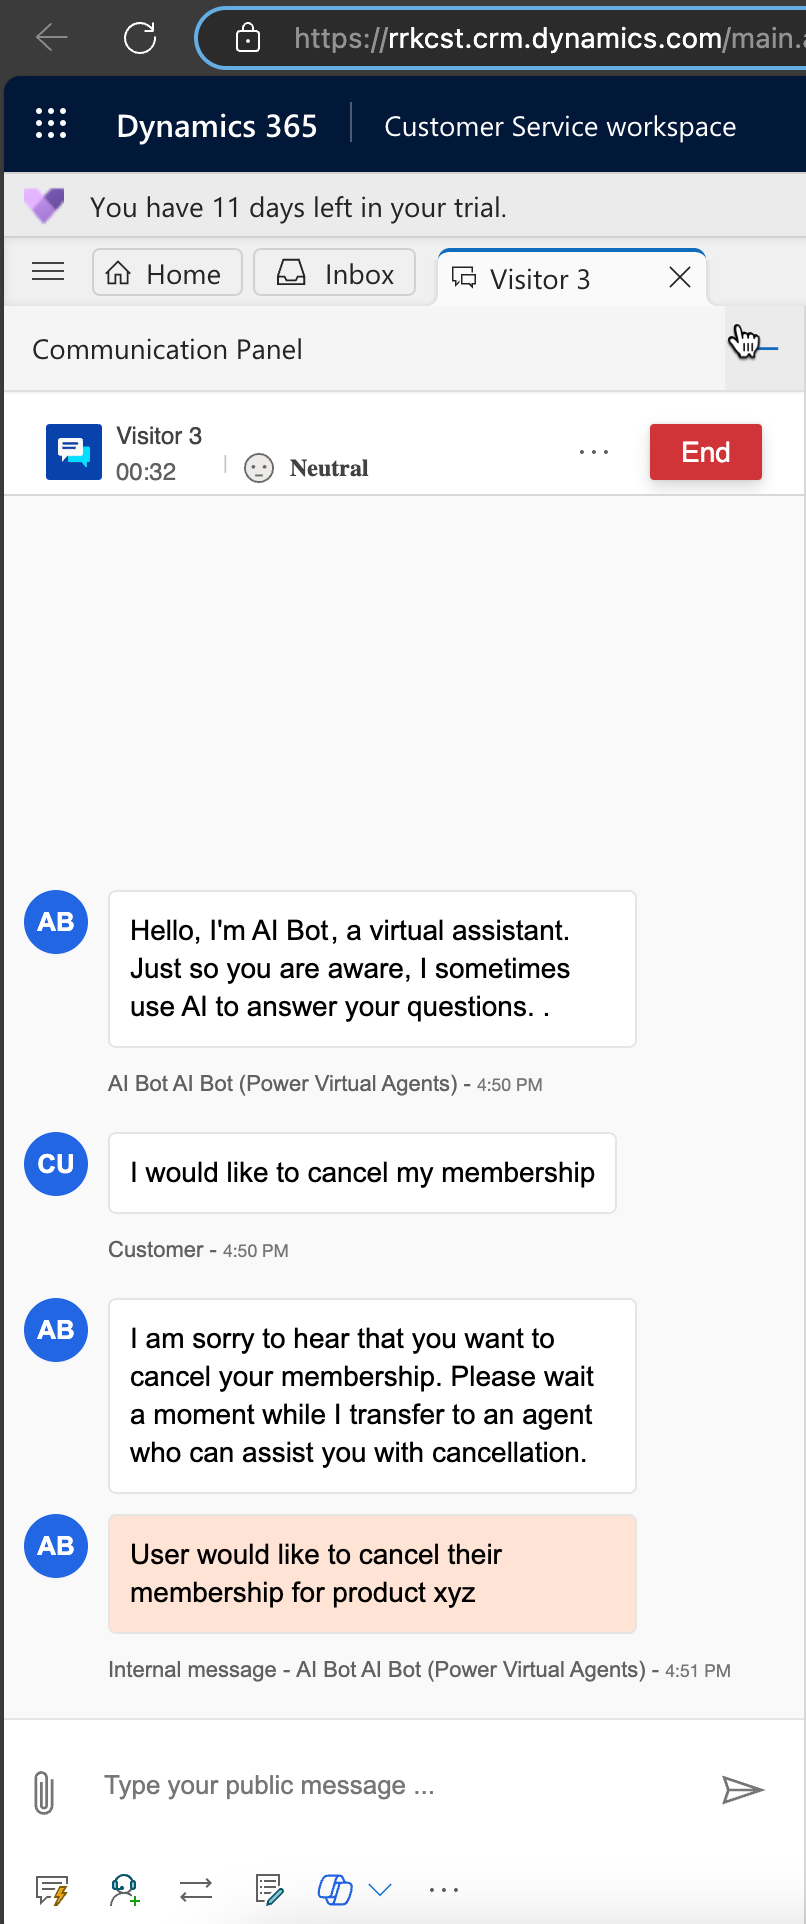
A good example of this would be when a user requests membership cancellation, and we want to transfer to an agent.
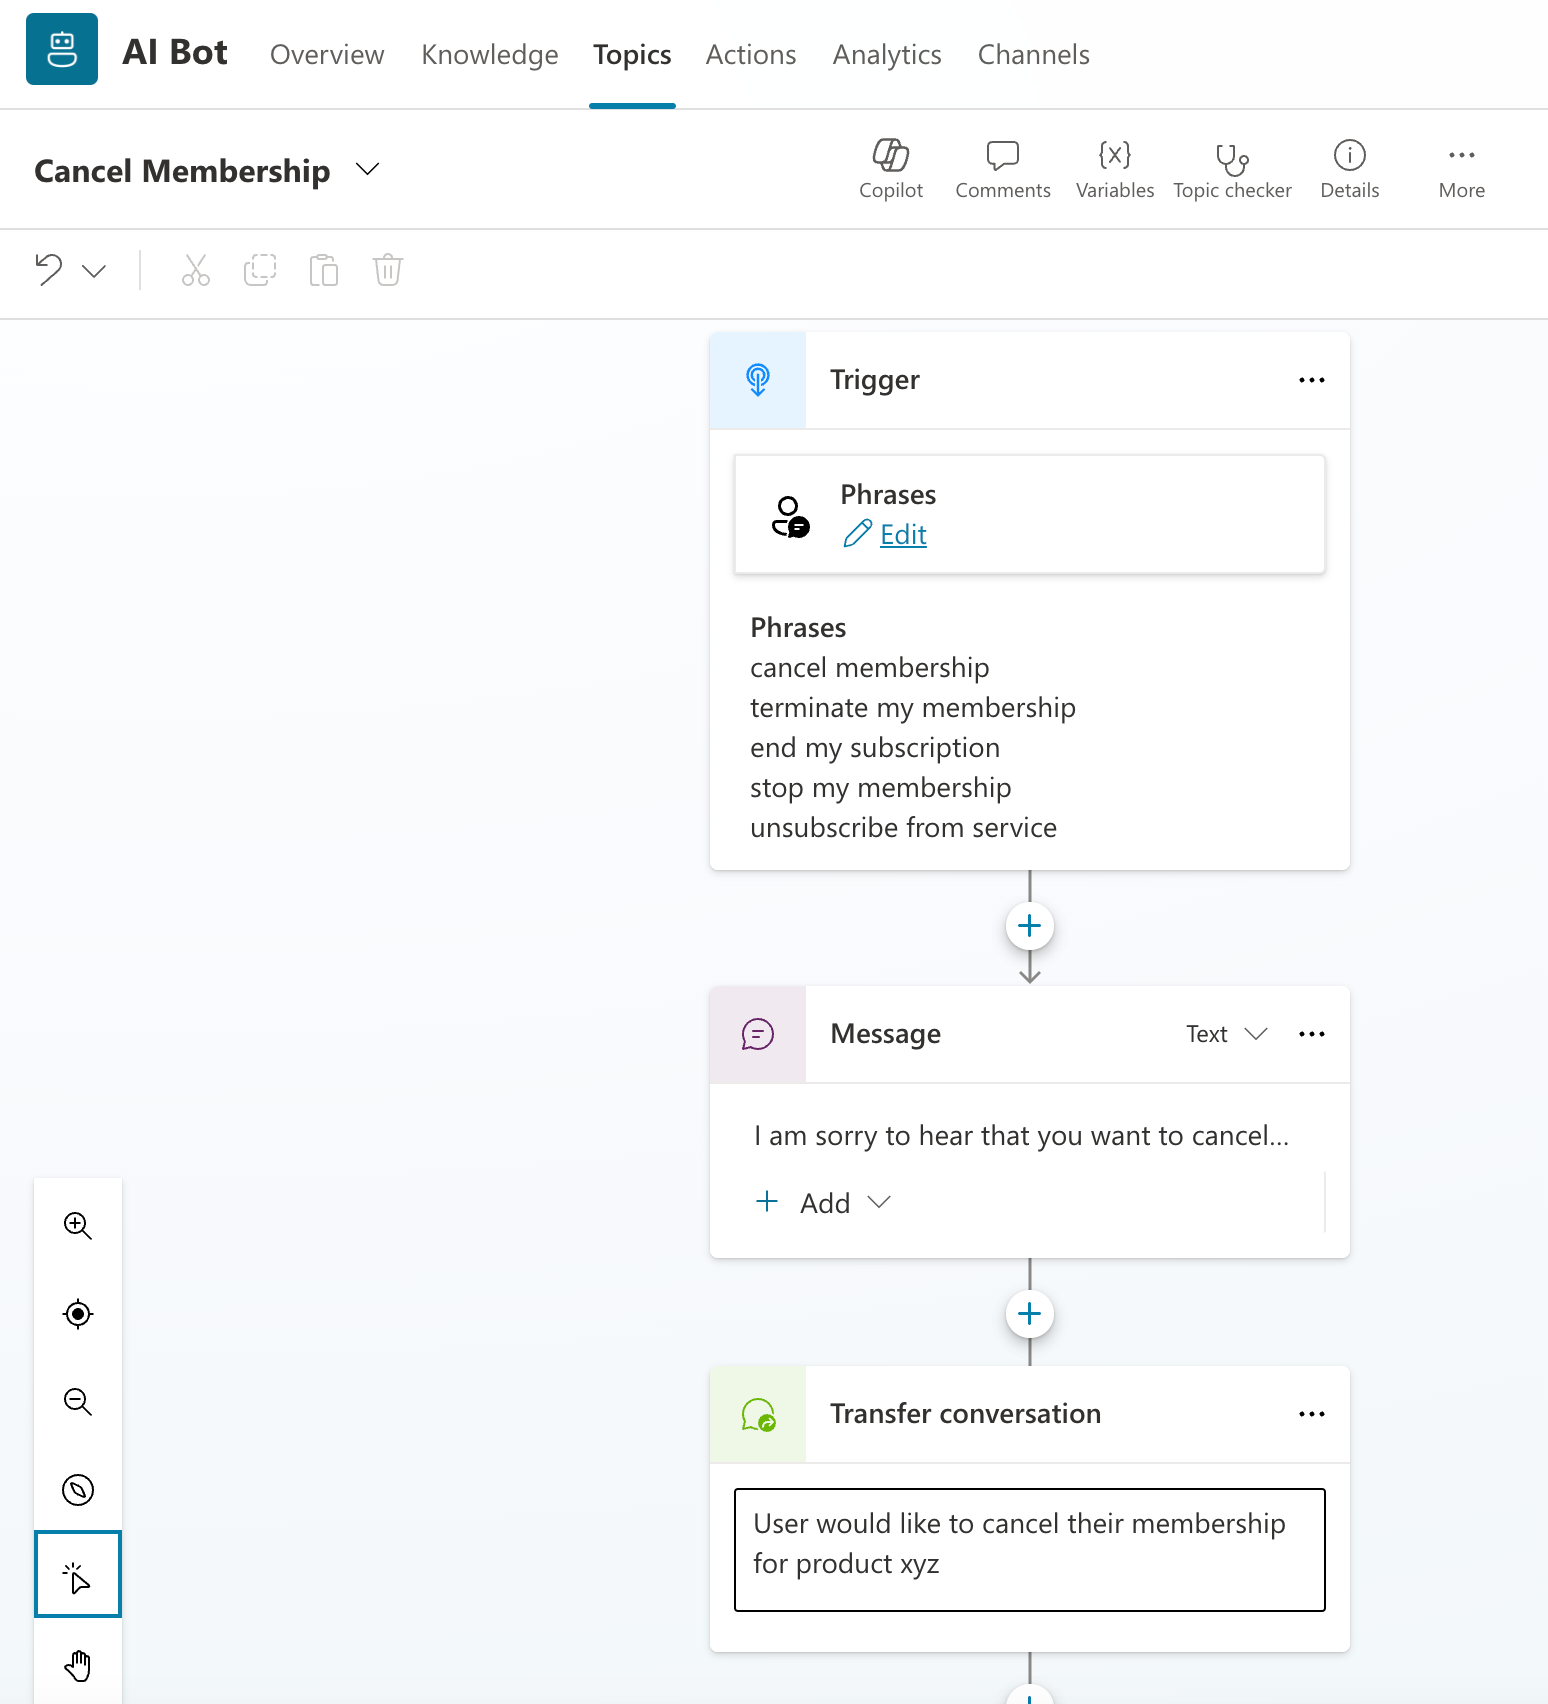
As we can see, the bot immediately triggers the Cancel Membership topic and routes to the agent.
The transfer of the conversation to the agent is very seamless and very easy to configure saving a lot of time and has a lot of capability in optimizing the customer interactions as needed for our use cases.
Hope this post gave you some ideas on how you can leverage Copilot Studio to seamlessly transfer to a live chat agent.